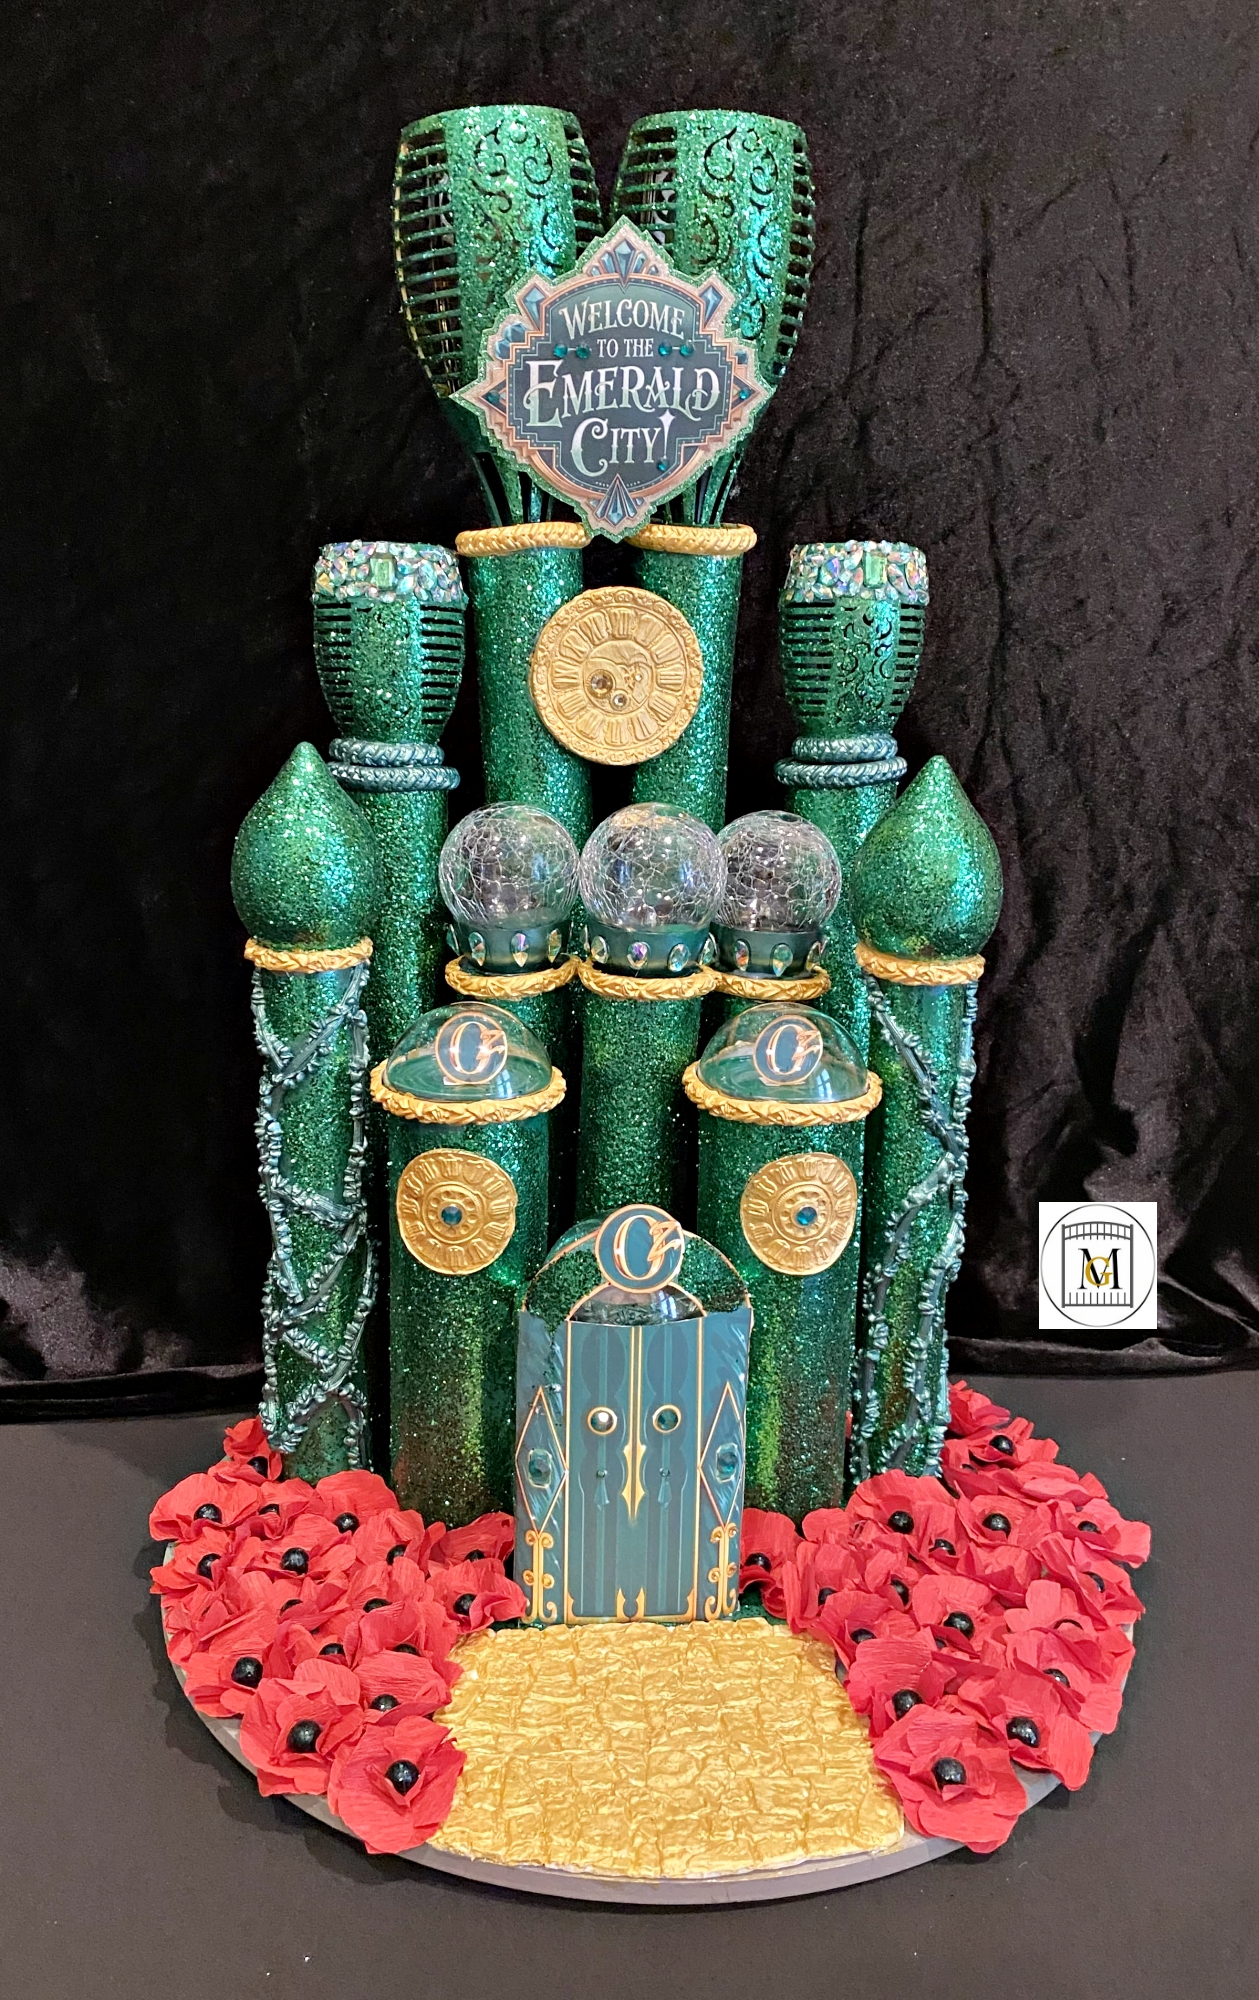
DIY Wicked-Oz Emerald City
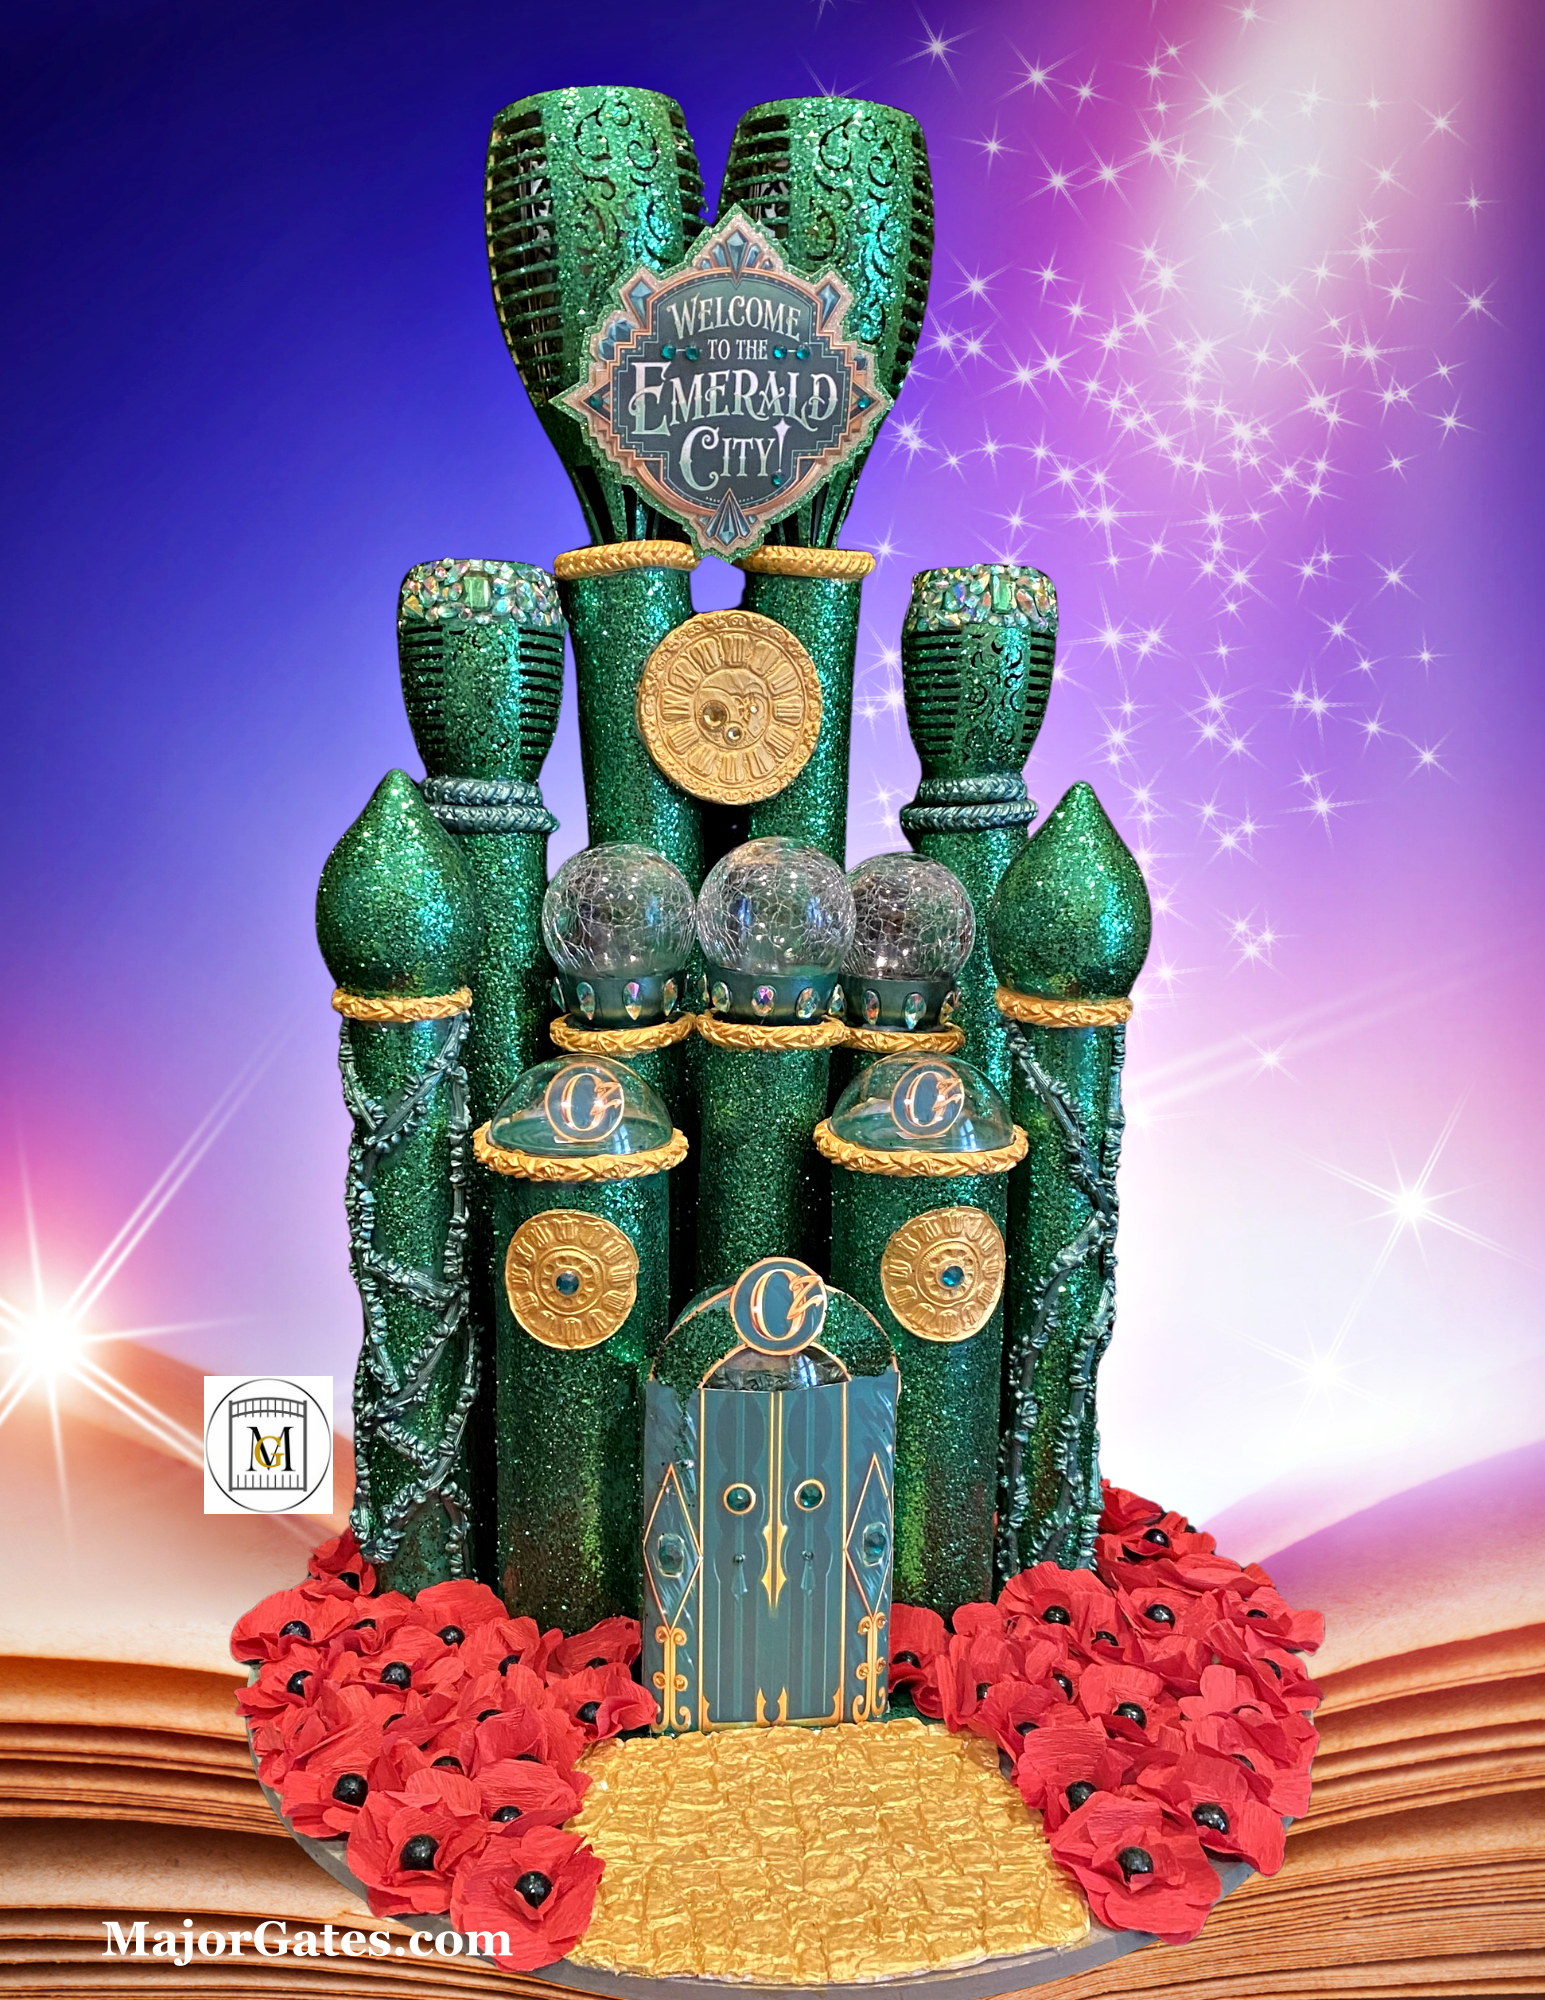
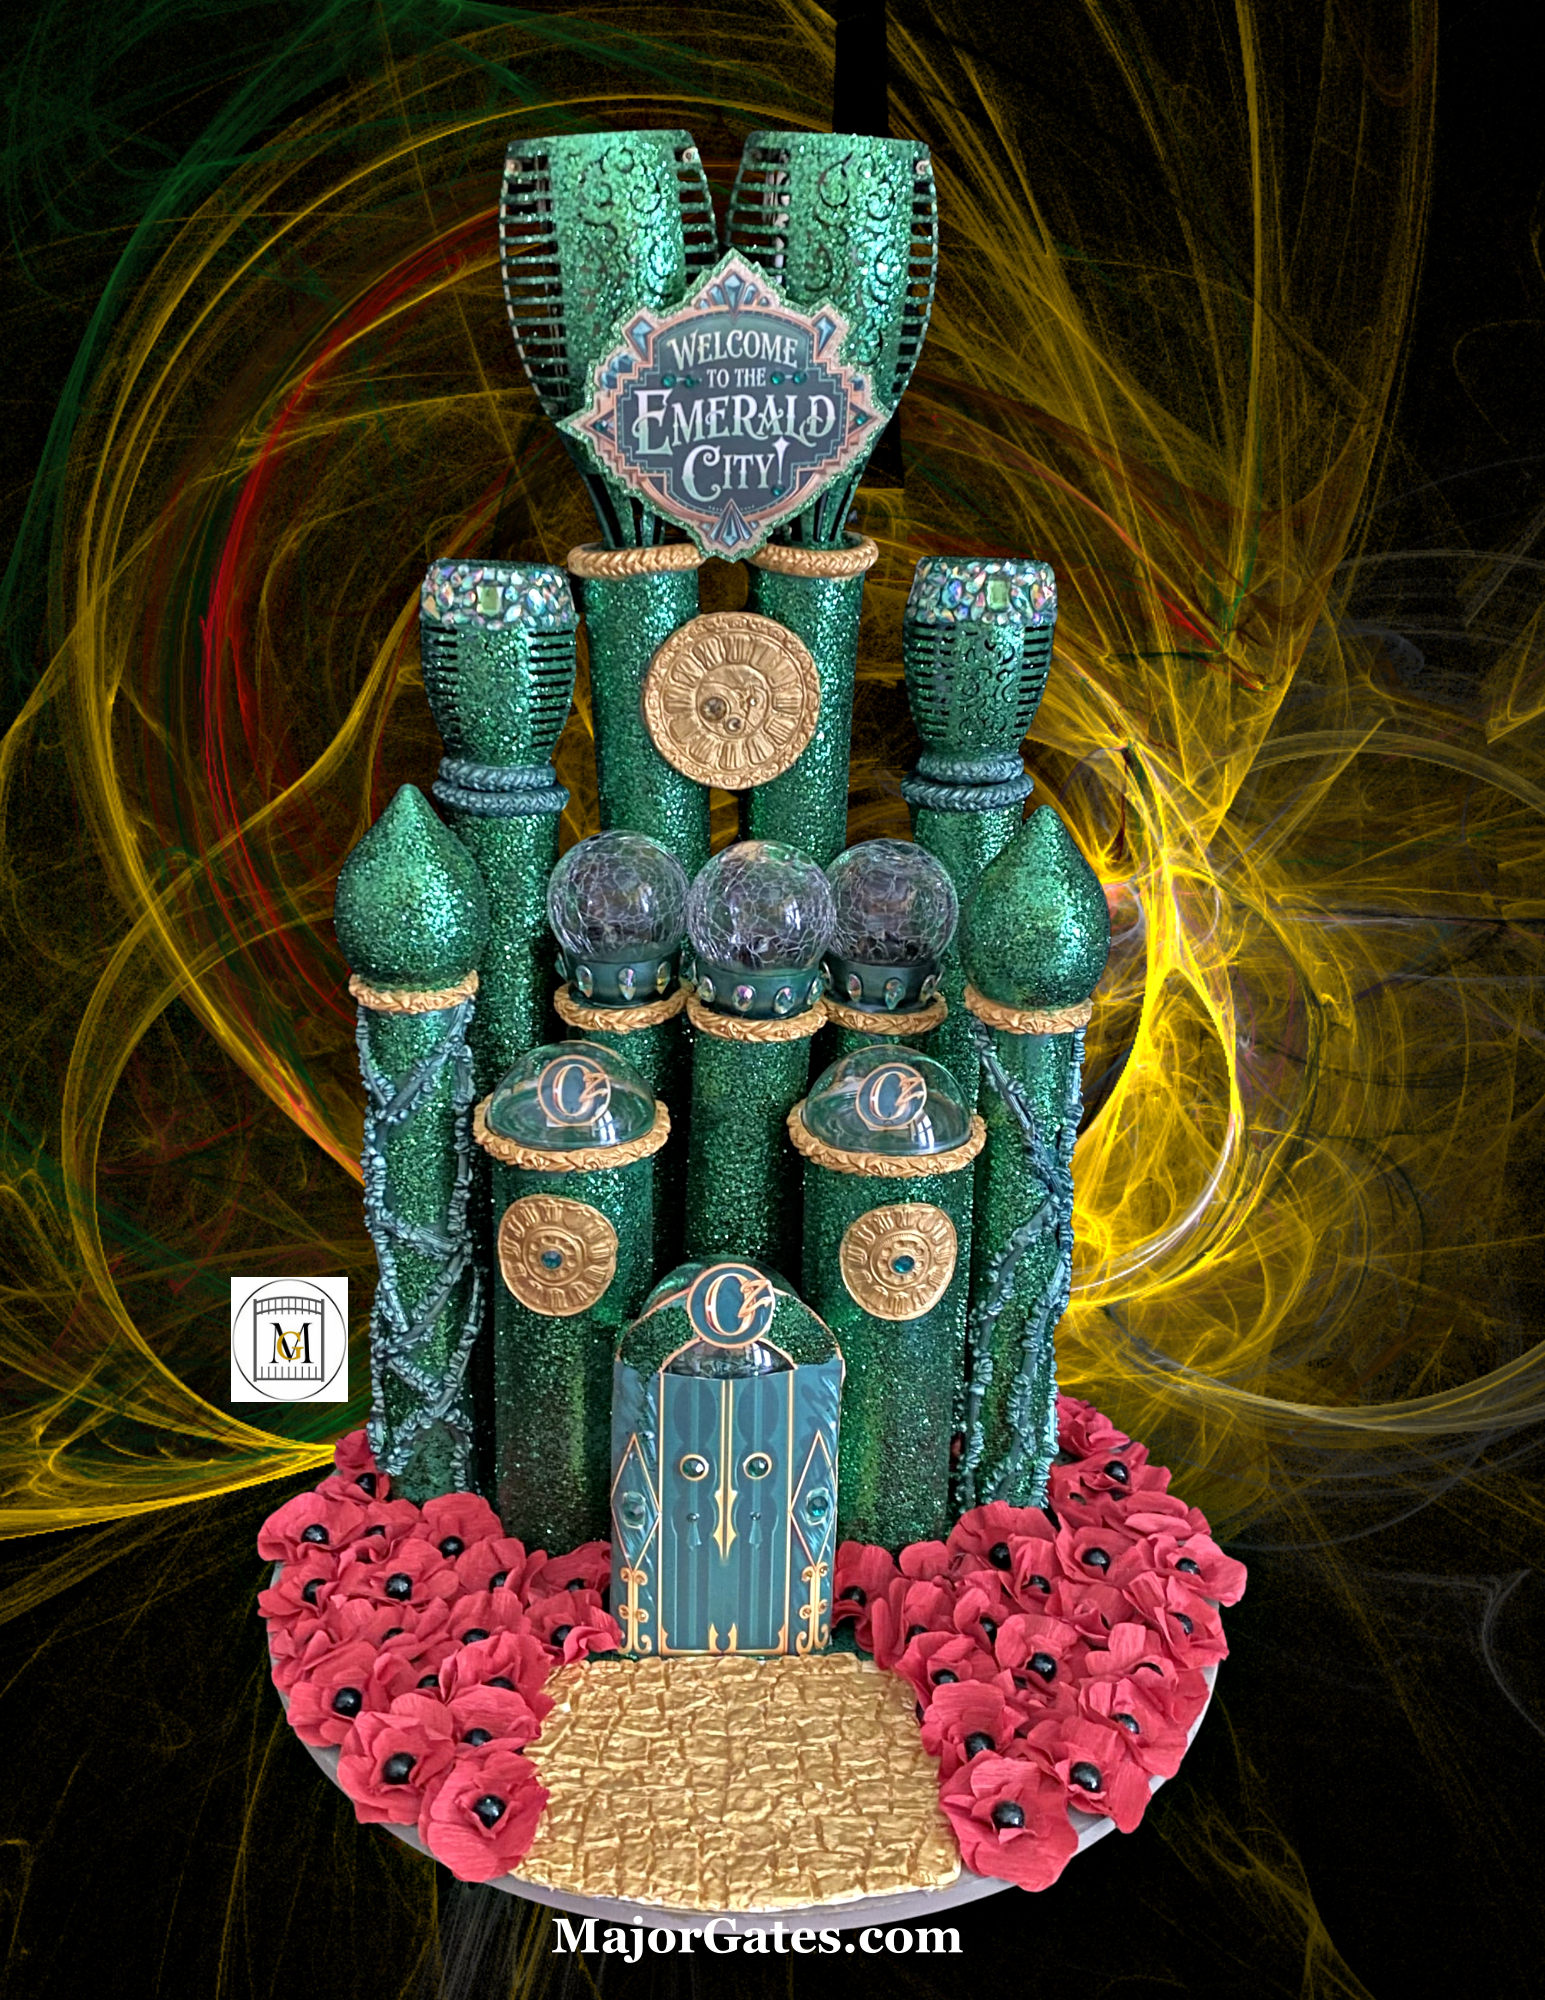
Making a DIY Wicked-Oz Emerald City Centerpiece was so much fun to make. It turned out so nice and is the focal point of the party table. I used various objects to make the centerpiece, so use your imagination. For example, I used pool noodles, Pringles cans, paper towel rolls, old solar lights with ornate detail that stopped working, Christmas bulbs, and a container from Total Beets to hold the door. This project was very affordable to make and it just took time to complete. So I work full time, so I could only work on this on the weekend and some nights. Overall, it took me about a week with the free time that I had. It could probably be done in 2 days if you have more time. Most of the time was waiting for things to dry.
Also, most of the supplies can be found at a local craft store if you don’t have these things on hand. I also purchased whatever I couldn’t find locally on-line, and have links below for most of the supplies. I made the Emerald City sign by hand cutting, even though I have a cutting machine. But I realize a lot of people don’t, so I wanted to show how to make a sign by hand cutting.
To see my available 2-Liter/Wine Bottle Party Label Downloads, click here: https://majorgates.com/product-category/2-liter-wine-bottle-labels/

This theme is such a great theme. I love the Wizard of Oz and really enjoyed the movie Wicked. You can make so many cute things for this theme. So if you are familiar with some of my other DIY projects, you know I love to work with air dry clay. The molds are affordable and for those of us who struggle with an artists hand, molds are the way to go to add great detail to many projects. So I try to buy molds I can use with other projects as well. Well, I hope you enjoy reading about how I made this great centerpiece and give it a try. Great for Halloween, Birthday, Shower, theme party or event.
Don’t Forget To Follow Me On Pinterest!
Visit my shop to see my available Wicked-Wizard of Oz available party downloads here: https://majorgates.com/blog-2/shop/
Supplies
- 4-8 solar stake garden lights – I found at Dollar Tree but you can also find at hardware stores and on-line. You can use more or less, this depends on the size base you have. You could also substitute with large ornaments in different shapes.
- 18″- 20″ wood circular wood base/plaque
- 2 Pool noodles – preferably green – I found at Dollar Tree
- Clear glue or Mod Podge
- Sharp Craft Scissors (Large and small fine)
- Green glitter in various (fine, regular, extra-fine)
- Small plastic bowl (used for the glue)
- Cardboard box (optional) – used to spray paint in and sprinkle the glitter
- Paint brushes
- Mini hot glue gun and glue sticks
- Drop cloth
- Ruler or tape measure
- Serrated knife (to cut the pool noodles)
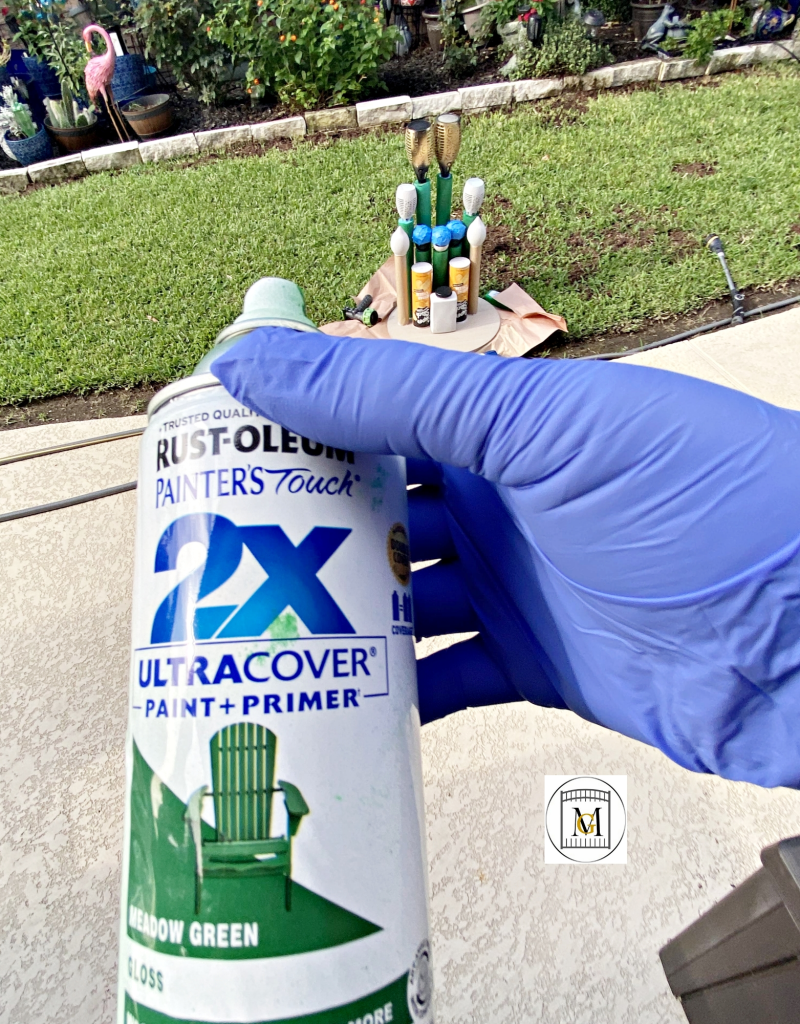
- 2 cans of Green spray paint – I used Gloss Meadow Green – Rust-oleum 2X Ultracover (paint +primer)
- Metallic green acrylic paint – I recommend getting a good set of metallic paints for crafting
- 65 lb Regular white card stock
- Color Printer
- Craft Mat (optional)
- Chalk paint
- 2 tall Pringles cans
- 2 paper towel rolls
- 2 onion bulb ornaments – I found at Hobby Lobby and retailers start putting Xmas stuff out in July
- 1-3.15 inch clear fillable ball ornament. This is the size that fits the Pringles cans.
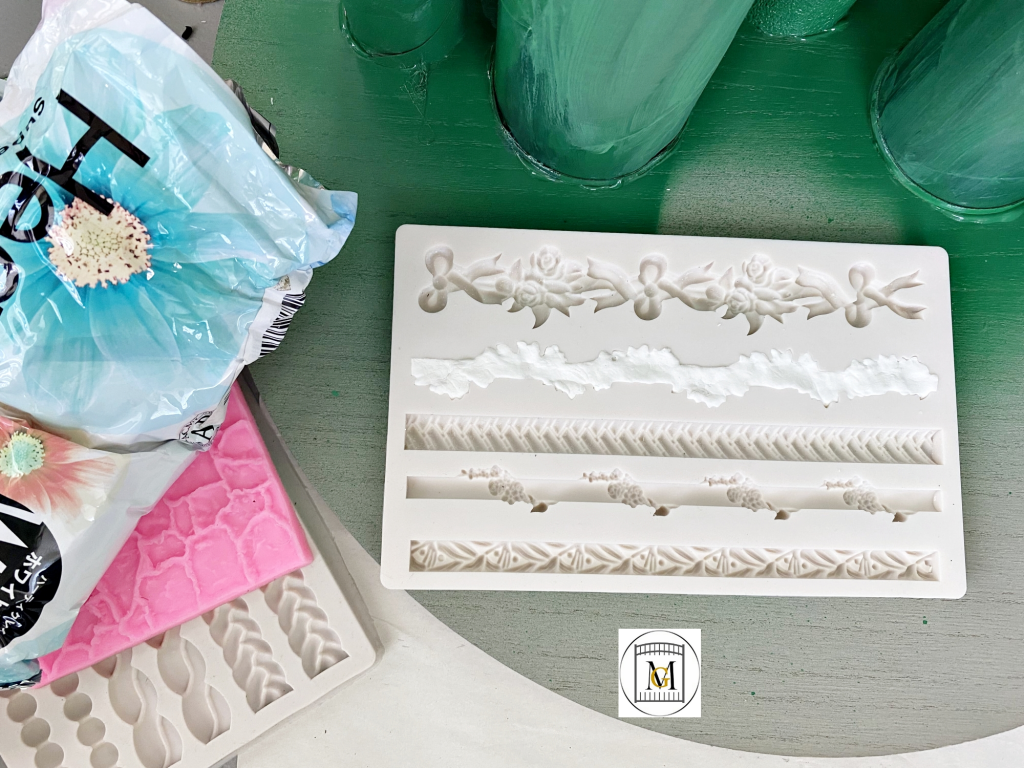
- White air dry clay (I use Hearty)
- Silicone molds (clocks, borders, cobble stone mold)
- 5 1/2″ container or box (I used a Total Beets container) – you can use any container that your cutout of the Oz door will fit.
- Green flat backed craft gems – I found at Hobby Lobby and on-line at Amazon
- 2 oz acrylic paints – I used FolkArt Metallic Inca Gold(676) and FolkArt Multi-surface Metallic Malachite Green (6310CA)
- 1 sheet of gold glitter card stock(optional – used as background for the sign)
- 1 sheet of green glitter card stock (optional – used as background for the sign)
- Disposable gloves
- Red crepe paper
- Black filler balls
Affiliate links are in this post. So, I may receive a small commission at no extra cost to you if you make a purchase through my affiliate link. Therefore, I only recommend products that I use or would use and love! So, I have saved you the time of searching for good products for you. As an Amazon Associate I earn from qualifying purchases. Just click on the pictures or links for the items seen in this post.
To see my available Party Label Bundle Downloads, click here: https://majorgates.com/product-category/party-bundles/

Directions DIY Wicked-Oz Emerald City
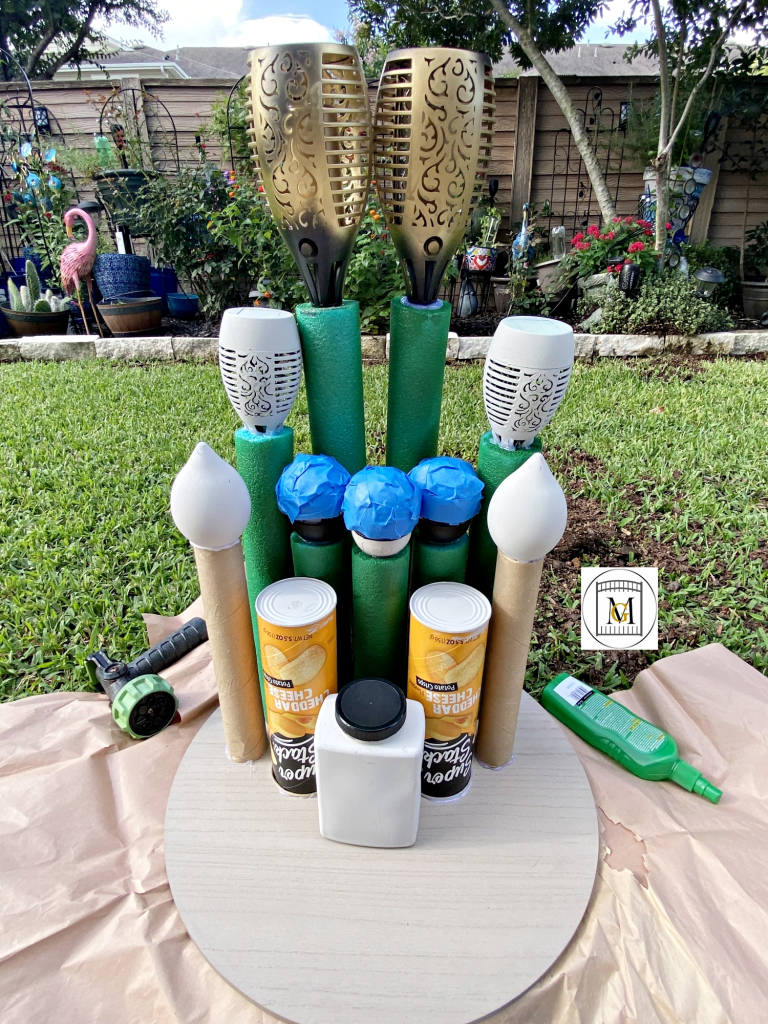
- Cut the pool noodles in the approximate sizes – 18 inches, 13.5 inches and 10 inches. Then do a dry fit on the circular stand.
- Then attach the tops (solar lights or other topper) with hot glue. I found the cracked glass solar lights at Dollar Tree and then put painters tape over the globes before spray painting.
- Apply chalk paint to the Pringles cans, solar lights, other toppers, the container, and the paper towel rolls.
- Then spray paint everything green and allow them to dry.
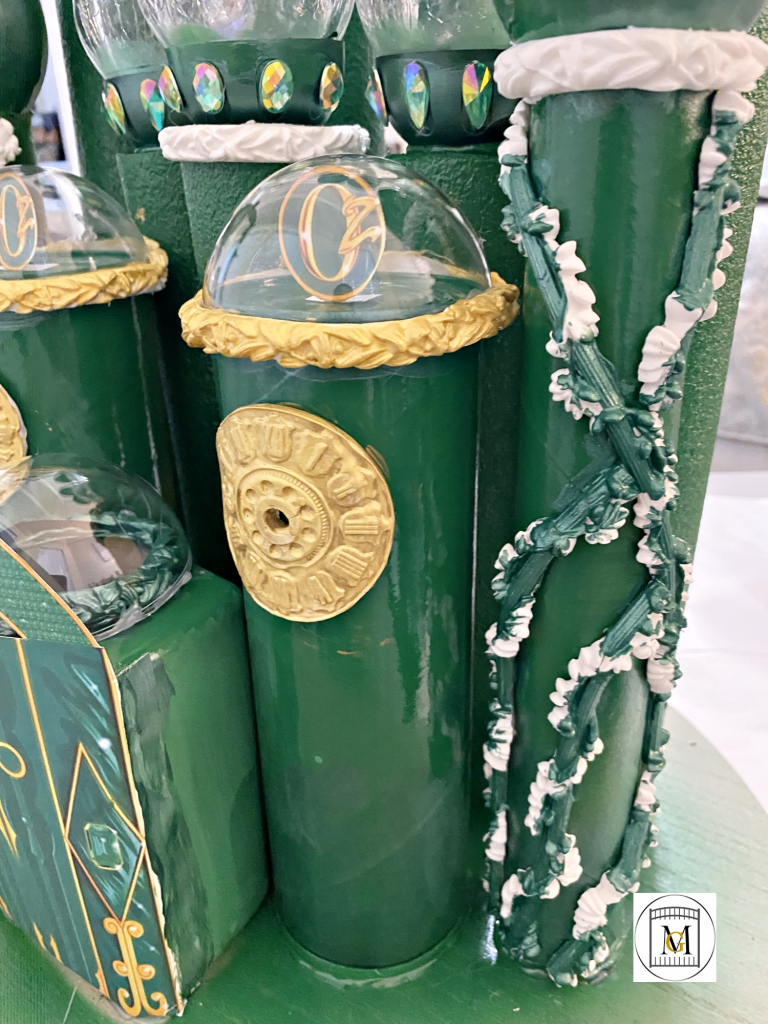
- Next attach any clay moldings, gems, or other embellishments with hot glue, and then paint with acrylic paint. I used Inca Gold and Malachite green from Folkart. So, I added clocks and border trims with air dry clay. Then I painted the trim in either Inca Gold or Malachite green and allowed to dry for at least 2 hours.
- So, I covered any gaps in the spray paint by hand painting with the Malachite green.
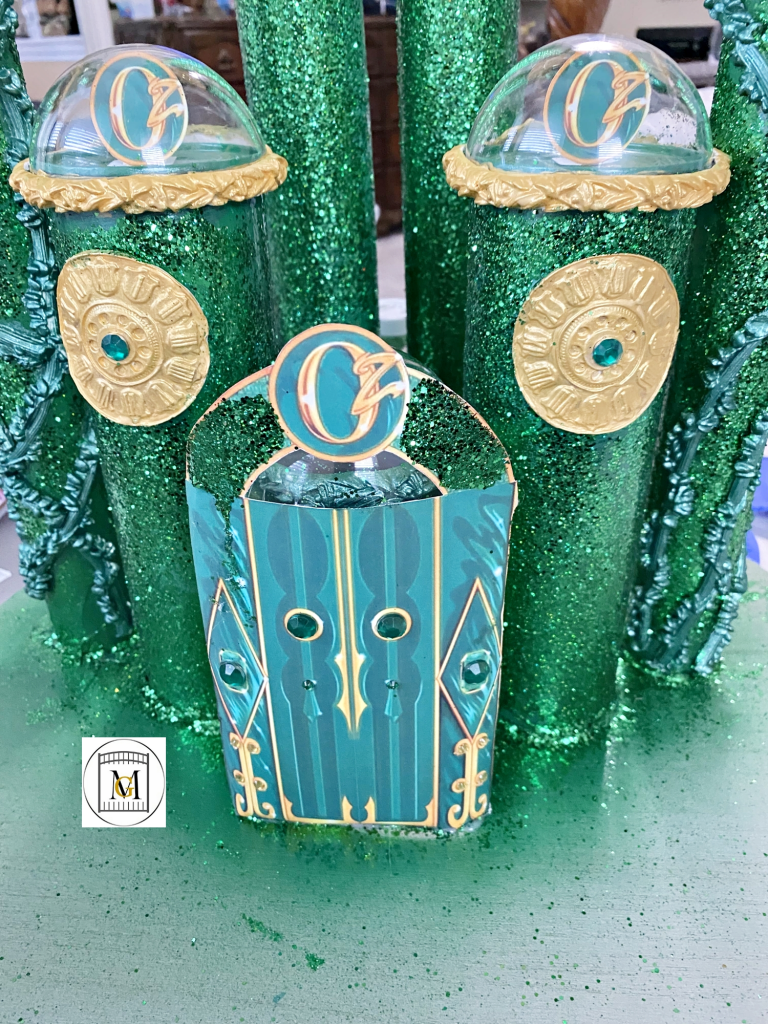
- I also printed the Oz door entrance, 2 per page and cut out the Oz logo and added them to the tops of the Pringles cans. Then I covered the Oz logo with a half of a plastic fillable Christmas ornament (3.15″). I also added a half ornament to the container as well.
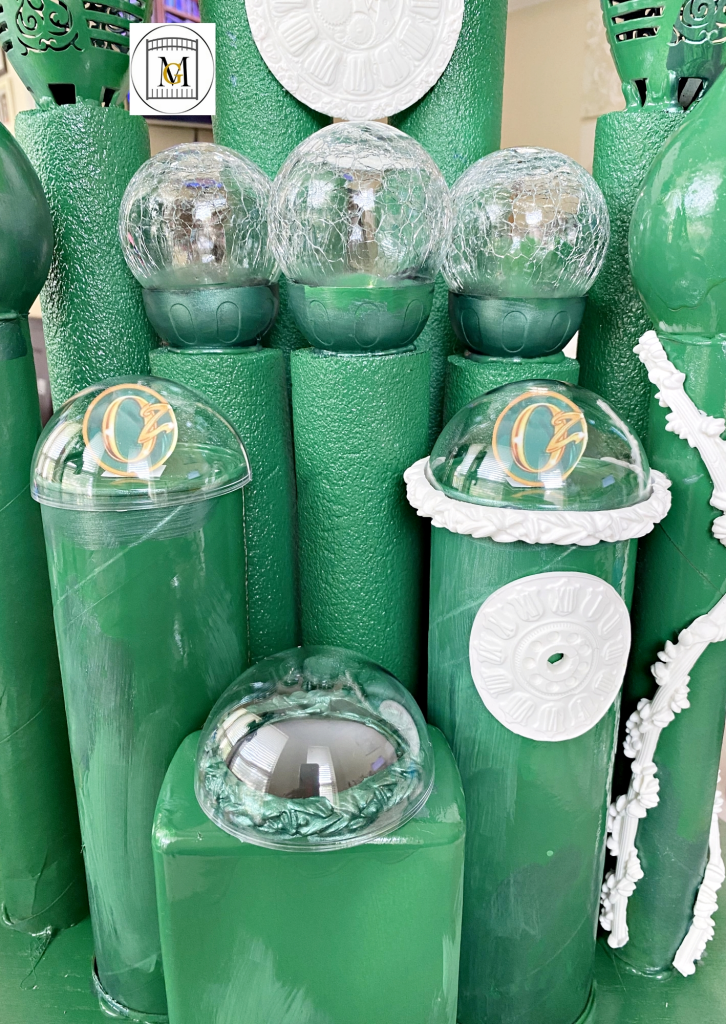
- After that, I added green flat backed gems in various sizes to two of the solar lights tops and around the cracked bulb solar lights. This step took a while but I love the look.
- So paint everything and add all embellishments before adding the glitter.
- Note: I used a dab of glue or utility tape to temporarily hold the objects in place as I did the dry fits. I then removed the object from the board as I worked with them.
If you need Potion/Apothecary Bottle Party Labels, see my available downloads here: https://majorgates.com/product-category/potion-apothecary-labels/

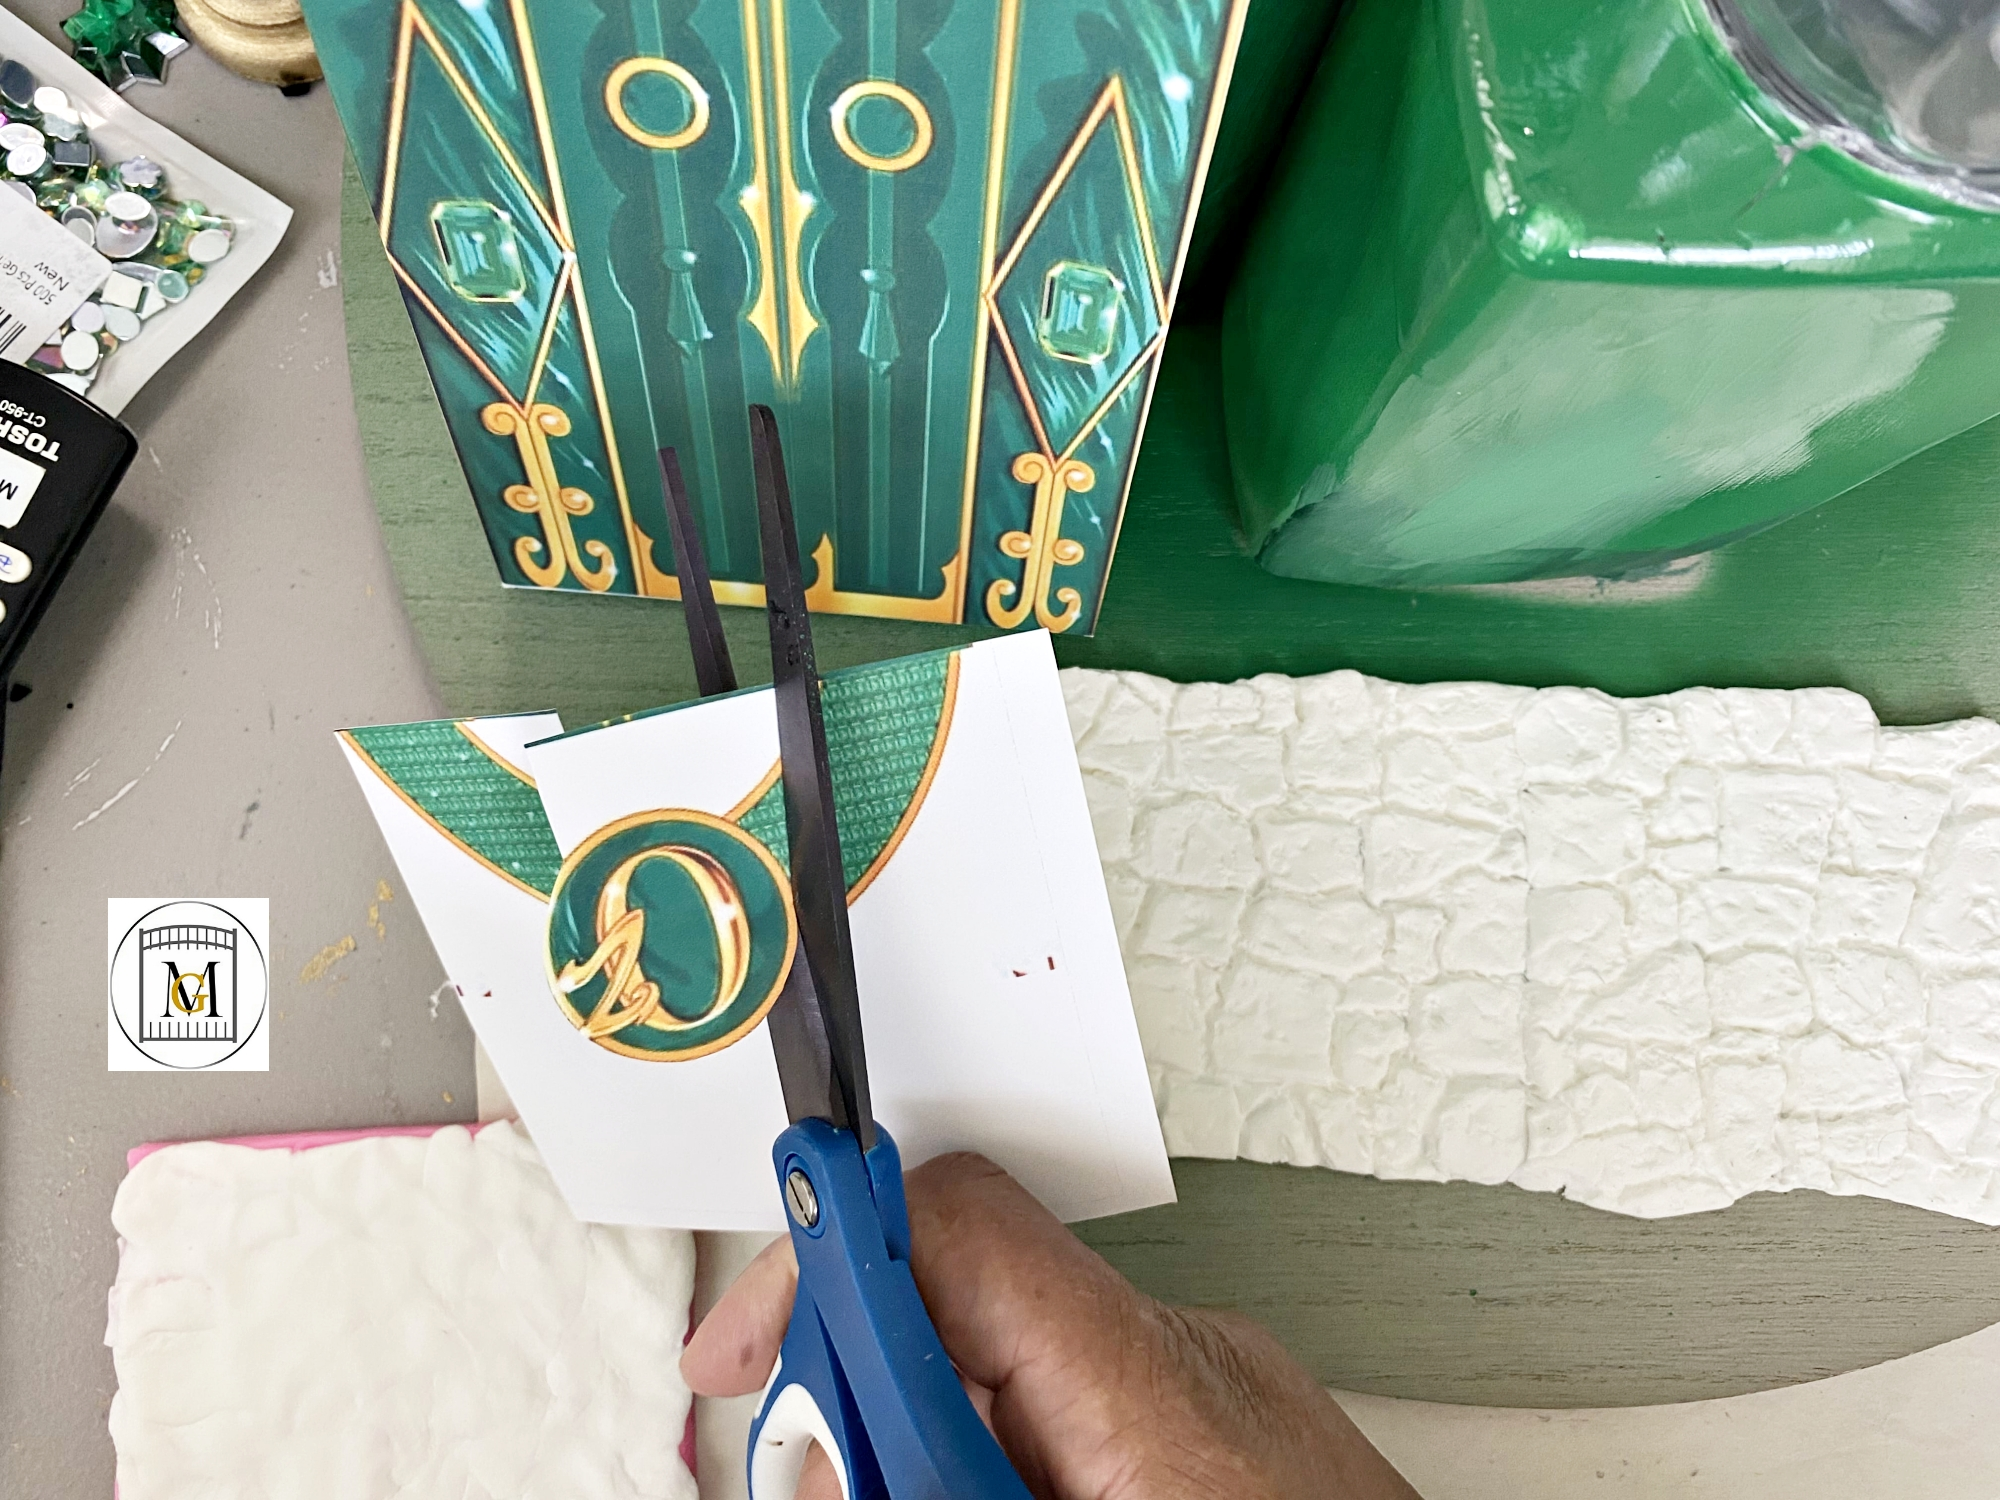
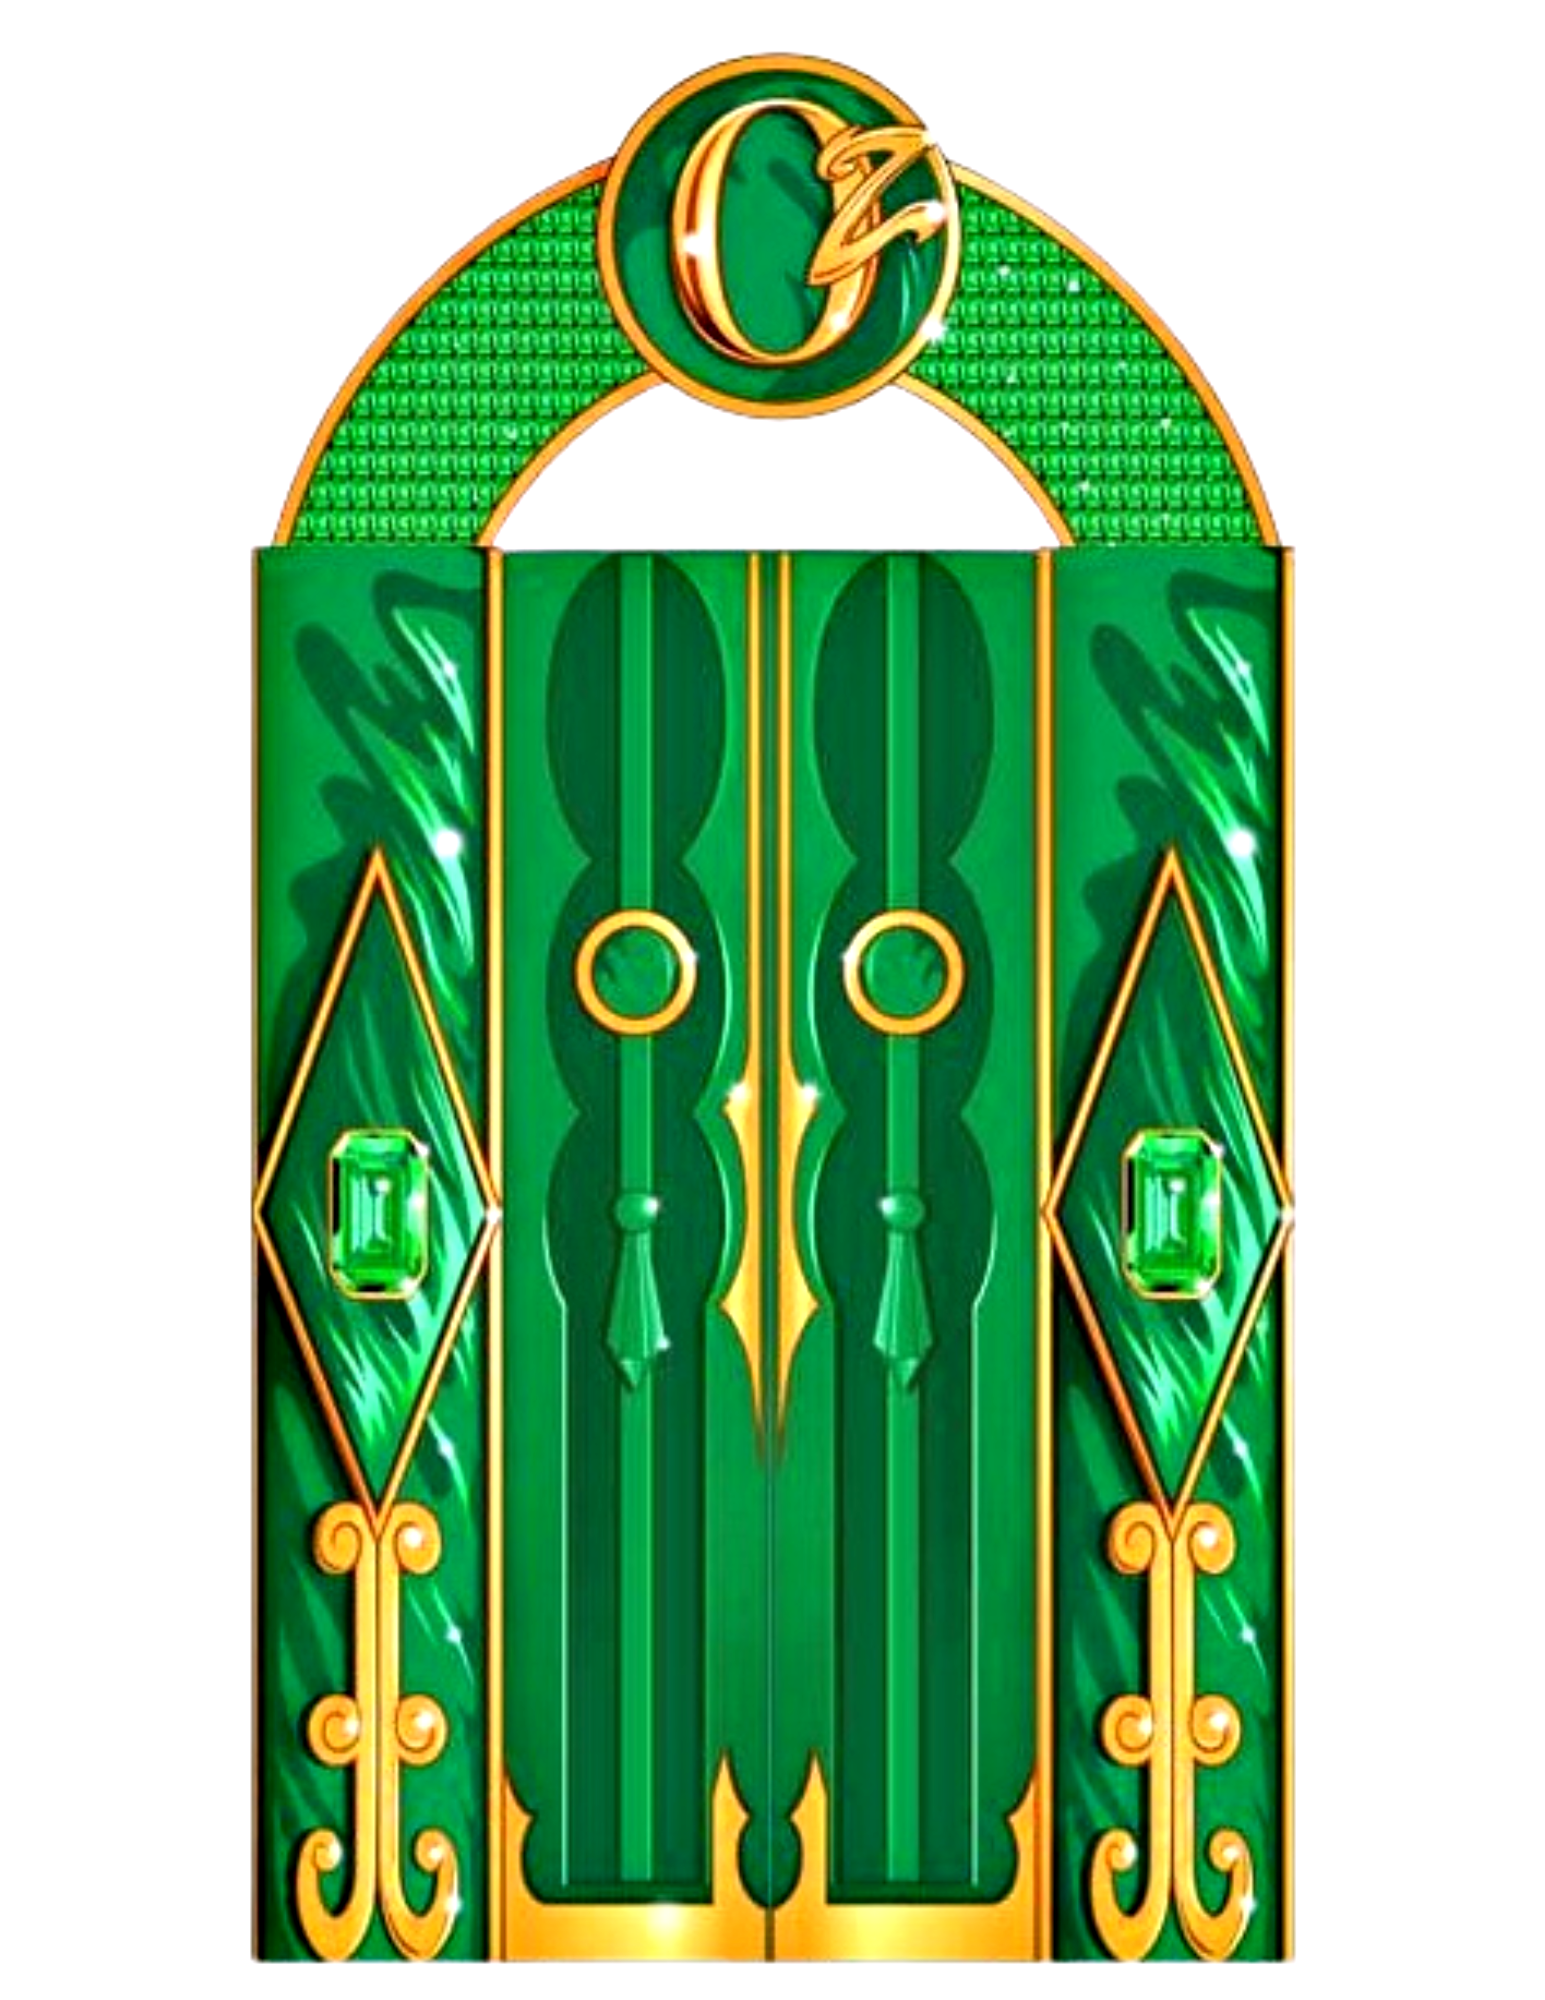
- For the door, I printed the image (2 per page) on card stock and then hand cut it out leaving a little of the white edge on the sides (about 1/4″). I used a craft knife to cut out the white by Oz. So the container lid was showing in the clear part of the door, so I just cut it off with utility scissors. Then, I hot glued the door to the container. I printed using a free program in PhotoScapeX, I printed 2 per page and the size was perfect. So just adjust your print settings to the size you need. PhotoScapeX is free and I am not affiliated, but the program works well for printing and simple editing. Also, they have a paid version but I have not needed to get it as yet. http://x.photoscape.org/
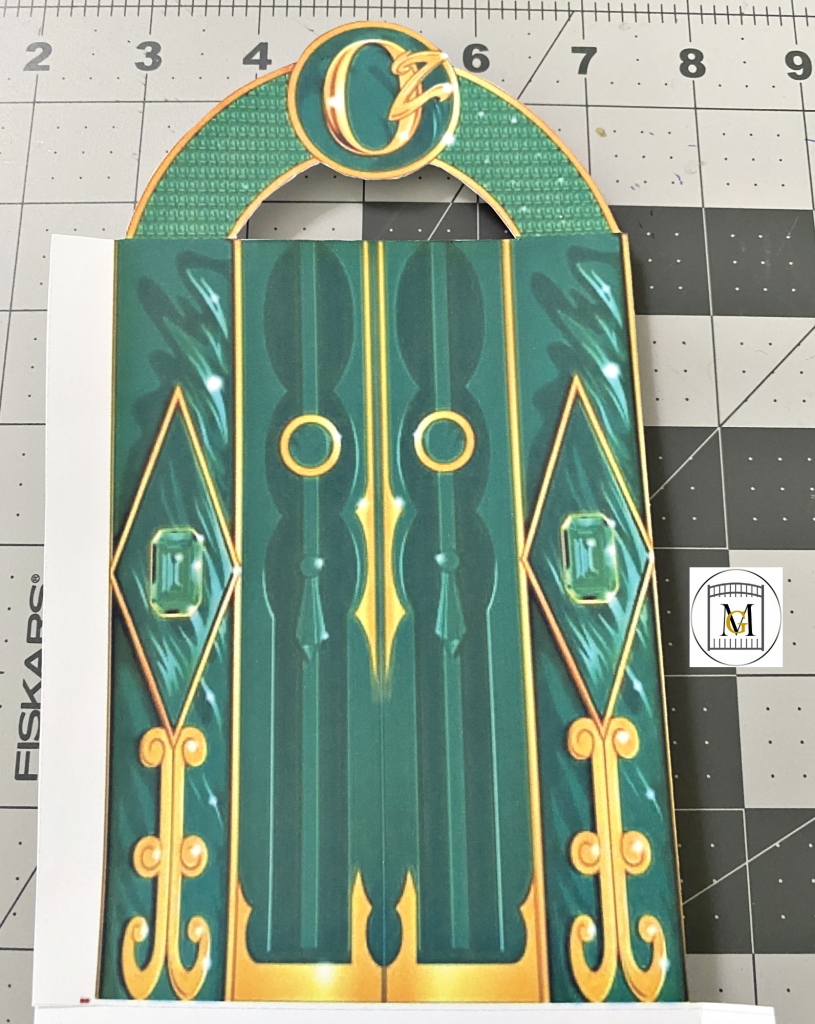
Here is the image I used for the door. NOTE: This image is only to be used for personal use only and not for sale. I am not the image owner. As with most images found on the internet, if you use them, they must be for personal use only. If you want to sell something made with the image, you must contact the image owner and get permission and often have to pay a fee.
- Next, pour some glue in a small bowl and with a medium sized artist brush, brush 1/3 or 1/2 of an object and then sprinkle with the glitter, and repeat until covered. So for this project, I mixed 2 sizes of green glitter together (regular, fine and extra fine). I lined a cardboard box with paper before sprinkling the glitter. If you don’t get glue on the paper, you can pour the excess glitter back into the bottle and use it again. To dry, place on stakes, dowels, thick skewers, or chopsticks in the yard or in a plant.
- Now, repeat the step of pouring some glue in a small bowl and with a medium sized artist brush, brush 1/3 or 1/2 of the object and then sprinkle with the glitter, and repeat until covered. Do this for all the pieces going on your centerpiece. Also, make sure you only glue the sides of the container that is holding the door and be careful not to get glue on the printed door.
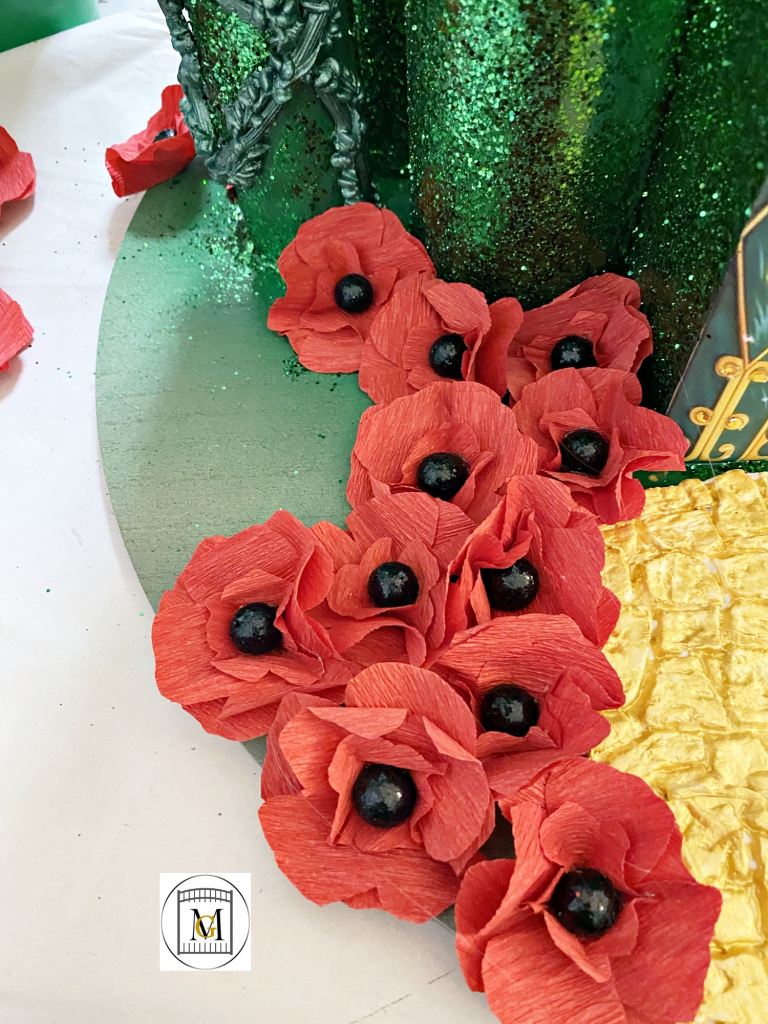
- Once all your pieces are dry, hot glue the pieces to the base. Be sure to leave room for the poppy flowers and the brick road.
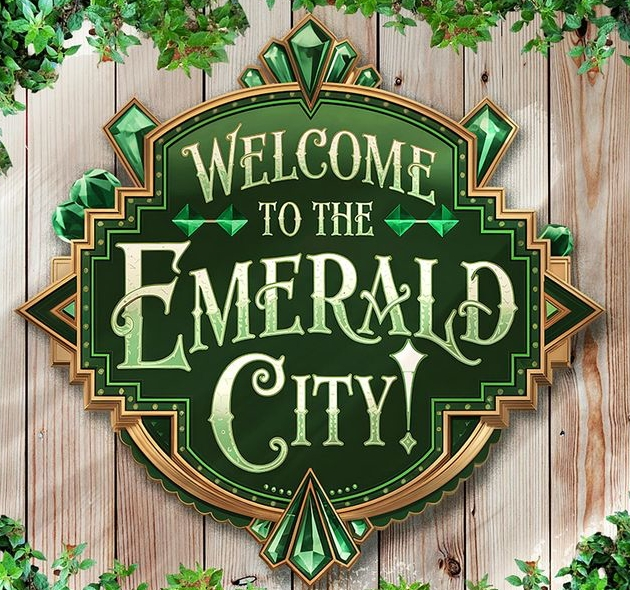
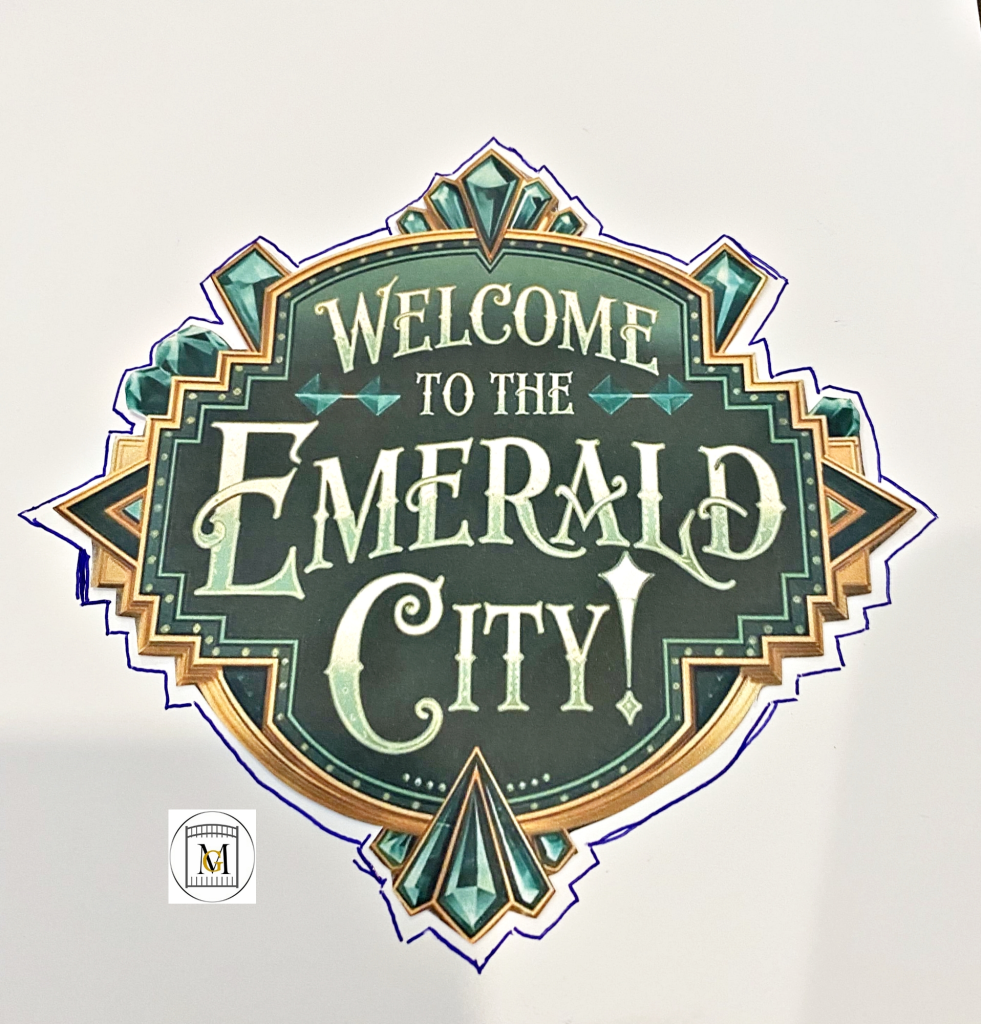
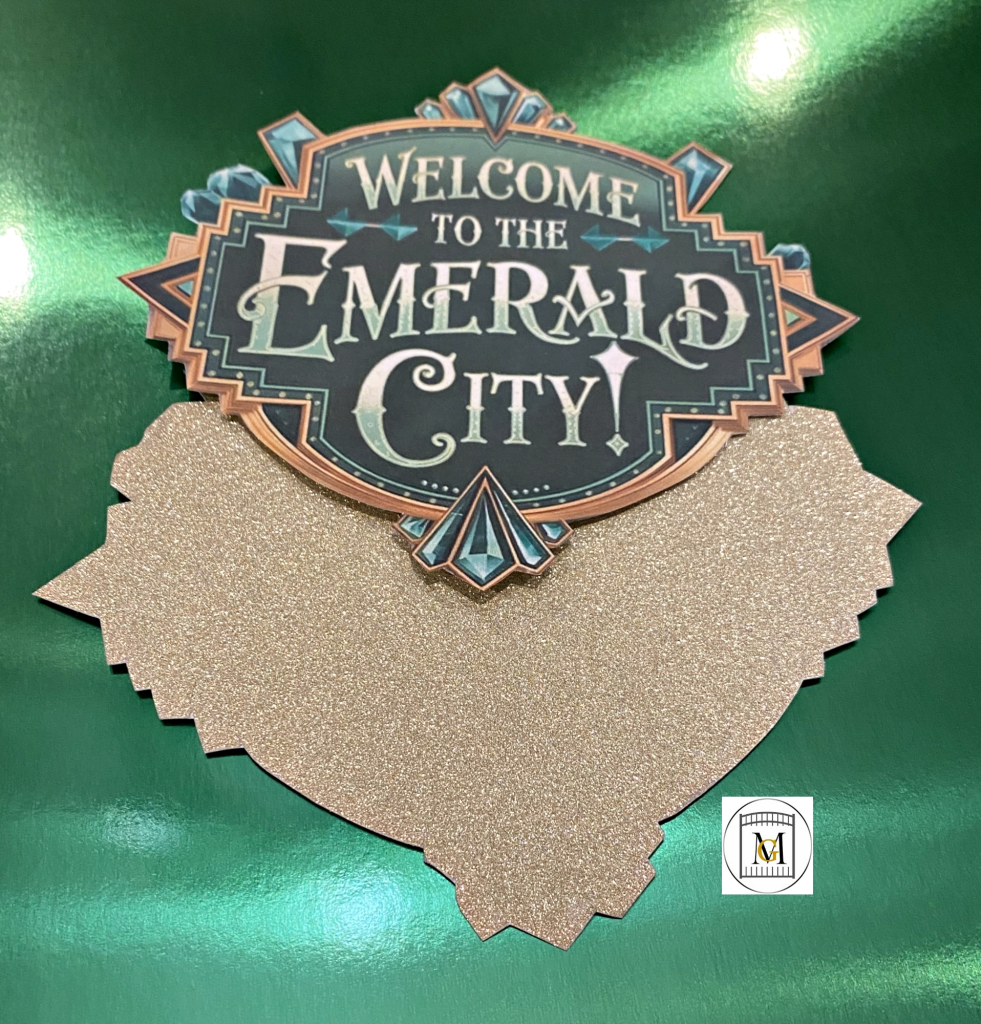
- Then, make the sign. I found an image on-line (see below) and printed 2 to a sheet of paper on card stock (Same rules as above – for personal use only). Then, hand cut out the image. Next, trace on glitter gold card stock a little larger than the original image and cut out. Then, take the gold glitter cut out and trace a little larger than the gold cut out and cut out. Last, glue all three pieces together. Then glue to the centerpiece.
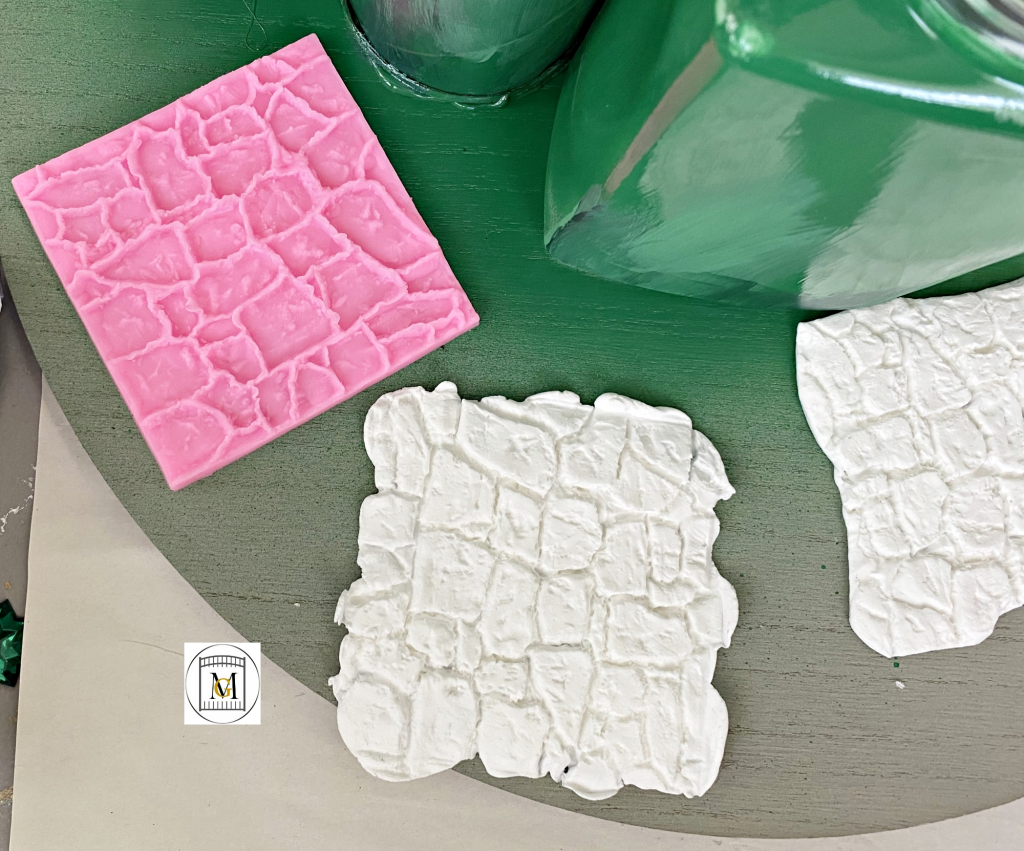
- So, I made 3 impressions of the brick pattern with the air dry clay. I trimmed the clay edges once I removed it from the mold, and hot glued the two pieces to the board. The last impression, I cut to the shape of the board and then glued in place. Then, I painted the stones in Inca Gold and allowed to dry.

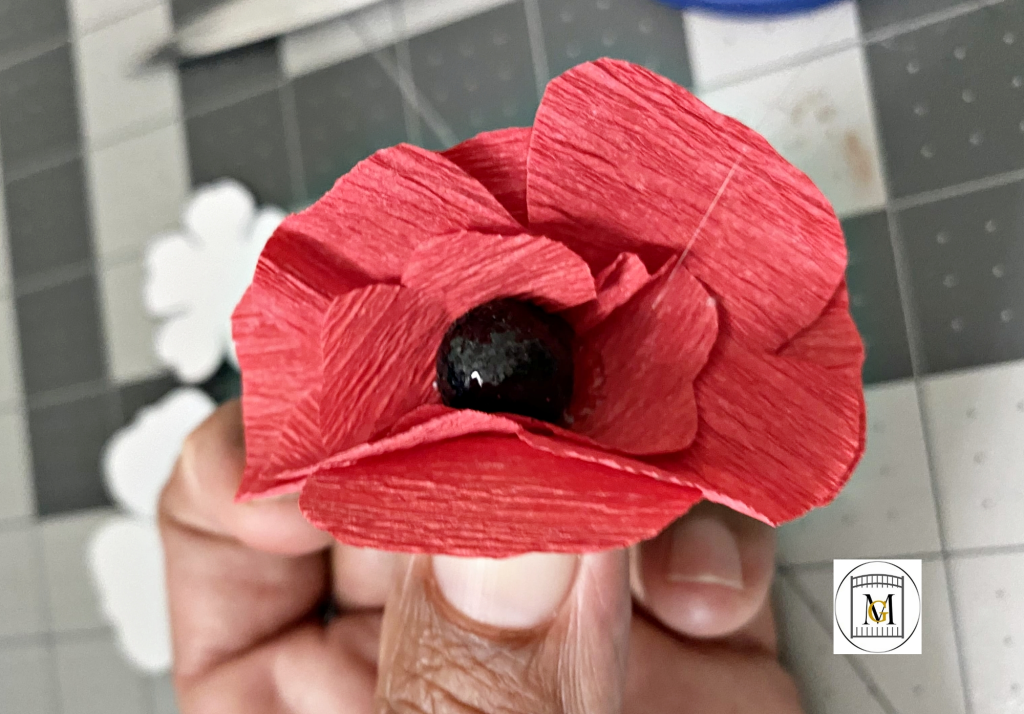
- Last, I made the mini red poppy flowers. I made around 50 flowers.
- Trace the larger template on the crepe paper. I folded the paper 5-6 times, so that more petals could be cut faster. Then, cut the petals from the template. I then glued 2 of the larger petals together, criss cross, and then one of the smaller petal.
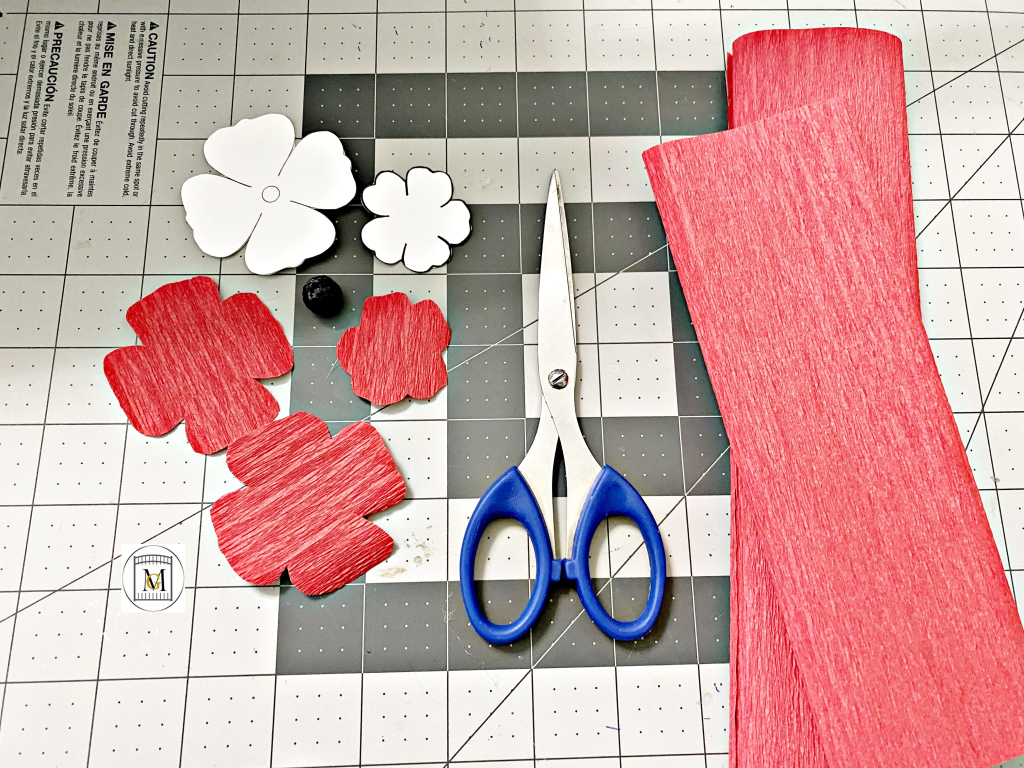
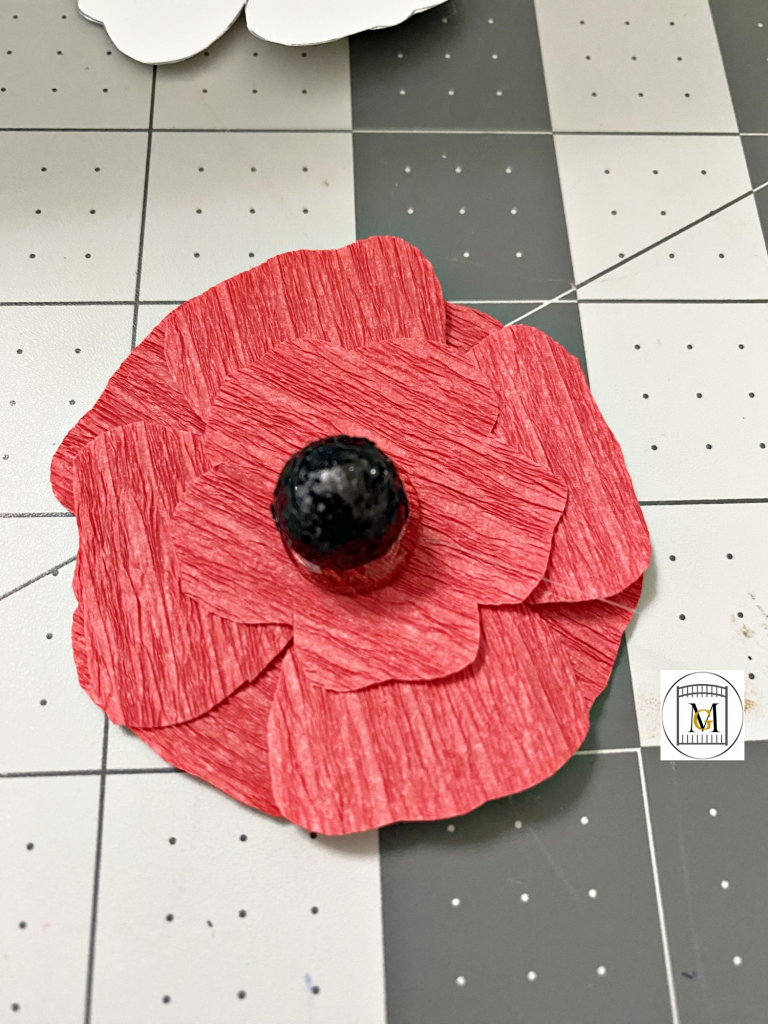
- Next, add a dab of glue to the center of the flower and add a black filler ball and pinch the flower closed from the base. Repeat until you have enough flowers to cover the base.
- You are done! Something wonderful and glittery for your event!
To see my available Jeopardy/Trivia Game Party Downloads, click here: https://majorgates.com/product-category/jeopardy-trivia/
