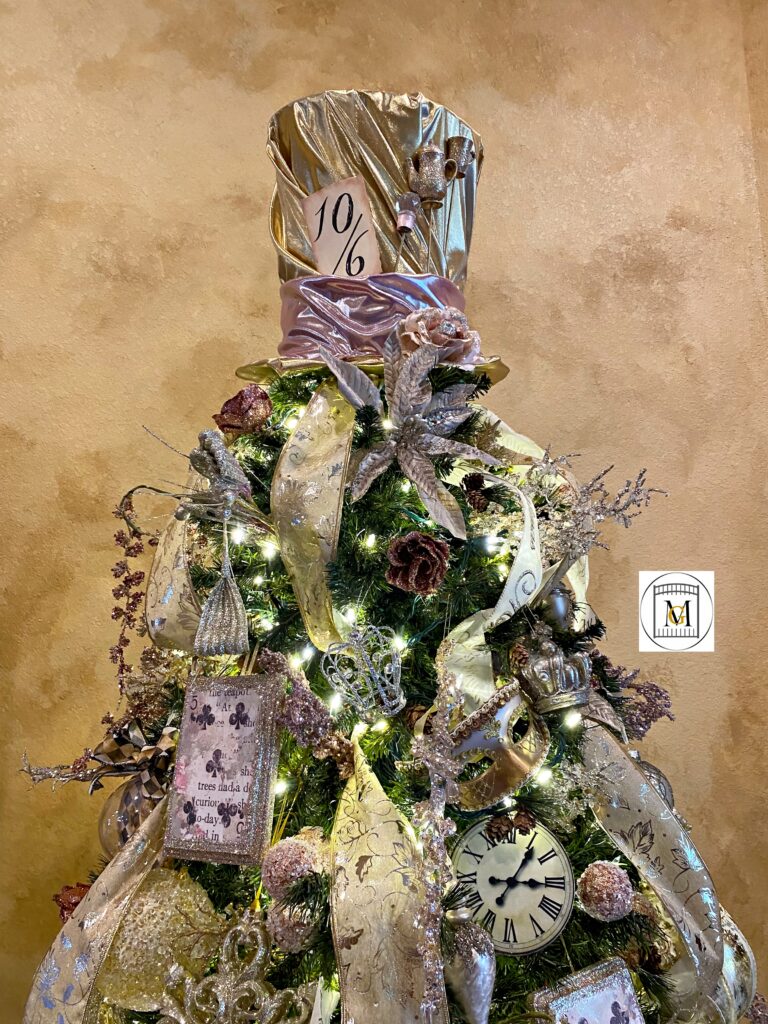
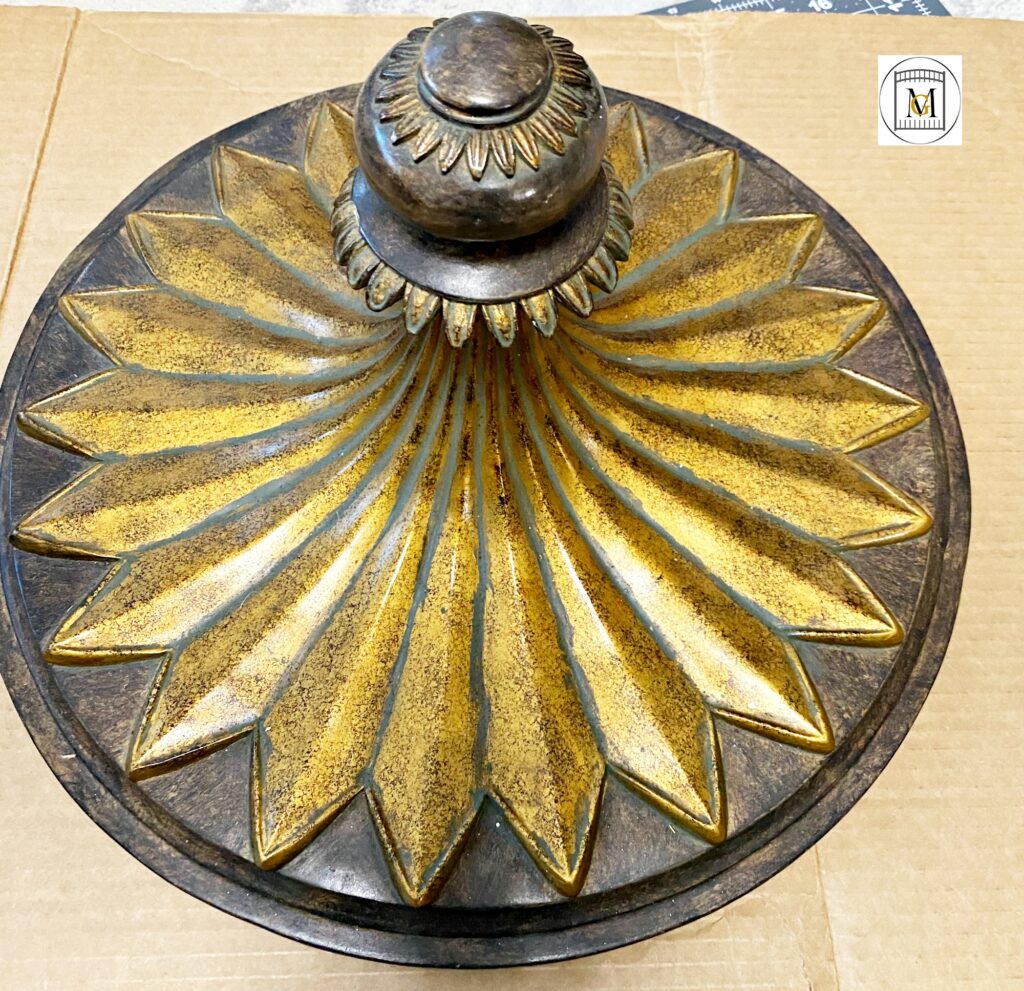
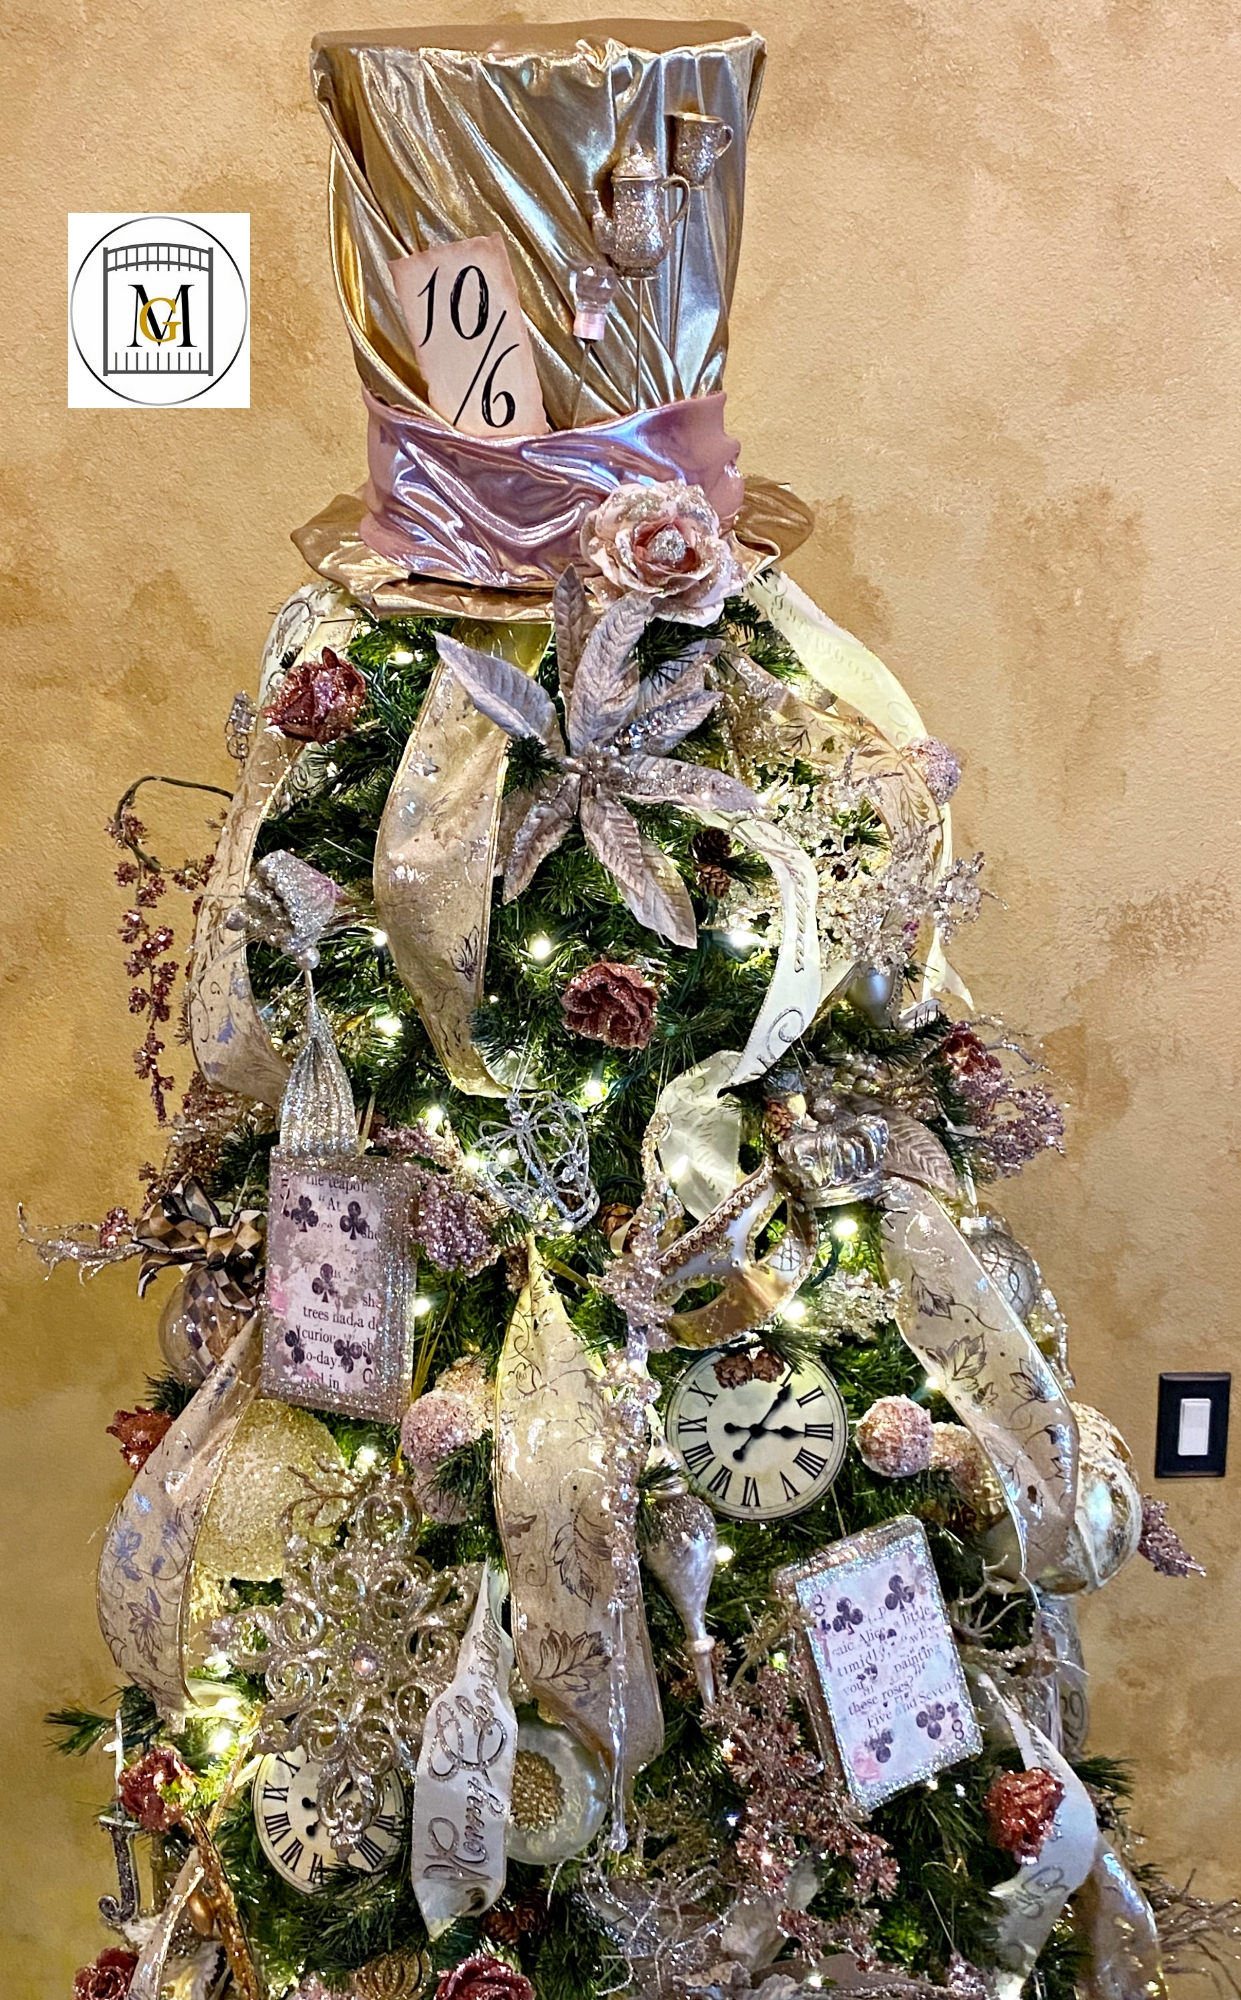
Mad Hatter Tree Topper
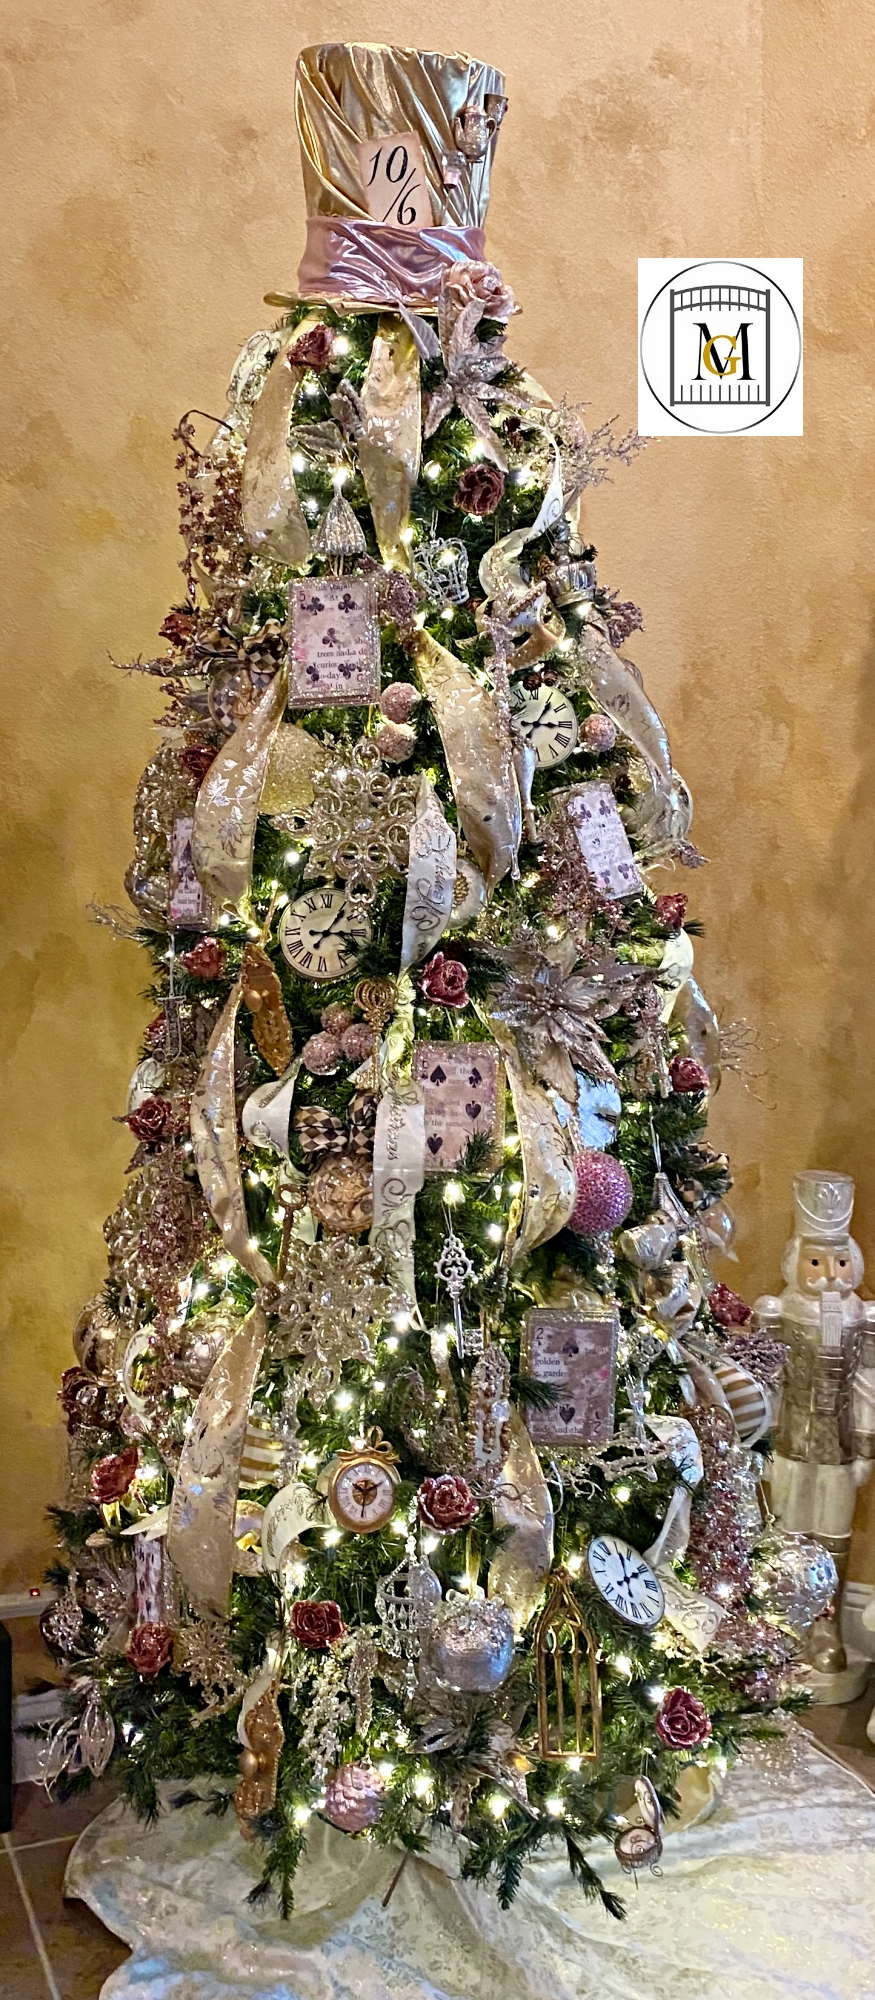
Making a Mad Hatter tree topper is so much fun. This tree topper adds dimension and style to an Alice In Wonderland, shabby chic or vintage Christmas tree. The supplies are easy to find and the Mad Hatter hat is easy to assemble. The best part is that no sewing is required.
Almost every year I change the main theme on my Christmas tree. Doing this is so much fun. However, when I change the theme, I often have to make ornaments to match the theme. Thank goodness, I love the make ornaments. For my Alice in Wonderland tree, I made faux door knobs, clocks, large cards, and tea cups. I wanted to make mini mad hatter hats but ran out of time. All of the decorations that I made will be posts on my website. You can always make these for other Alice in Wonderland events as decor, just leave off the hanging ribbon.
Changing the tree is not expensive if you make ornaments. Also, having a group of stable ornaments is key in which you are only adding in theme ornaments. For example, my core group of ornaments are a mix of gold, champagne, and silver ornaments. Then, all I have to do is accent with the theme ornaments.
Gathering supplies are easier than you think. Holiday colors start being available in mass in September. I get a lot of base supplies from my local dollar store, then I gather the rest from local craft stores and then on-line. I also do a general search on Pinterest and on-line of Christmas tree ideas for the theme I am interested in and get some great ideas. Then I use my imagination and create new ornaments.
Another tip is to start to decorate your tree early. I typically start right after Halloween, this allows for plenty of time for enjoying the holidays with family and friends. Also, if you have kids, starting early makes time for all the extra curricular activities and holiday events.
Don’t Forget To Follow Me On Pinterest!
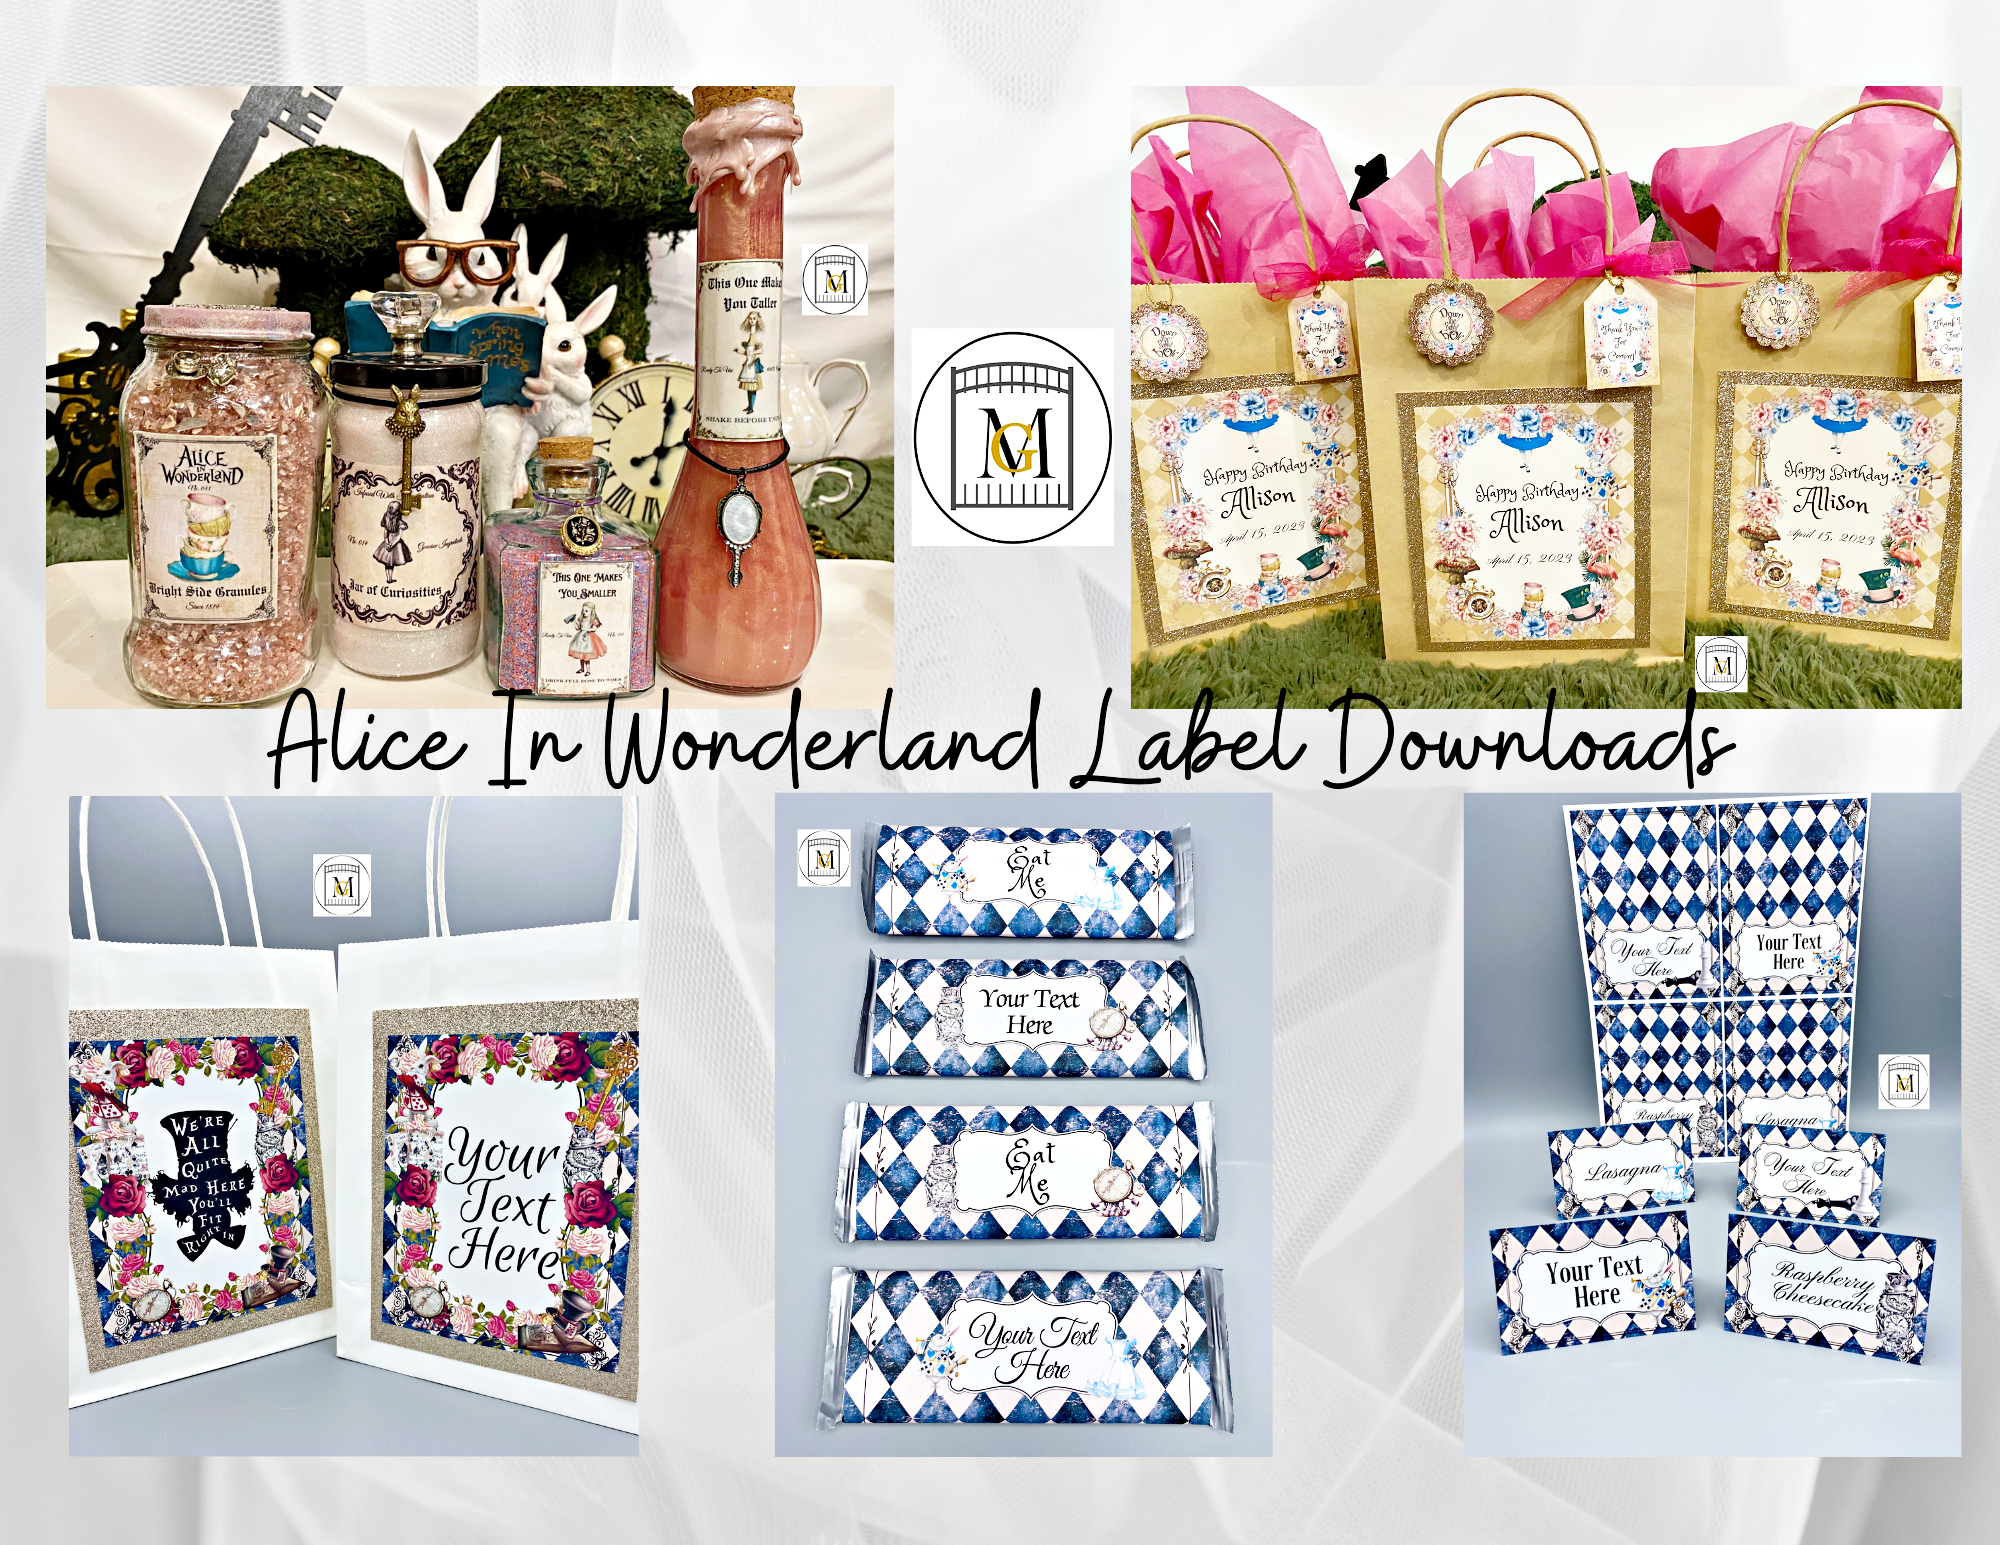
To see my available Party Label Downloads, click here: https://majorgates.com/product-category/party-bundles/
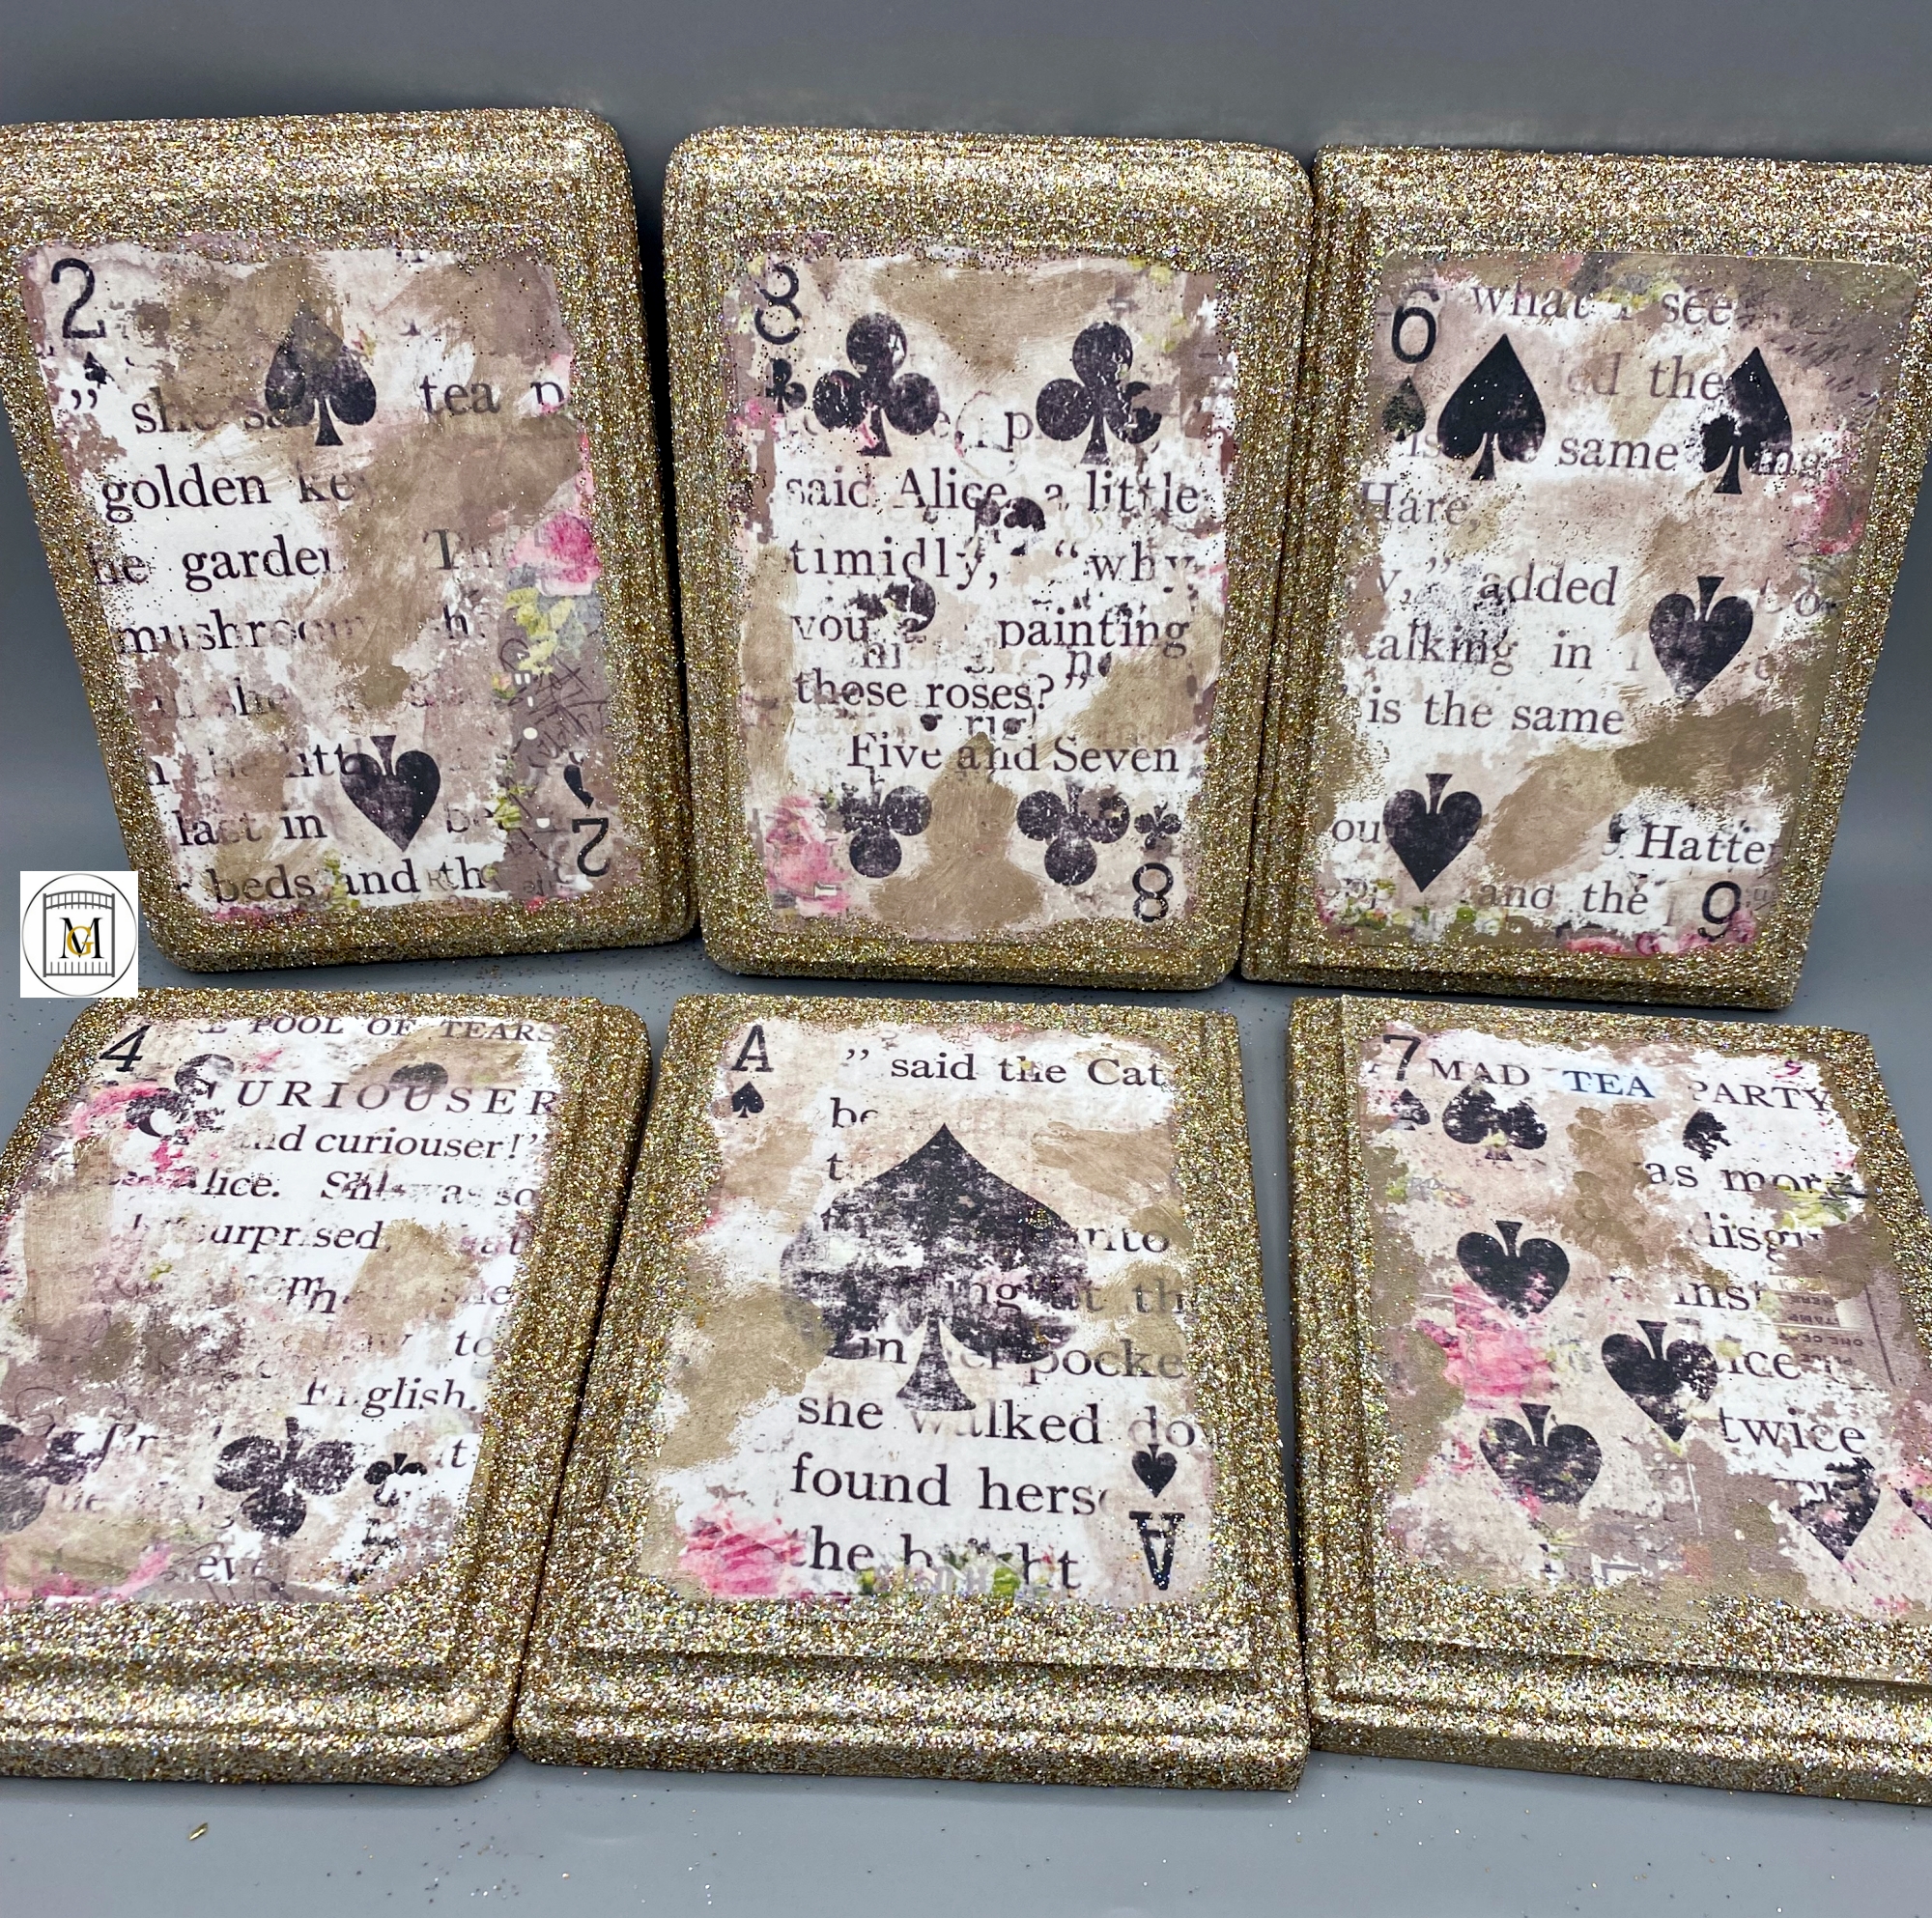
To learn how to make Playing Card Ornaments or Decoration, click here: https://majorgates.com/do-it-yourself/playing-card-ornaments/
Supplies
- Cardboard – 3-4 boxes broken down
- Scissors
- Craft Knife
- Pen
- Ruler or sewing tape measure
- Dual temperature hot glue gun and glue sticks
- 2 yards gold shimmer fabric
- 1 yard pink shimmer fabric
- Card stock
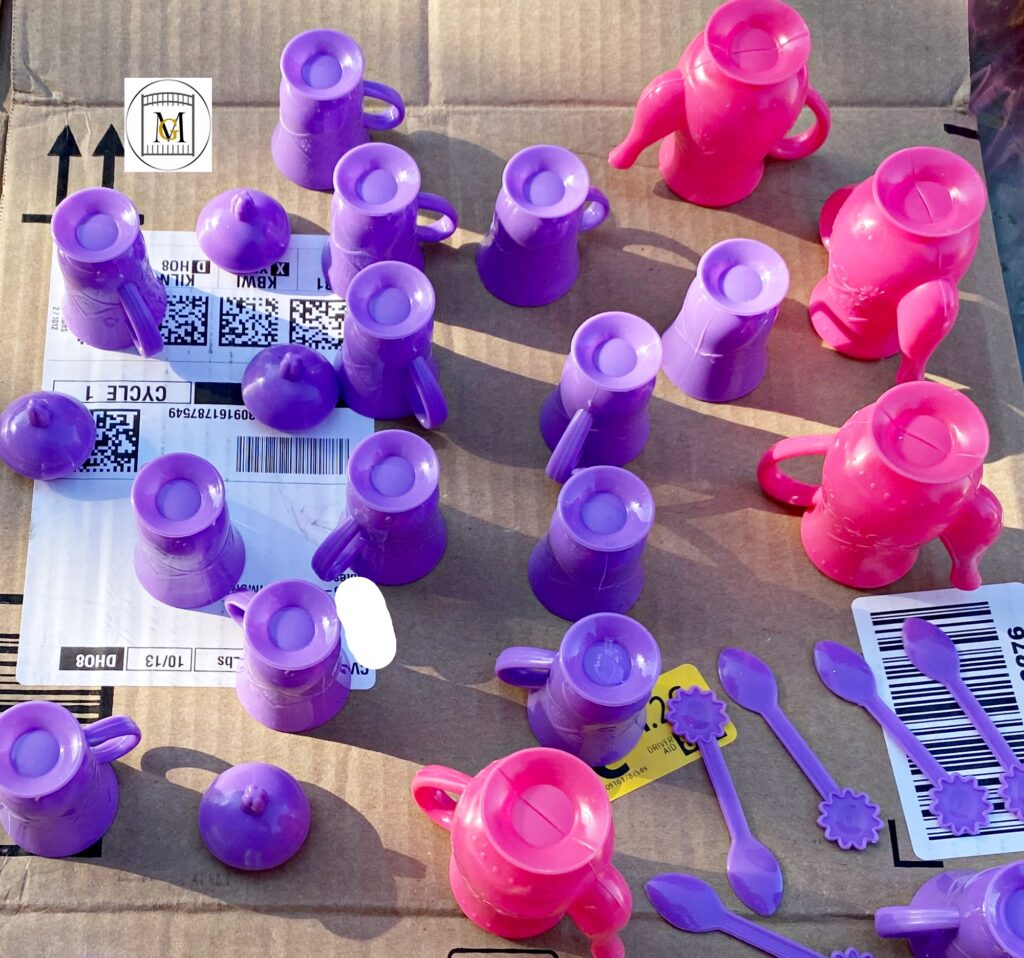
- Small toy plastic tea set – I used sets that I found at my local dollar store, but if you can’t find them, here is an option that will work.
- Craft handheld mini drill to drill in tea set toys
- Gold metallic spray paint – to paint tea set or other hat decor
- Fine silver champagne glitter for tea set
- Mod Podge (Gloss)
- Wooden Kabob/skewer sticks for tea set
- Gems
- Faux Rose
- Craft mat
- Drop cloth
To see my available Potion/Apothecary Bottle Party Labels, including for Alice In Wonderland, click here: https://majorgates.com/product-category/potion-apothecary-labels/

Directions For Mad Hatter Tree Topper
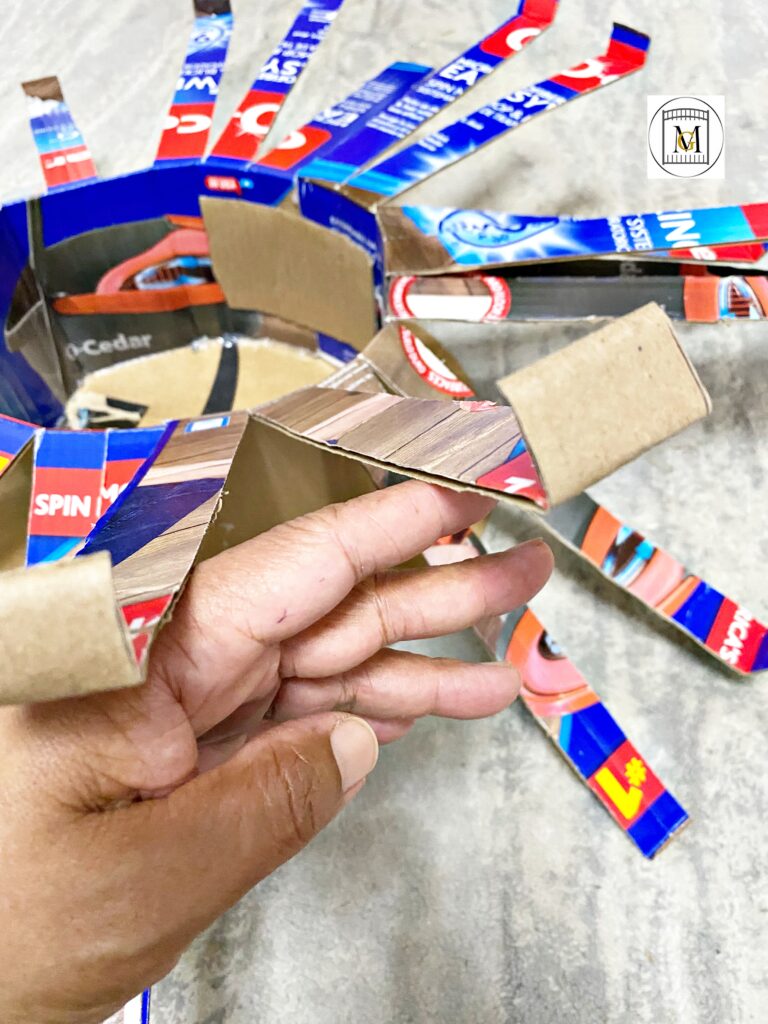
- Start by collecting a large cardboard box that is at least 30 inches wide (or use 2 smaller boxes like I did). The hat I made is 14 inches tall. So trace out a line that is 14 inches from the bottom. Remember that you can make a hat like this for whatever size that you need.
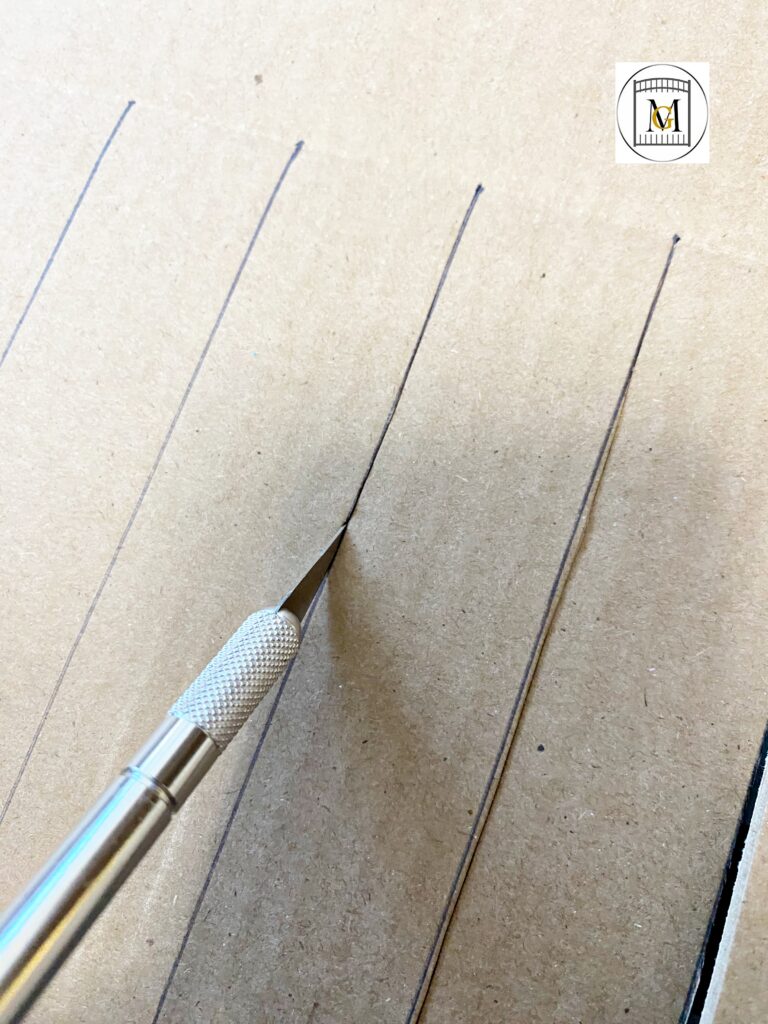
- Then, trace 1 inch strips that are 10 inches long and mark with a pen. So because I used 2 smaller boxes, I had to do this twice to get the size hat I wanted.
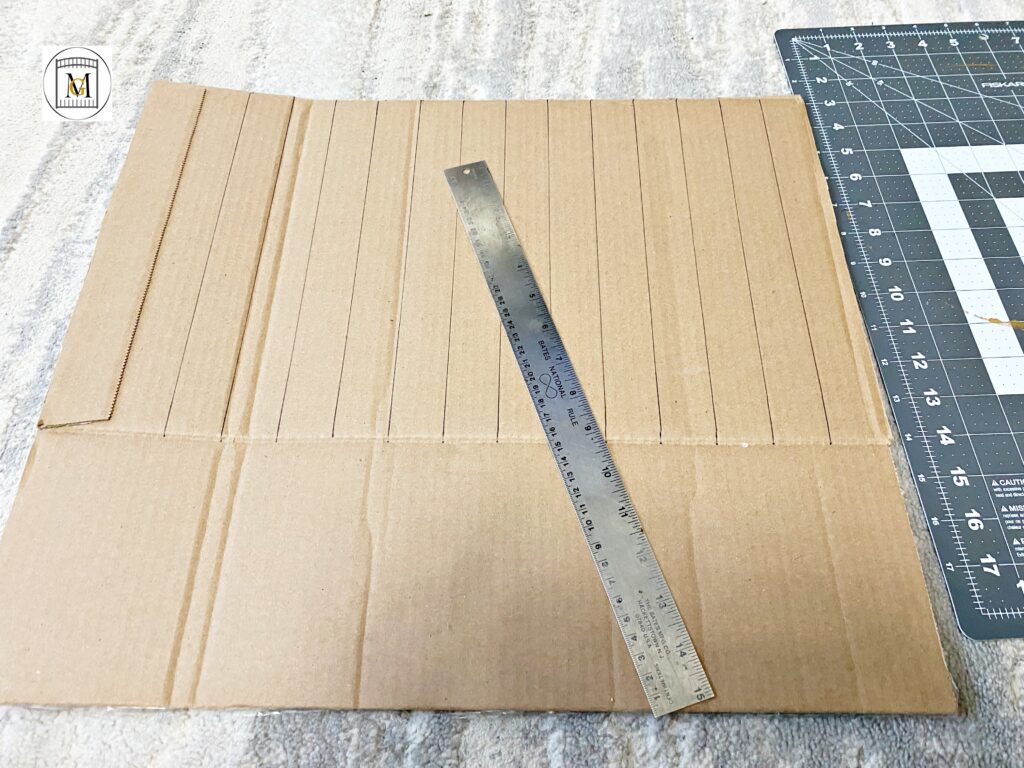
- Next, cut the strips with a craft knife, heavy duty scissors or tile scissors, but not all the way down the bottom of the cardboard. So this should be to the line you traced with 4-6 inches remaining at the bottom. The amount of space left at the bottom will depend on the size of your hat and how wide you want the base to be. I selected 4 inches for the hat in this example.
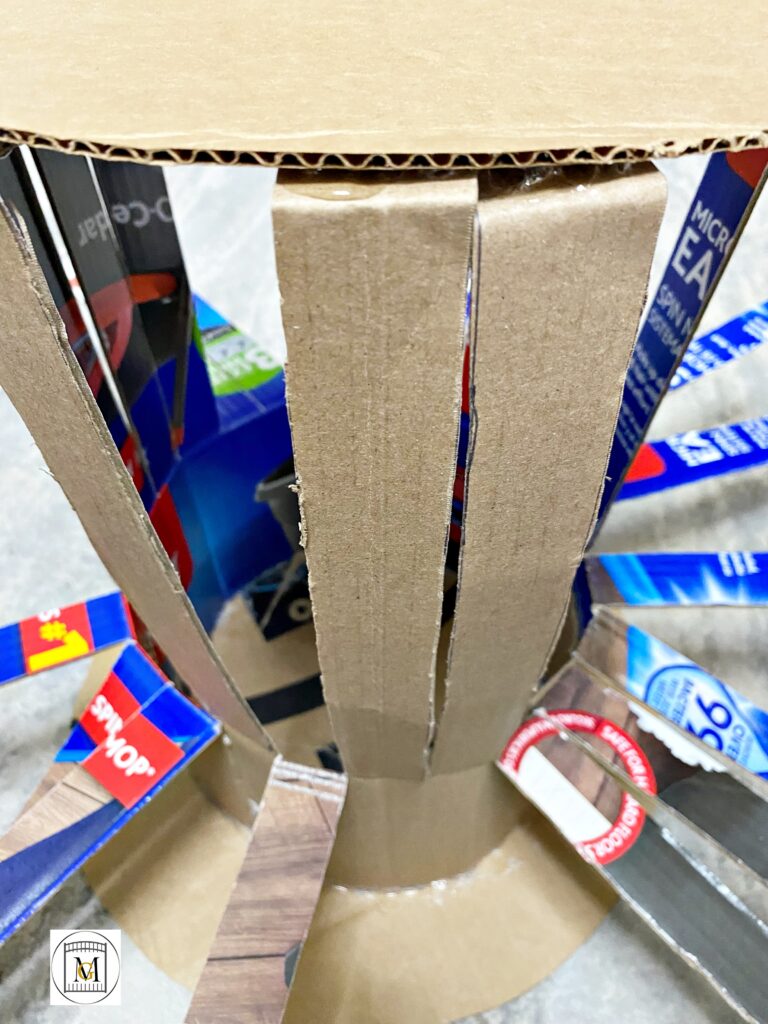
- Next, trace out the top and bottom of the hat on flattened cardboard. For the top which is larger, trace a 15″ circle or use a large plate or decoration around the house. Then for the smaller, trace an 11″ circle from a plate.

- Now, roll the cut strip cardboard to make a cylinder. If you had to use 2 cardboard pieces, do this for both and so each will form a half of the hat. Then, glue each half to the smaller circular cardboard piece to form your hat base. Next, fold about an inch from the top of the cut flaps inward on all the strips.
To see my available 2-Liter/Wine Bottle Party Label Downloads, click here: https://majorgates.com/product-category/2-liter-wine-bottle-labels/

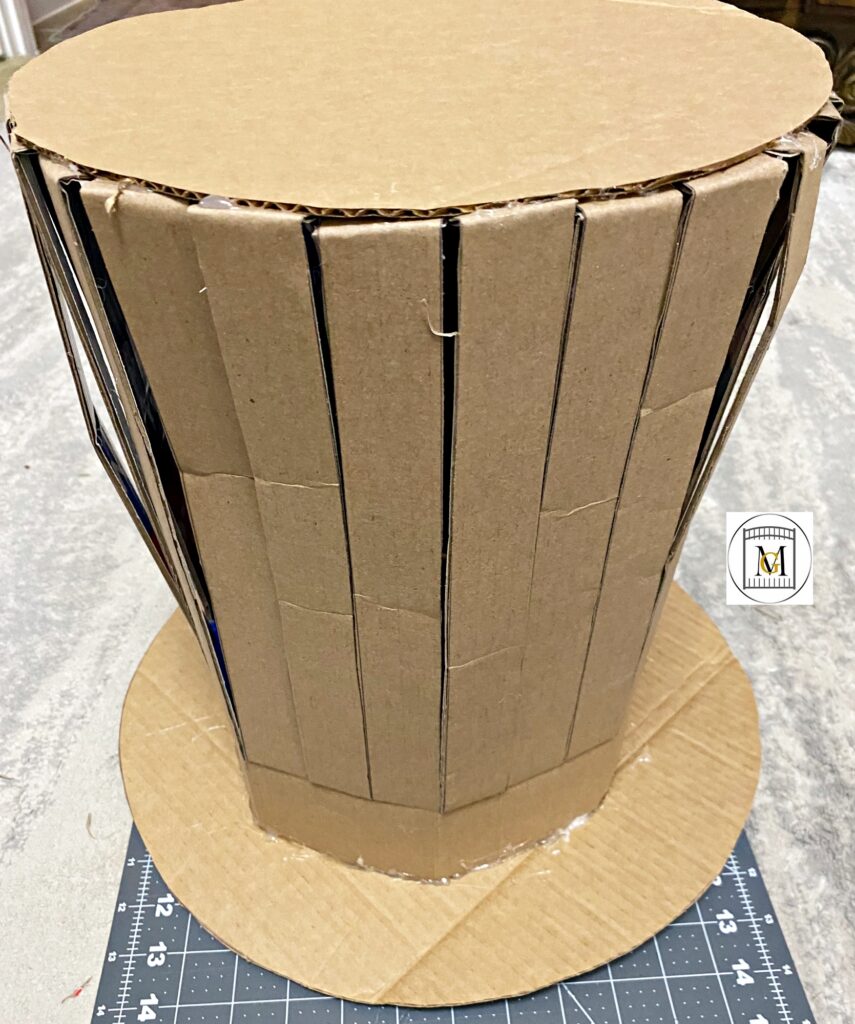
- Now, place a dab of glue on the top folded flap and secure the larger circular cardboard to the top. Repeat with glue for all the strips and place under the large circle of cardboard until the hat is completely formed.
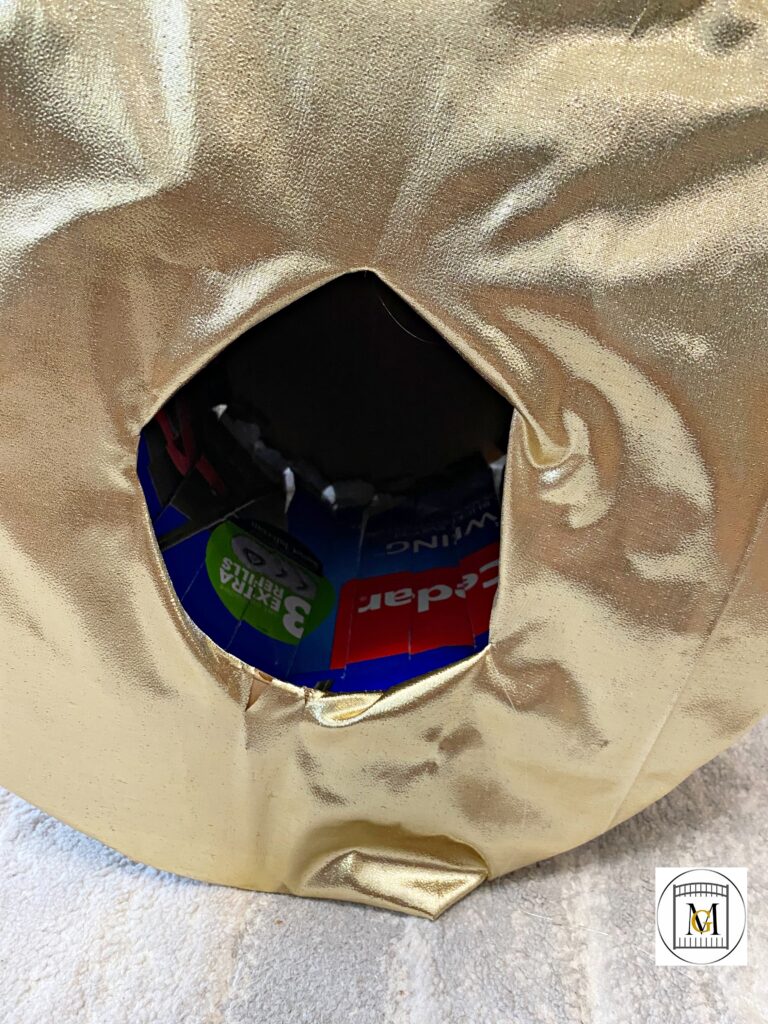
- Don’t forget to cut a hole large enough to fit on the top of the tree at the bottom with a craft knife. This is optional if you are making a hat for a birthday, tea party or other themed occasion.
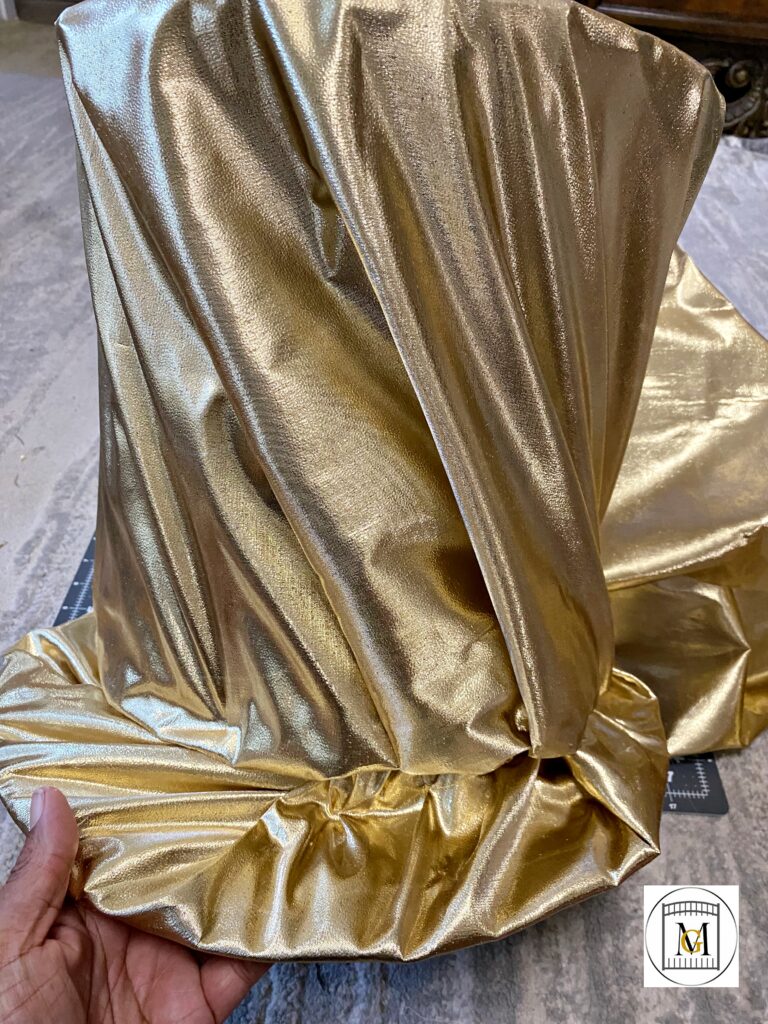
- Next, secure with the gold fabric by swaging or draping in a whimsical fashion. Start with the base first by cutting the fabric to cover the bottom circle and then glue at the base of the upper part of the hat. Then drape fabric over the top and glue at the seams of where the fabric is from covering the bottom. After glueing this will not look good, and that is okay, make sure the swaging of your fabric is looking the way you want it to. You will be covering the glued parts, and cut fabric, with a sash of fabric.
- Cut the fabric in the center and glue the fabric on the inside of the hole. This does not have to be neat as it is going over branches on the top of the tree. If you are making the hat for a decoration that is not going on a tree, do not cut the hole.
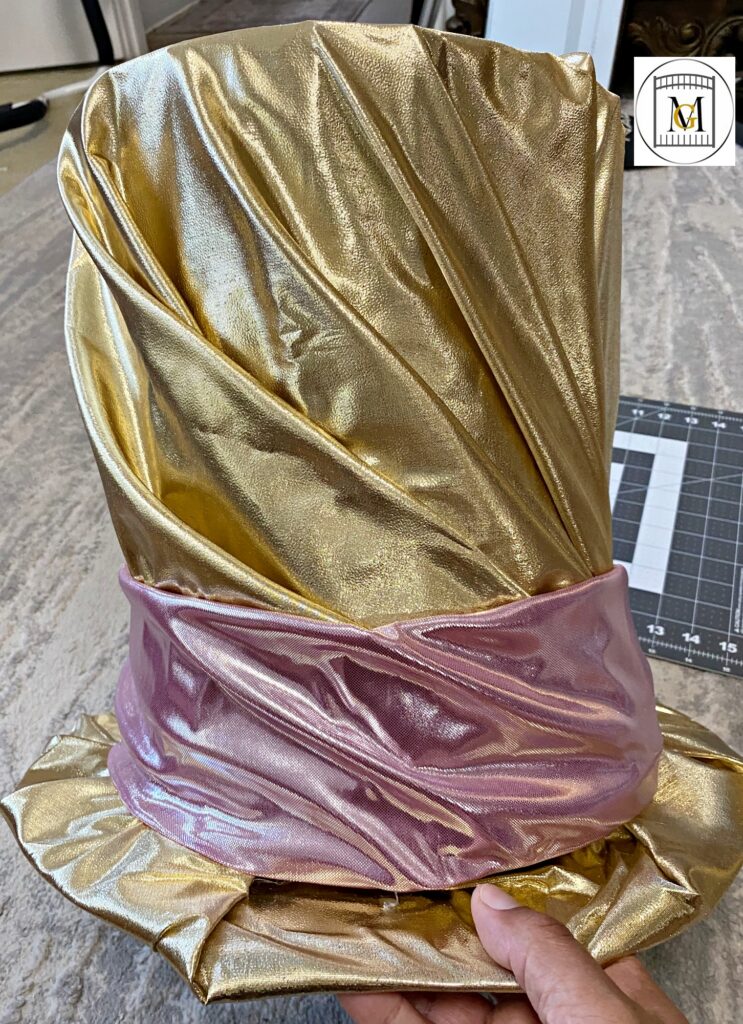
- Now, cut your sash fabric to desired width and height. The sash I made was 5 inches wide. So I cut the fabric 9 inches and then folded 2 inches in per side and secured with hot glue.
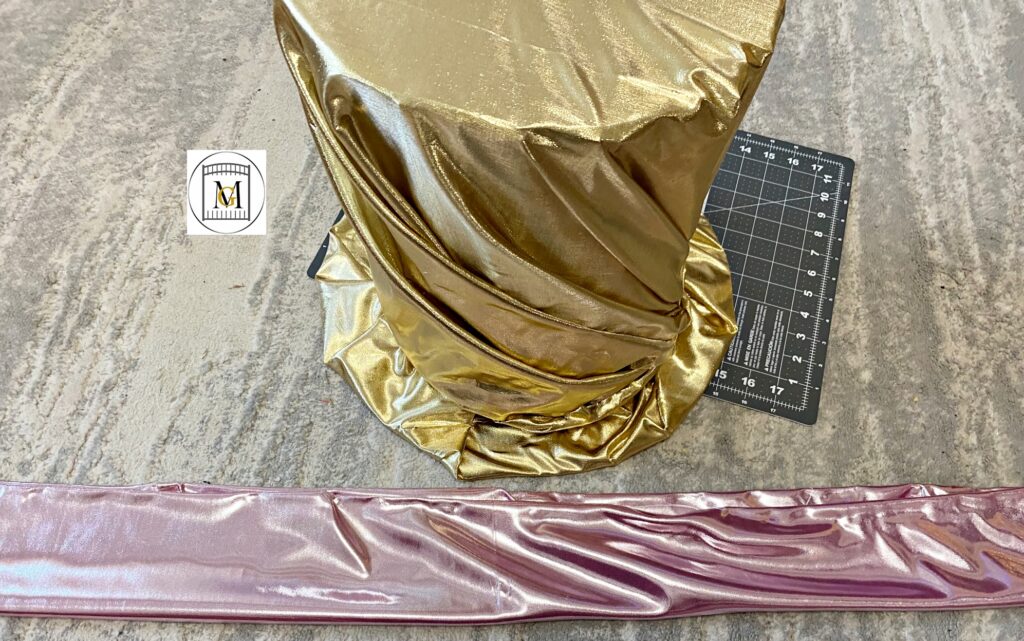
- Then secure the sash to the hat with the glue gun.
Mad Hatter Tree Topper Embellishments
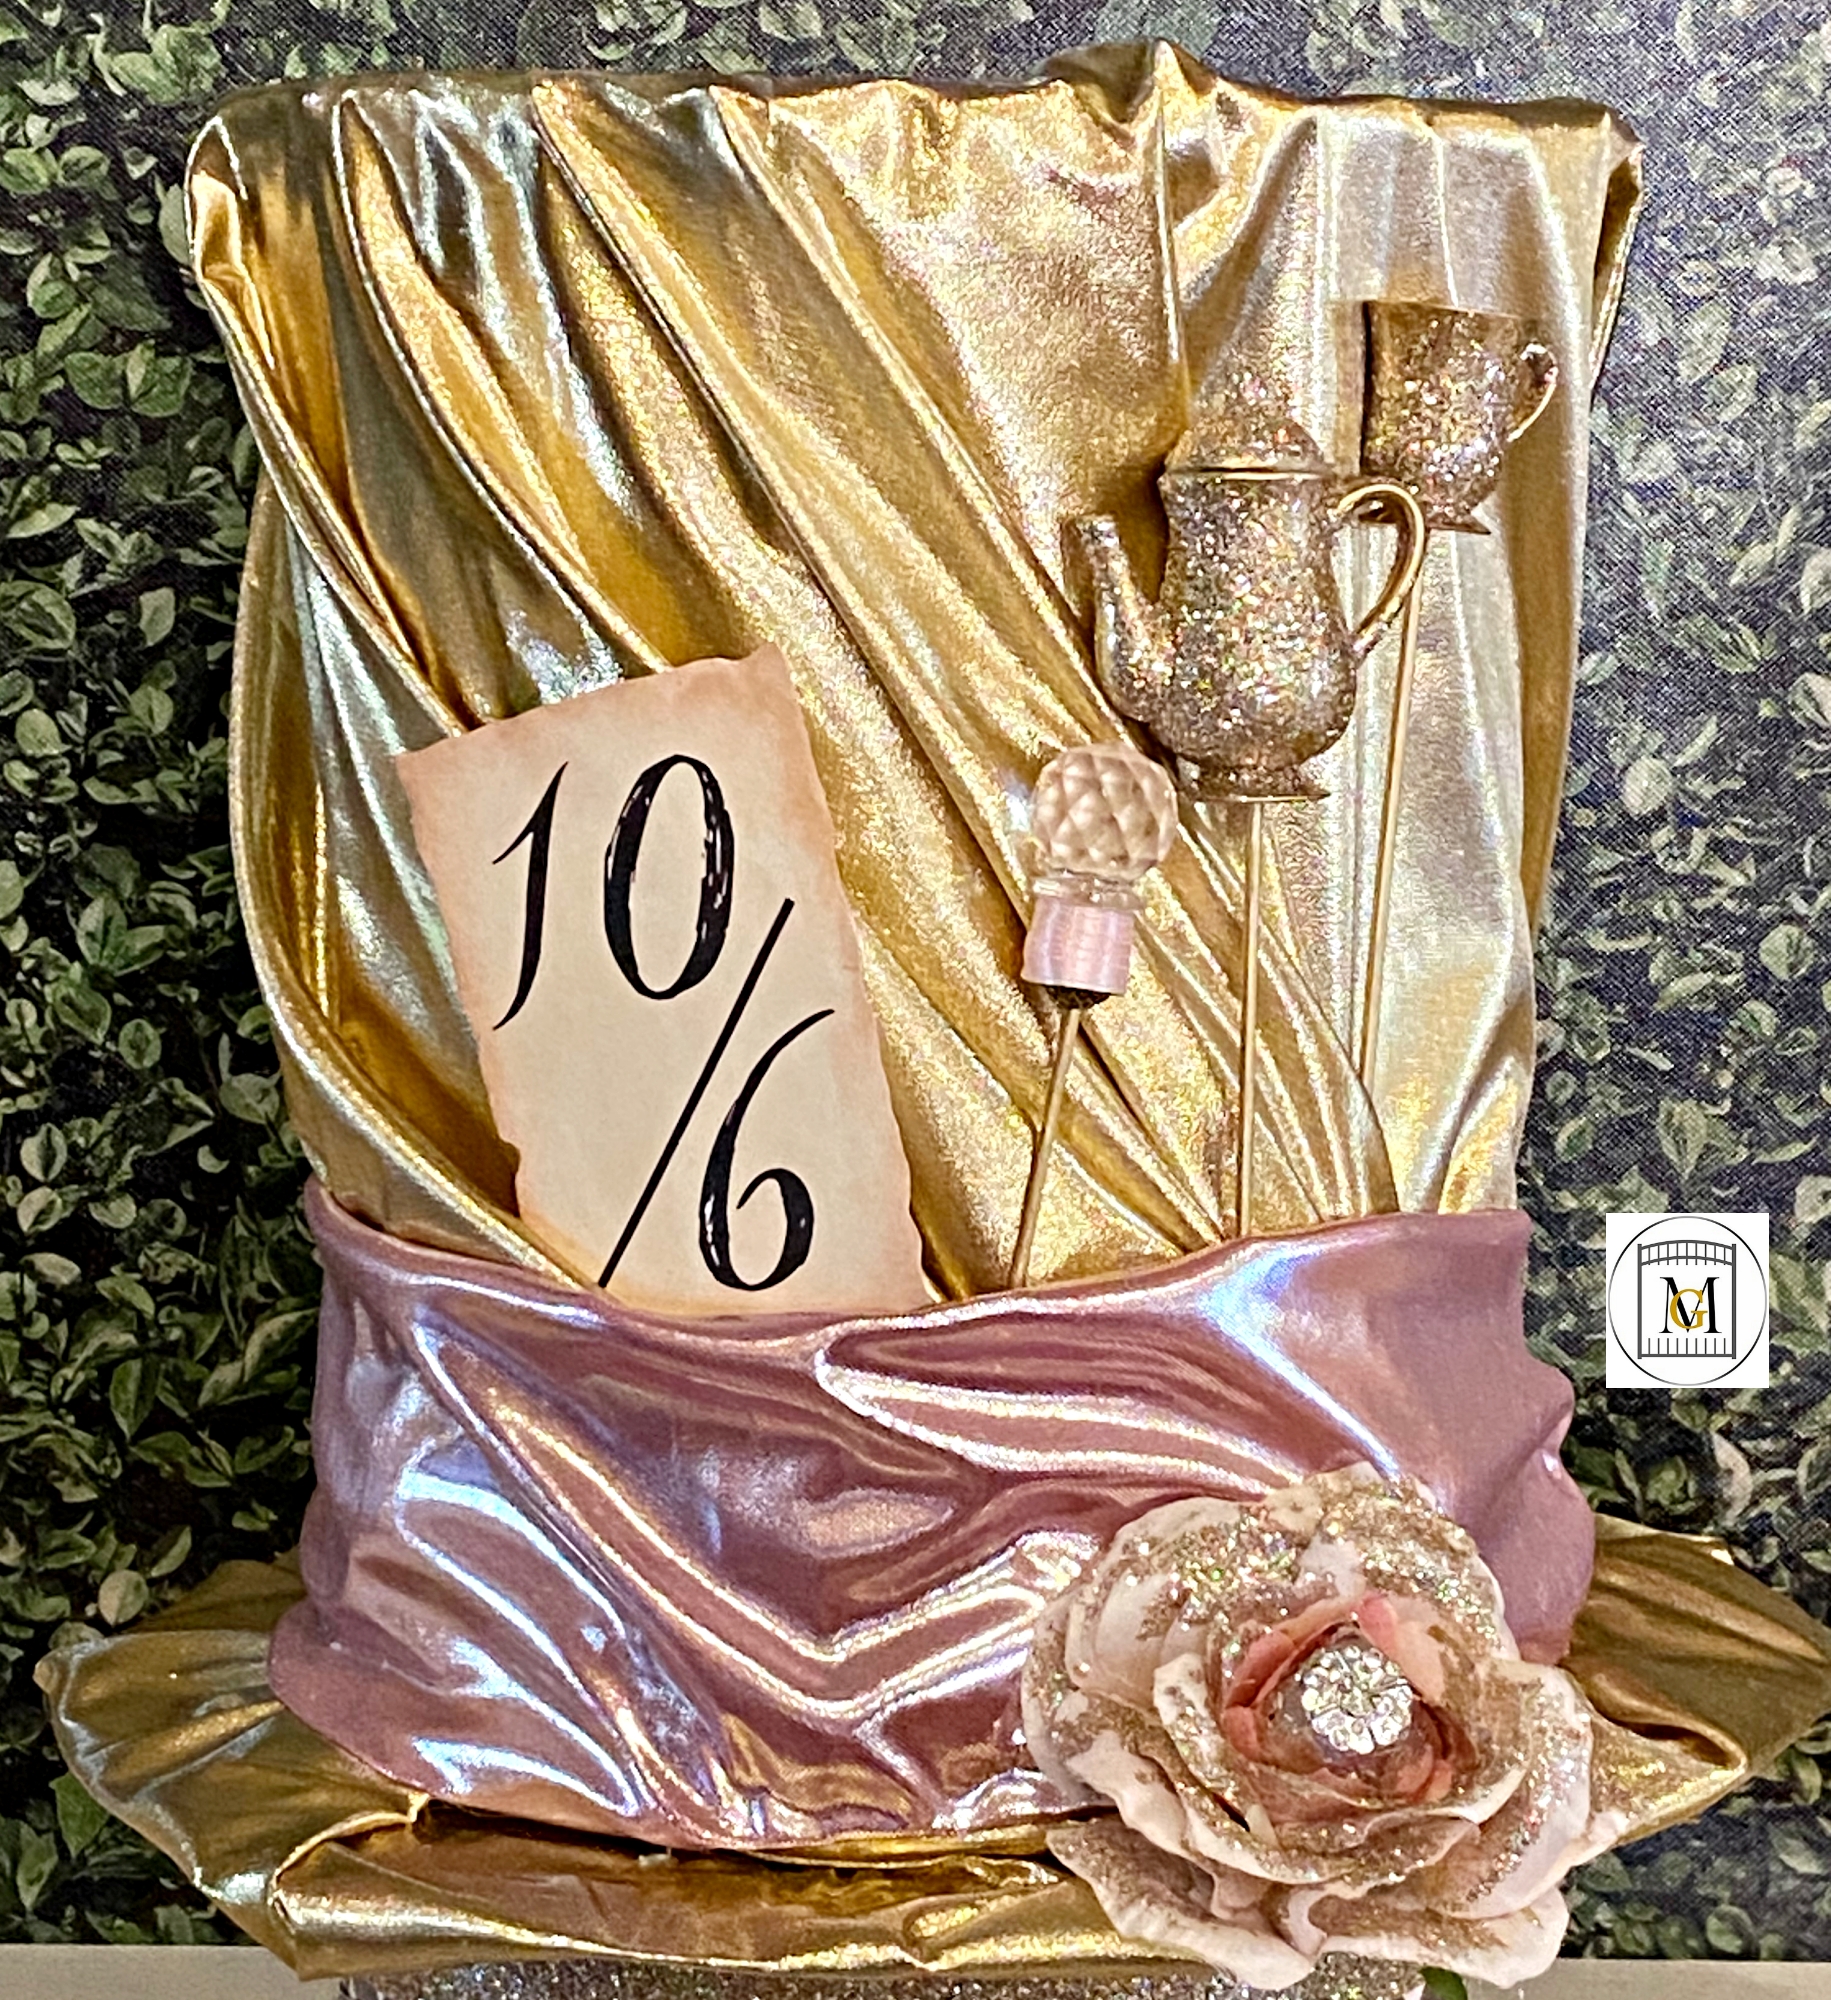
You can decorate your Mad Hatter hat with anything you like. I decorated this one with mini tea decorations, 10/6 card, gems and a glittered rose. Hopefully, this gives you some ideas of what you can do.
- I started with some plastic mini tea sets that I found at my local dollar store. I purchased several sets because I also made Mad Hatter Headband decorations for the ladies and accented some of them with these mini gold glittered tea sets.
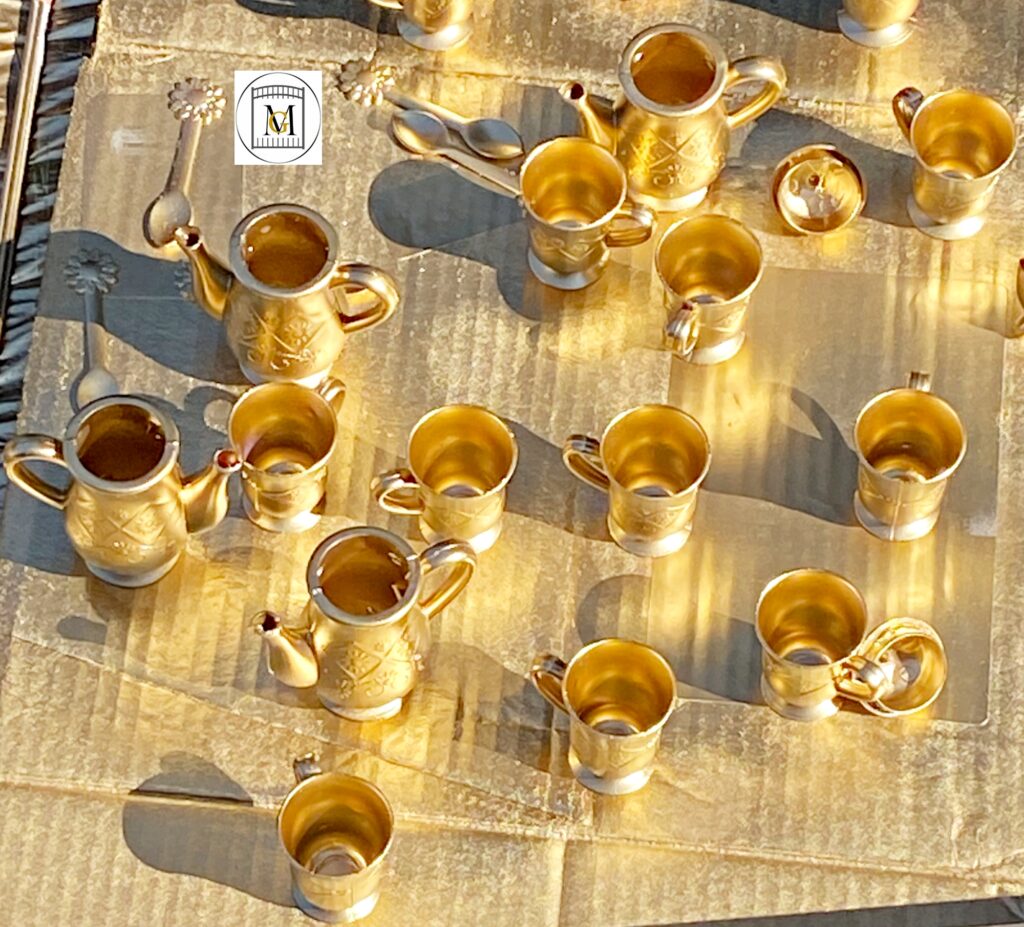
- Next, I took the sets outside, placed on a broken down cardboard box and spray painted with gold metallic paint. When painting, turn the tea sets upside down (always paint the bottoms first), allow to dry for at least 1 hour before painting them right side up.
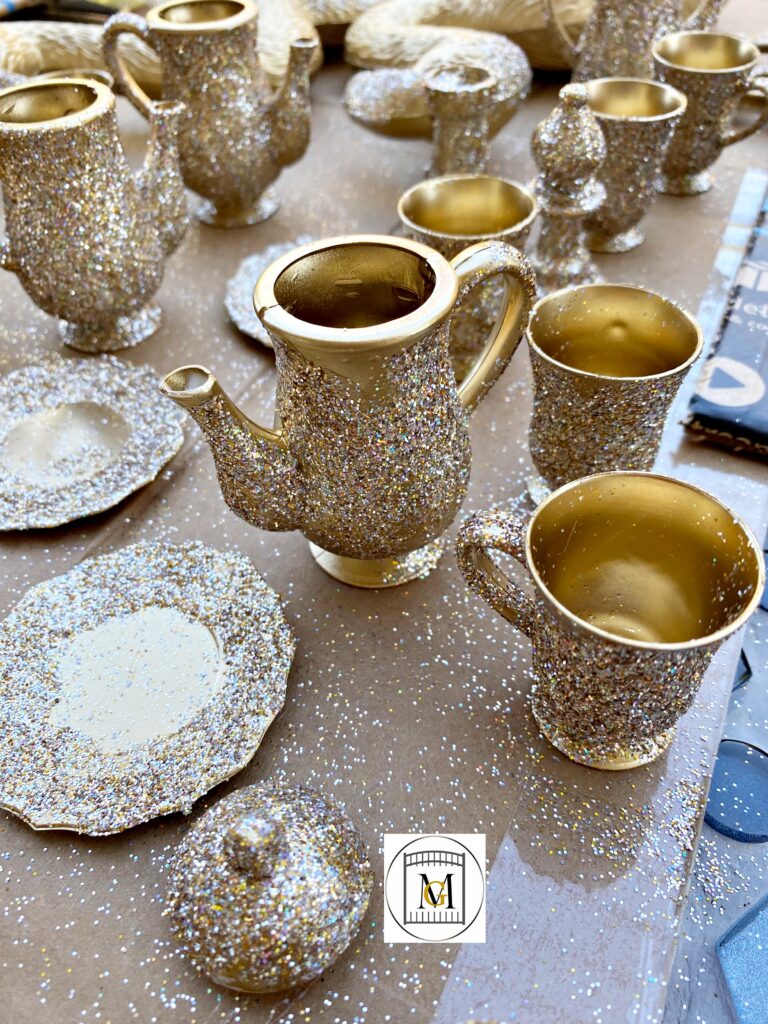
- Then once the gold paint is dry, paint the outsides with Mod Podge and then sprinkle with fine or ultra fine glitter (I used silver champagne gold from Hobby Lobby).
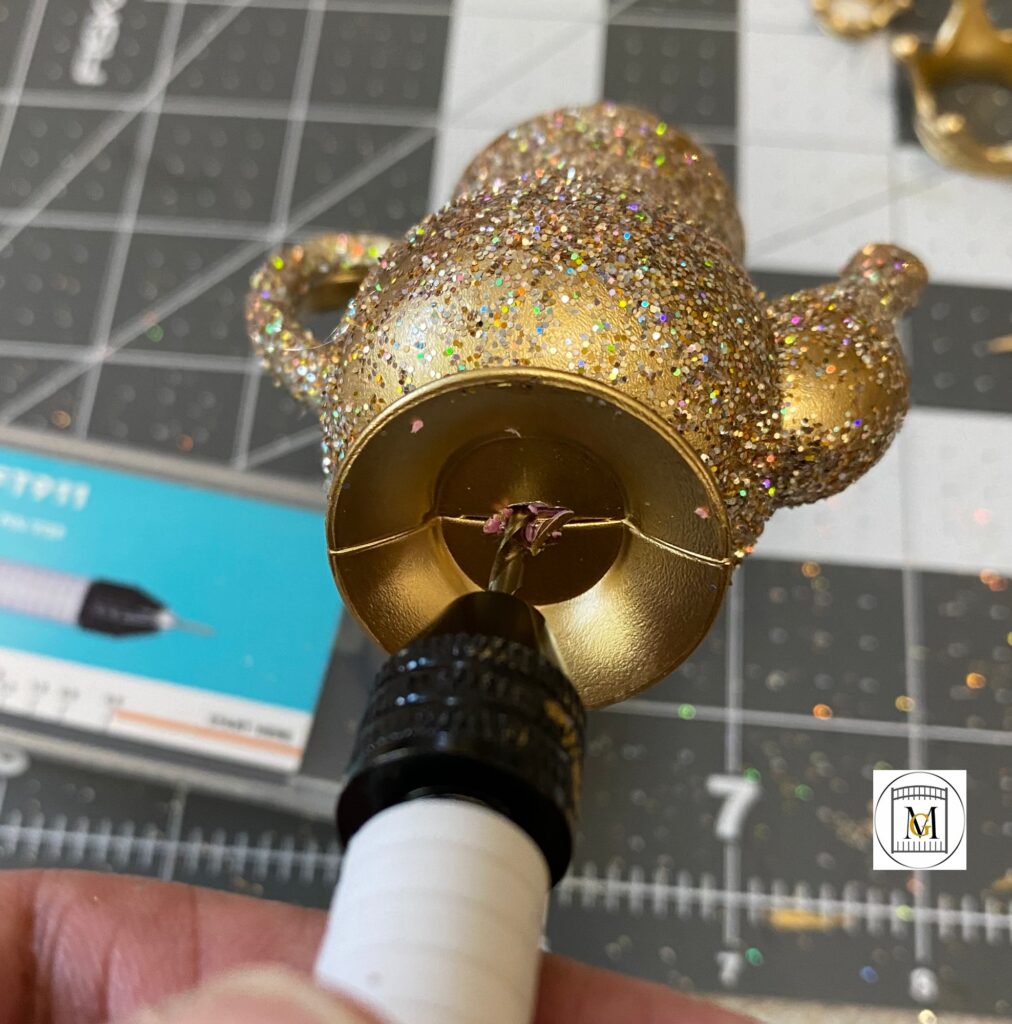
- Next, drill a hole small enough that will fit a kabob skewer. Do a dry fit to make sure the hole is large enough. I also painted the sticks gold to match. Then apply a dab of glue and insert the skewer.
- I also randomly applied Mod Podge to the petals of a pink rose and added glitter. Then I added a gem embellishment to the center for a little more bling.

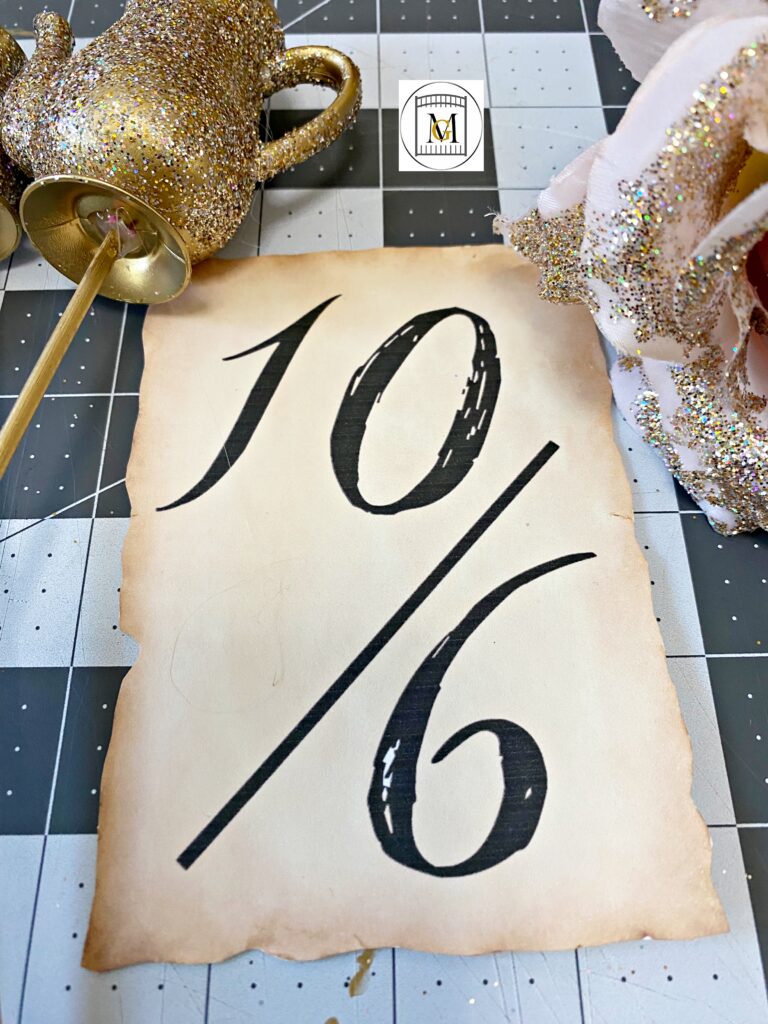
- Last, on card stock, I printed a 10/6 card that I created in Canva. You do not have to create one because there are plenty of images on-line that you can save down and print. The size is approximately 3″ x 5″.
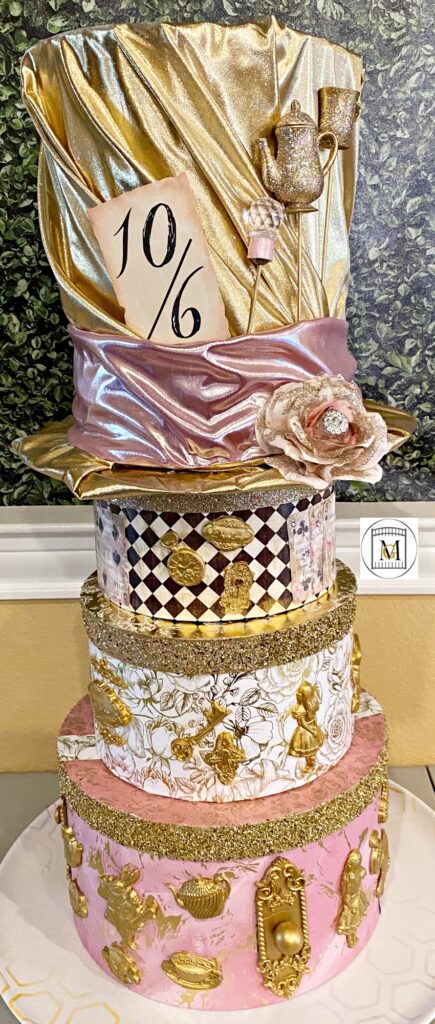
- Then decorate the hat. Add as much as you want. I also am working on a faux Alice In Wonderland looking cake to be the centerpiece on the dessert table. I will post how I made the hat boxes. Best part is that I can use them after the party.
- That is it. Use this wonderful decoration for a tree topper or display in other ways at any tea party or Alice In Wonderland themed event. Have fun!
To see my available Jeopardy/Trivia Party Downloads, click here: https://majorgates.com/product-category/jeopardy-trivia/
