Tangled-Rapunzel Tower Centerpiece
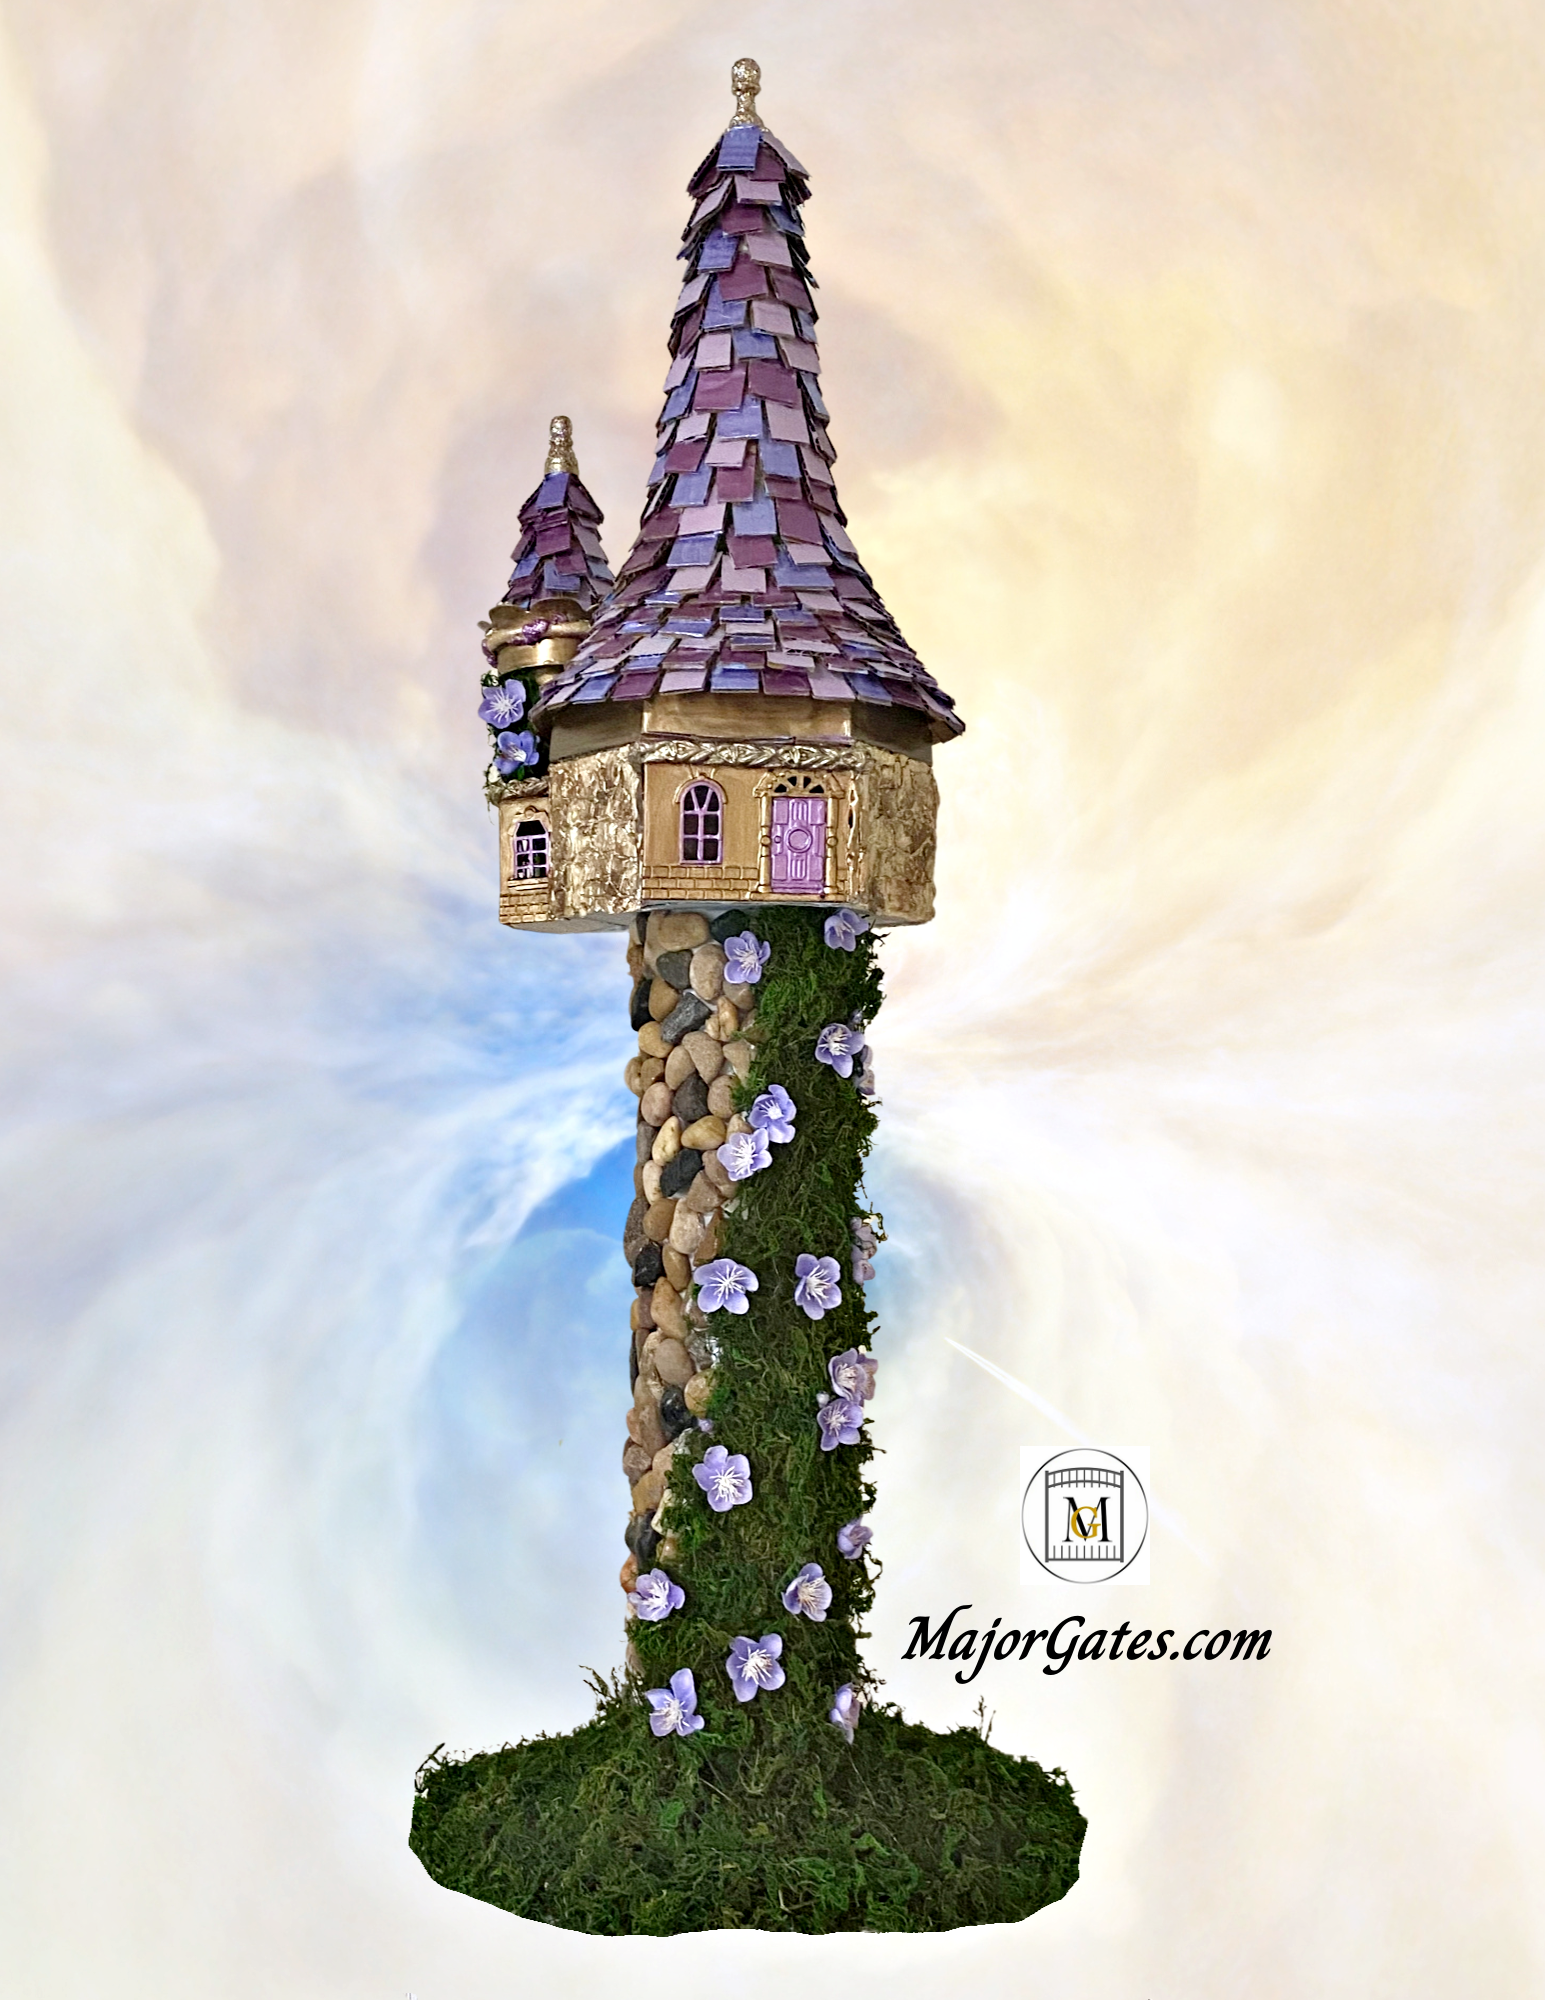
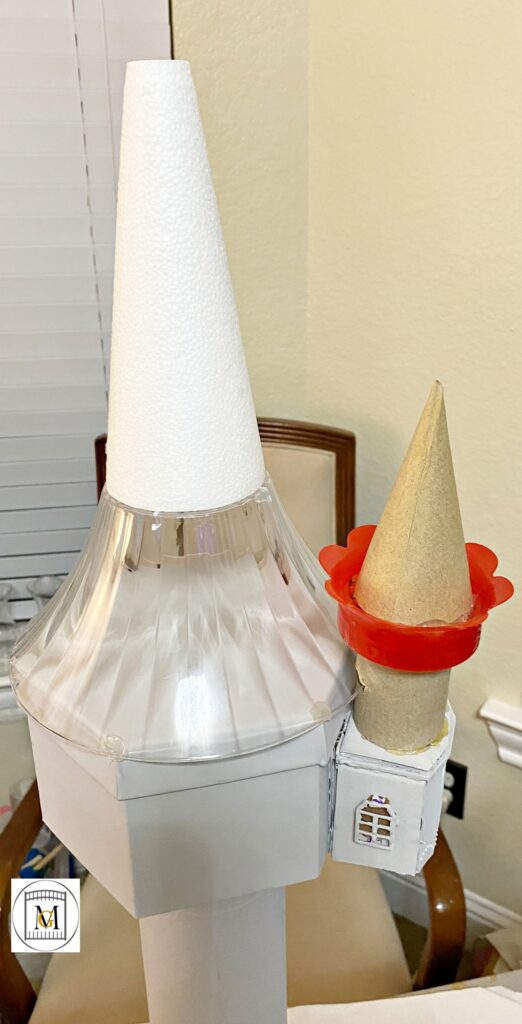
Making a Tangled-Rapunzel Tower Centerpiece was so much fun. I had to get really creative since I am not the best at cutting and molding my own shapes. So I had to find items close to the shapes that I needed. For example, using a bowl turned upside down for the roof with a cone floral foam, cylinder gift boxes for the tower, a hexagon gift box for the house part, and a pull apart miniature doll house for the house door and windows. If you are used to seeing some of my crafts, you know I love to work with silicone molds and air dry clay. The molds are cost effective and provide wonderful detail that I could not do with my free hands.
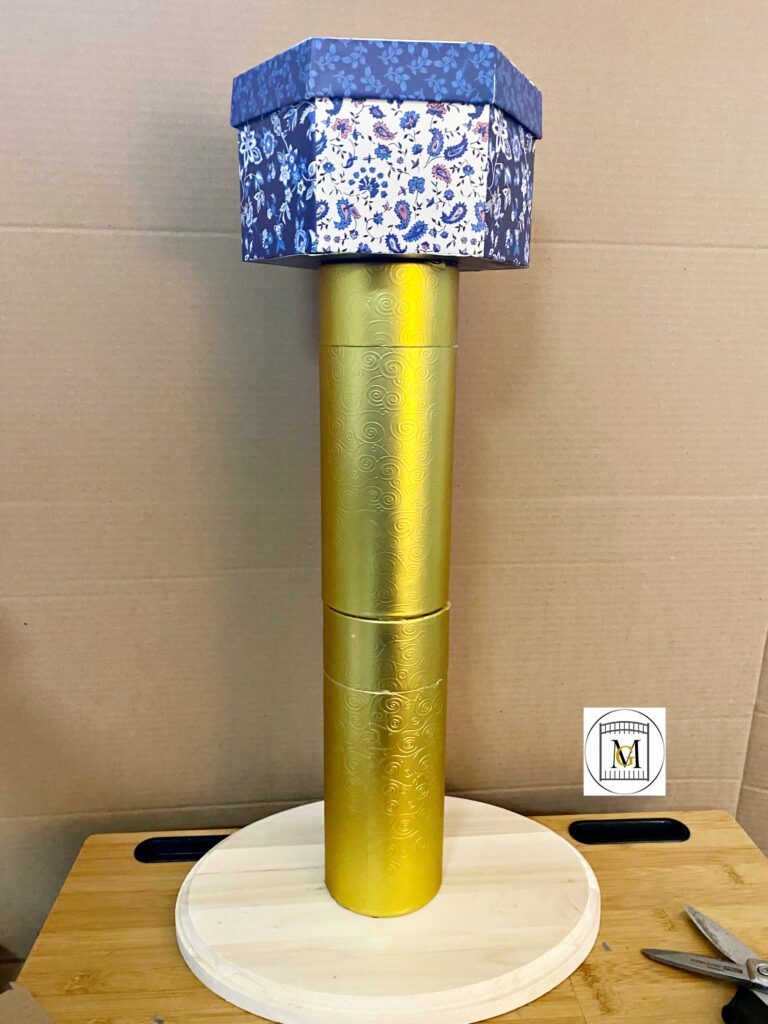
In the end, the tower ended up being 33 inches tall and it is perfect size for a party centerpiece or display table in the Tangled-Rapunzel theme. The project took about 2 days as I worked on it sporadically. It was pretty affordable to make since I got the structure pieces from Dollar Tree and the rest from Hobby Lobby. I’m guessing it cost about $25-$30 to make. The largest cost is probably the paints which I had already on-hand, so it depends on how many colors you want to use.
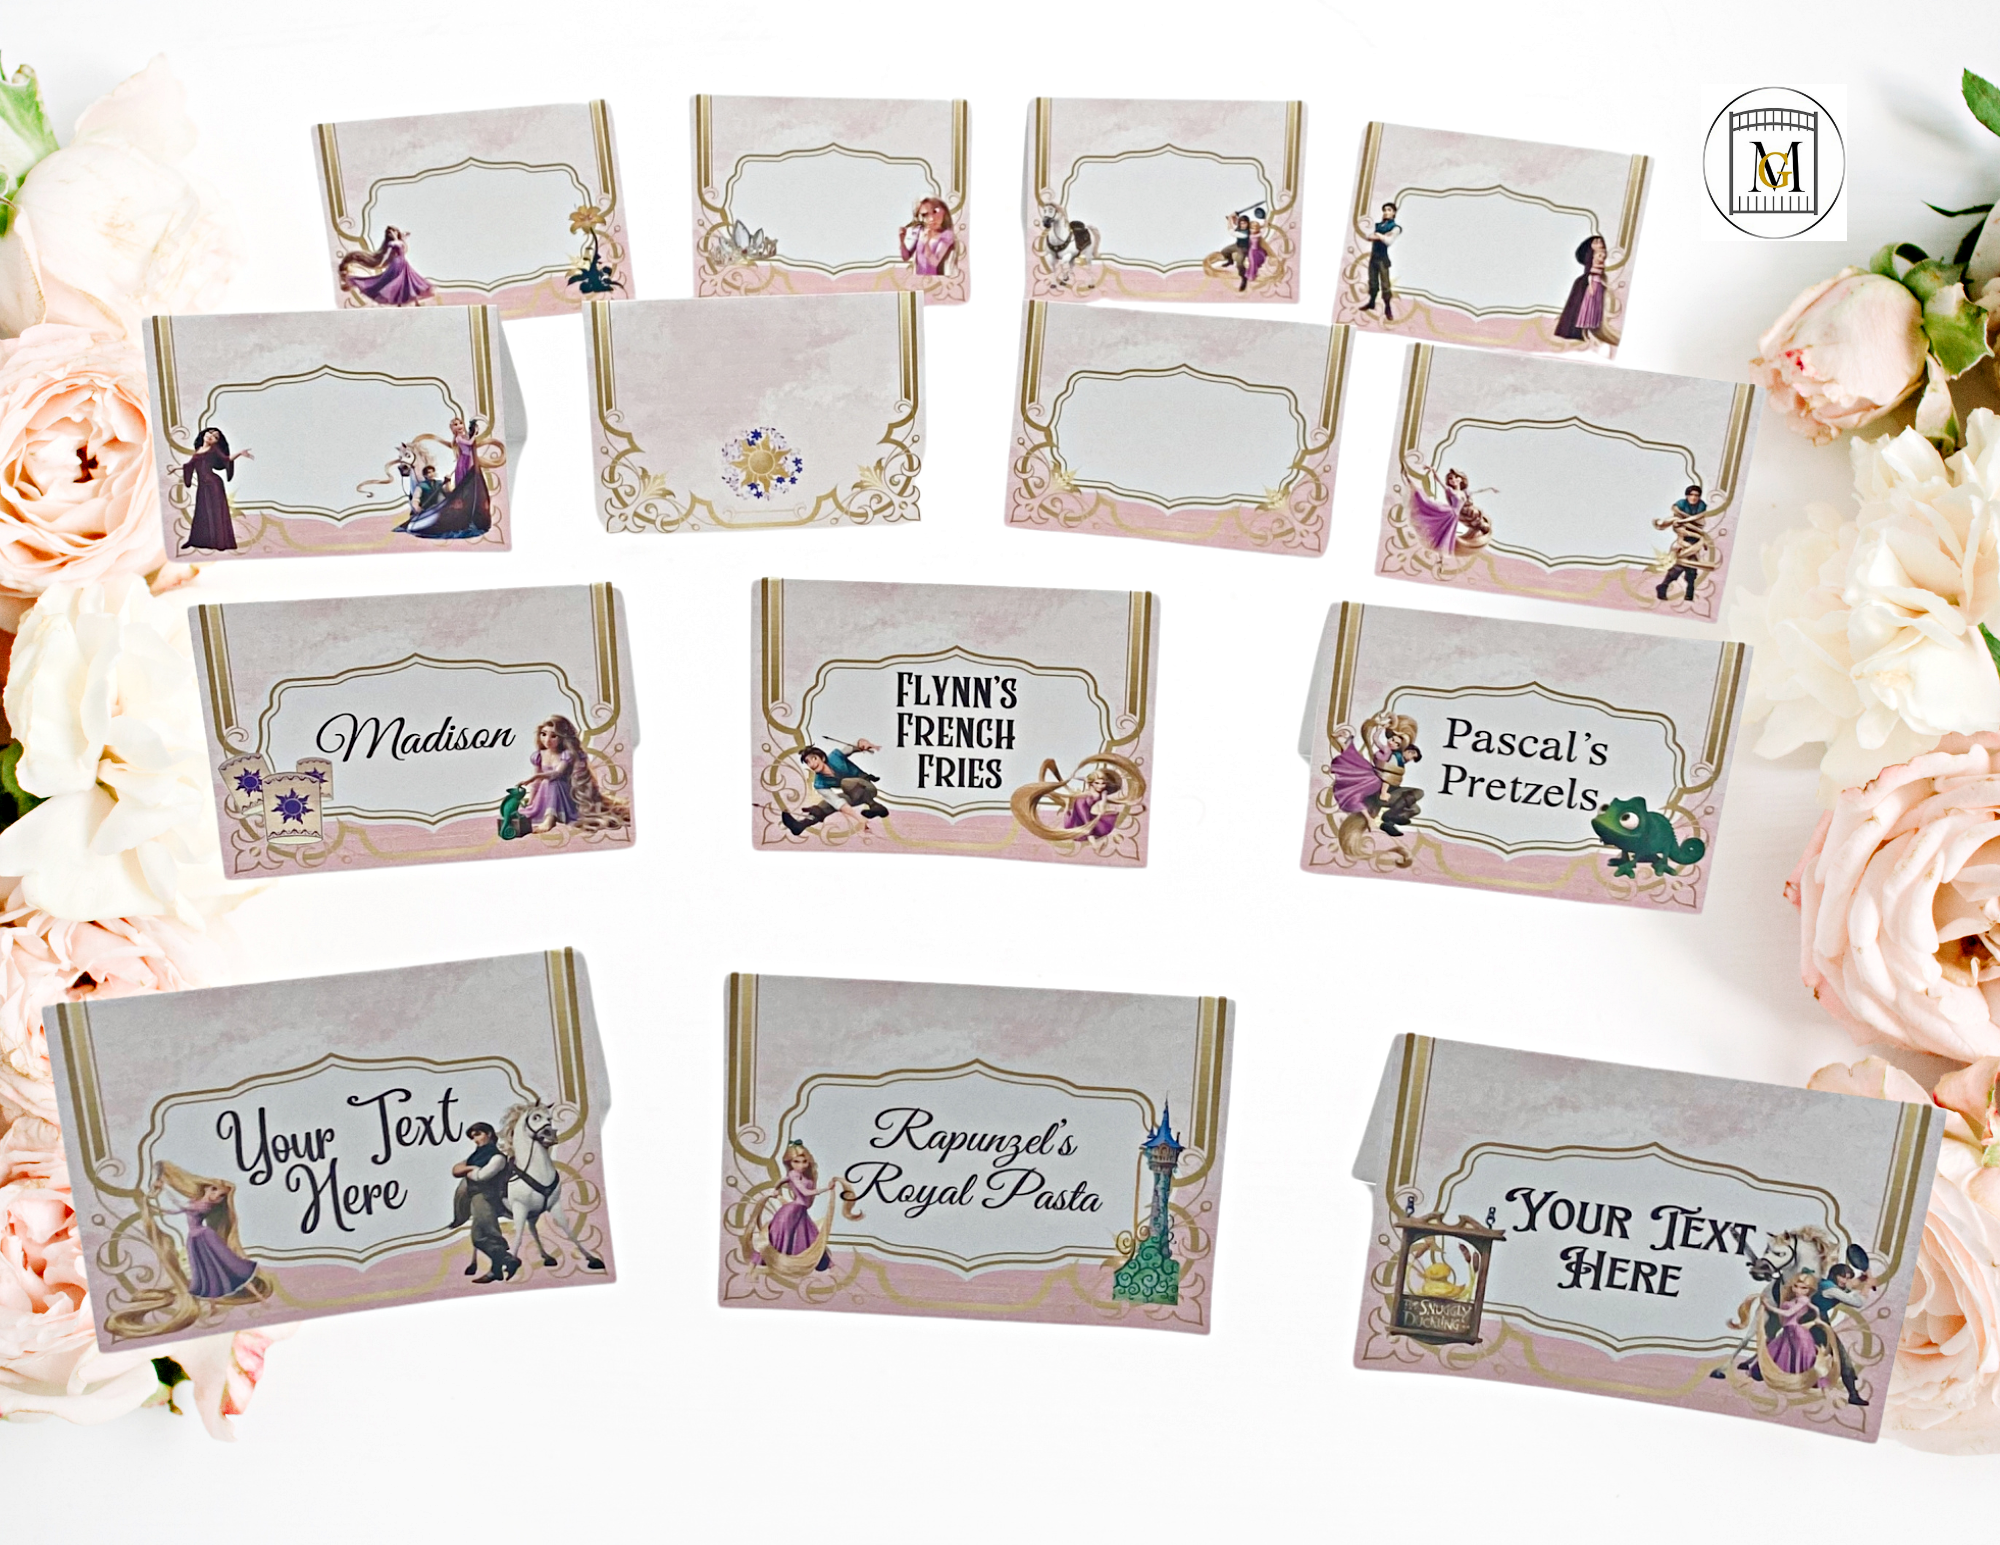
If you need food tents/candy labels, click here: https://majorgates.com/product/rapunzel-birthday-party-food-label-candy-label-place-cards-editable-download/
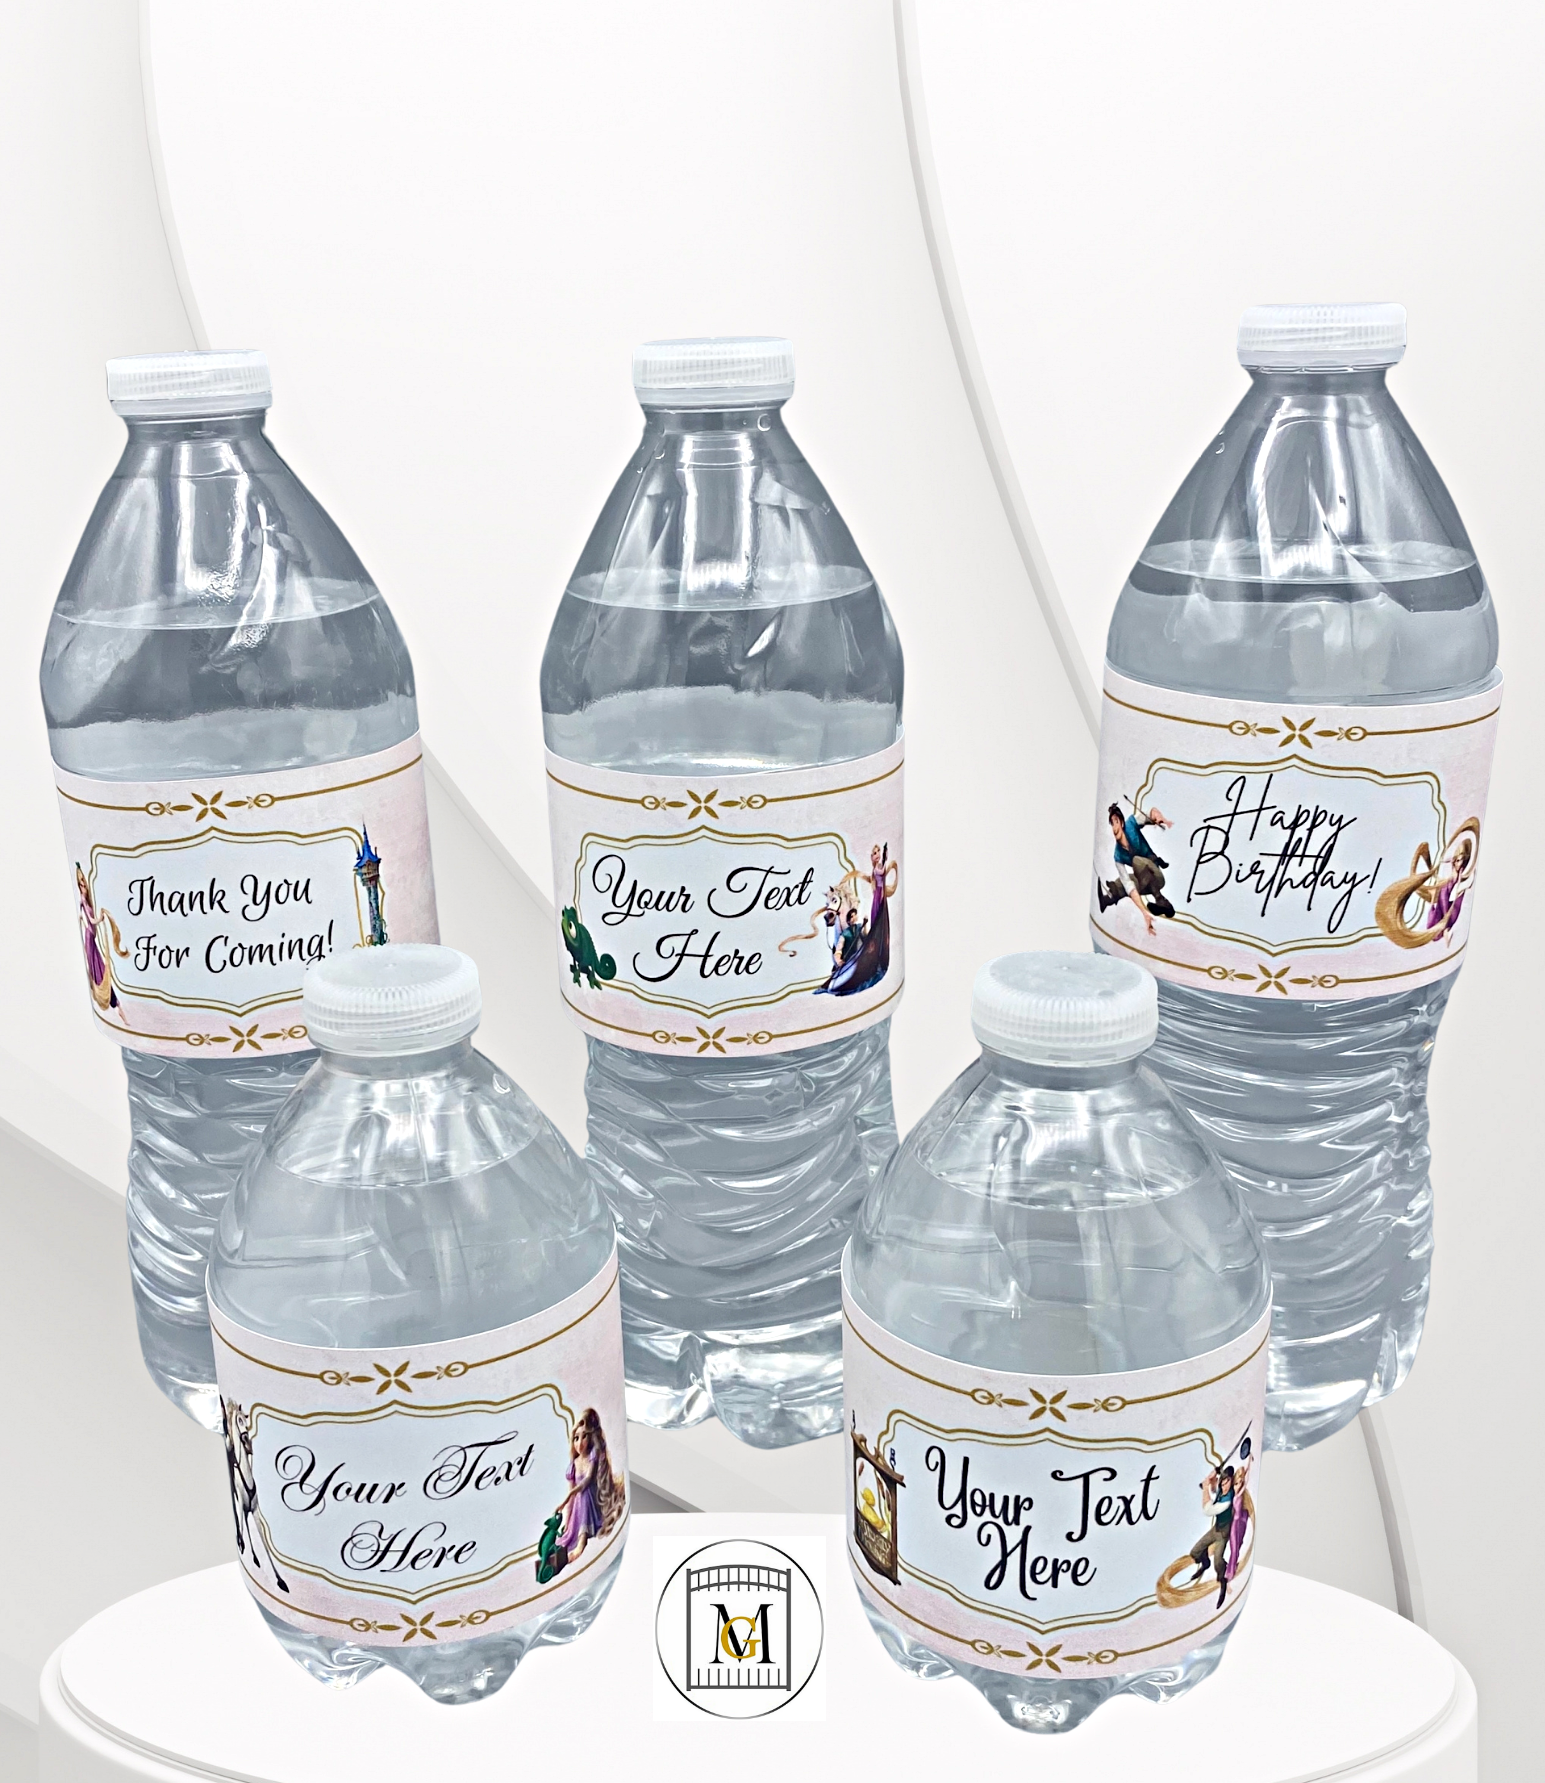
For water bottle labels, click here: https://majorgates.com/product/rapunzel-tangled-birthday-party-water-bottle-editable-label-download/
When I am creating crafts and party items, for supplies, I start at Dollar Tree. I walk around and think about what could make what. Think in terms of shapes, materials, and colors. Lighter color objects are easier to paint over. Then, whatever supplies I can not find, I go to craft stores and then on-line. I save tons of money this way. It is all about timing and what’s available at the Dollar Tree. So, if you are planning your event early enough, you can go several times to slowly gather your supplies.
Don’t Forget To Follow Me On Pinterest!
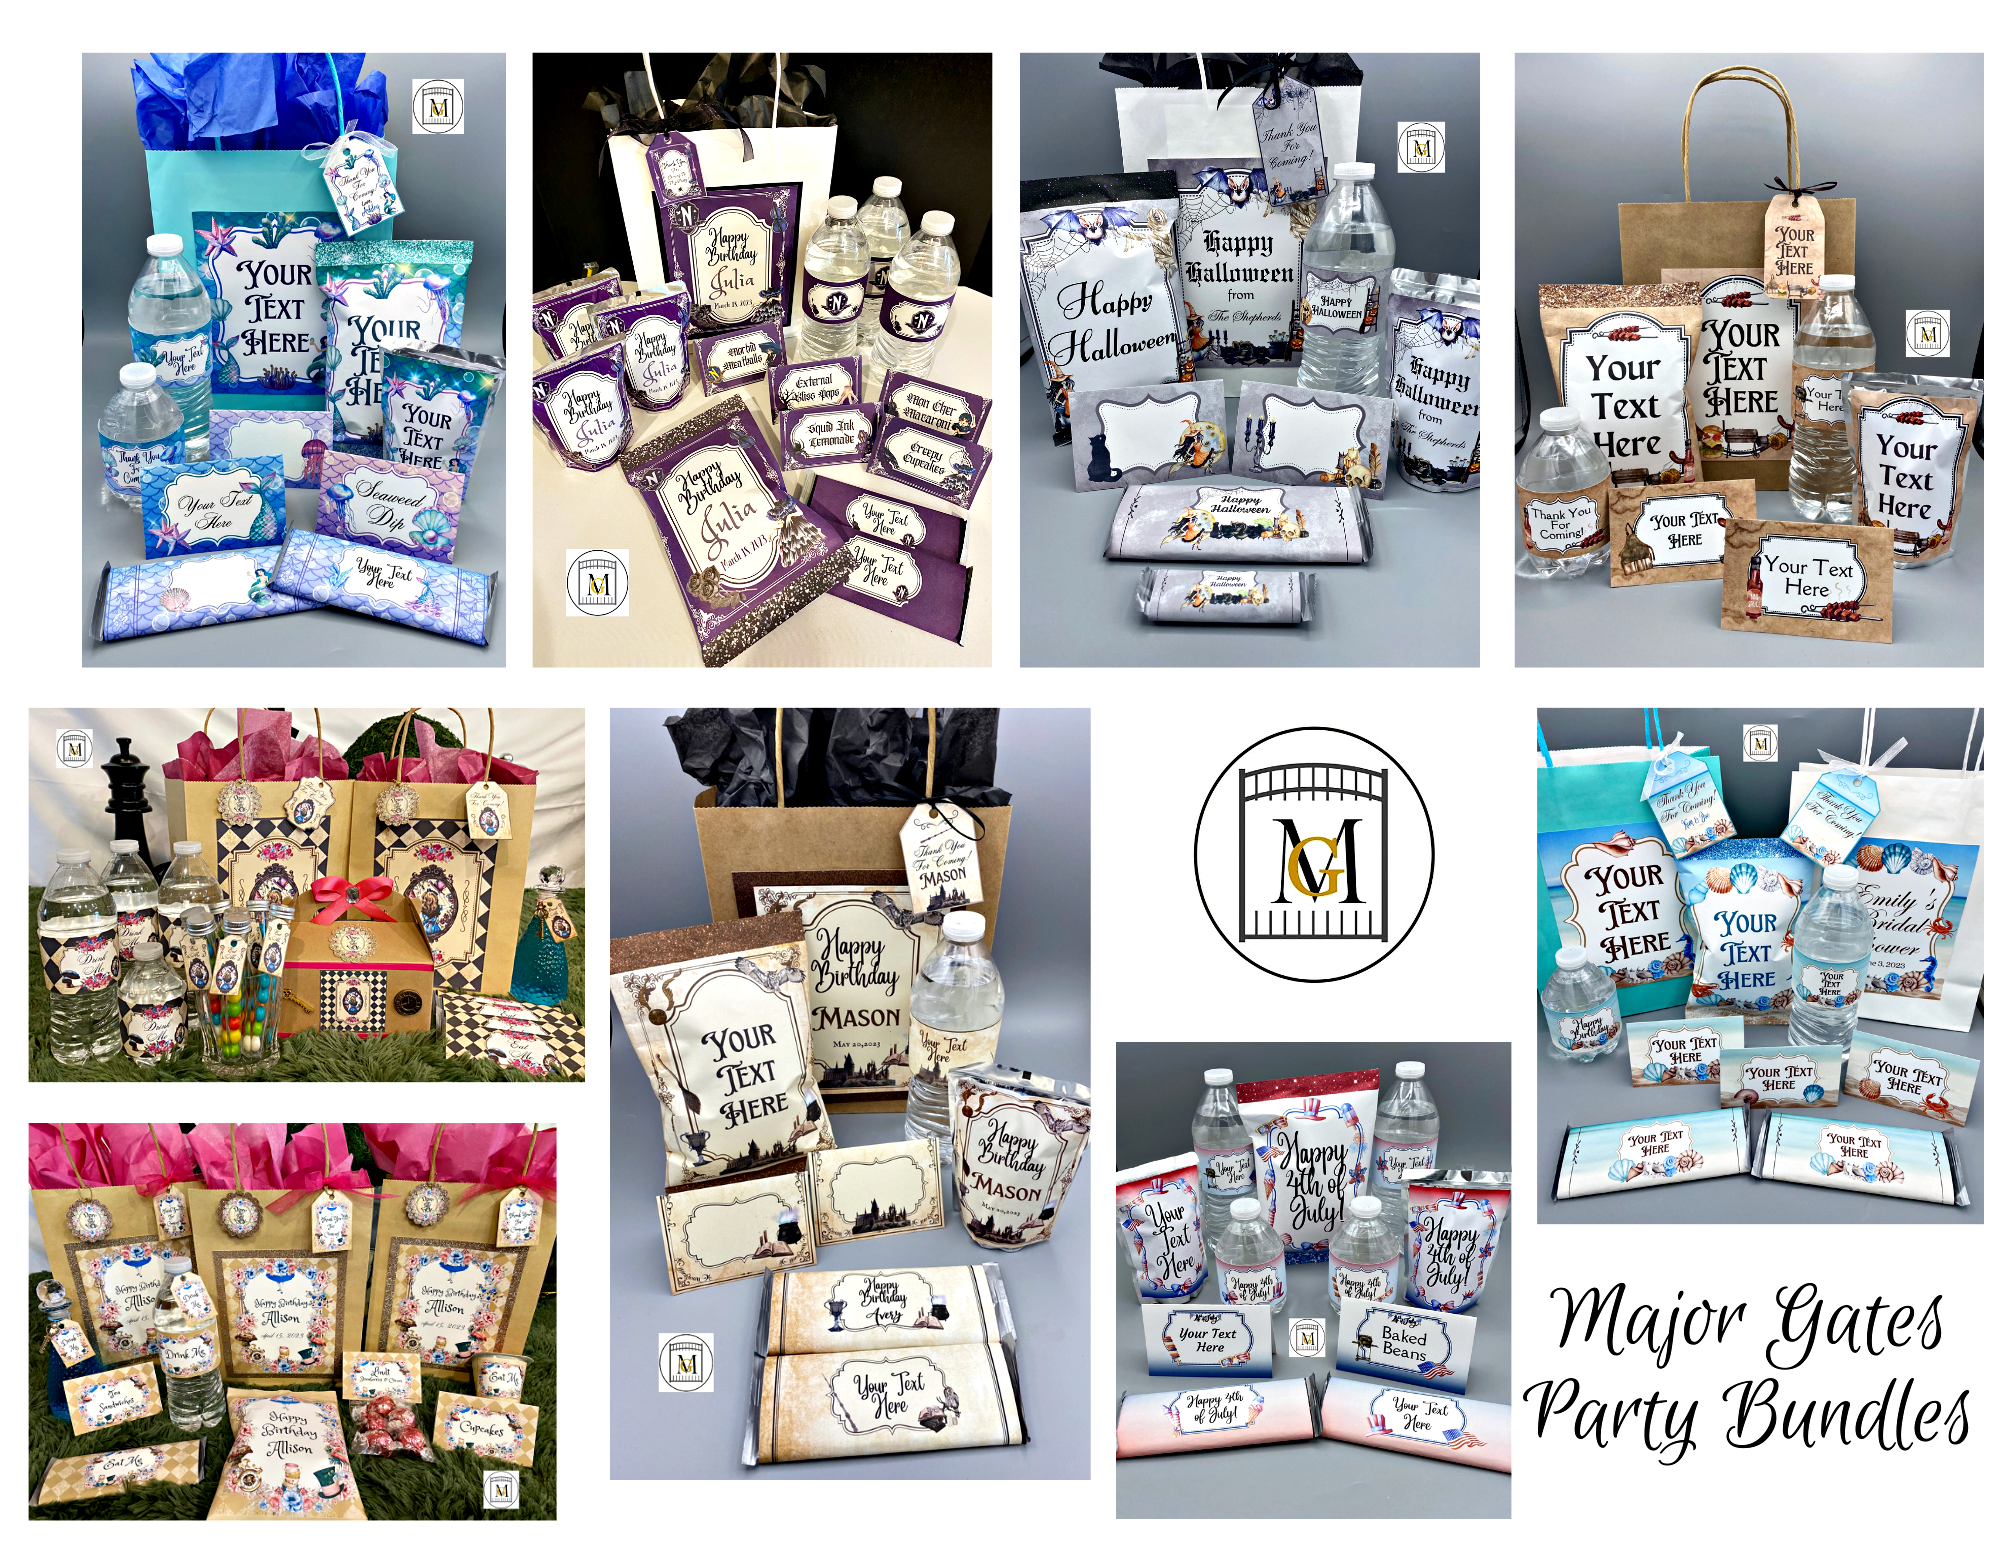
To see my available Party Label Bundle Downloads, click here: https://majorgates.com/product-category/party-bundles/
Supplies
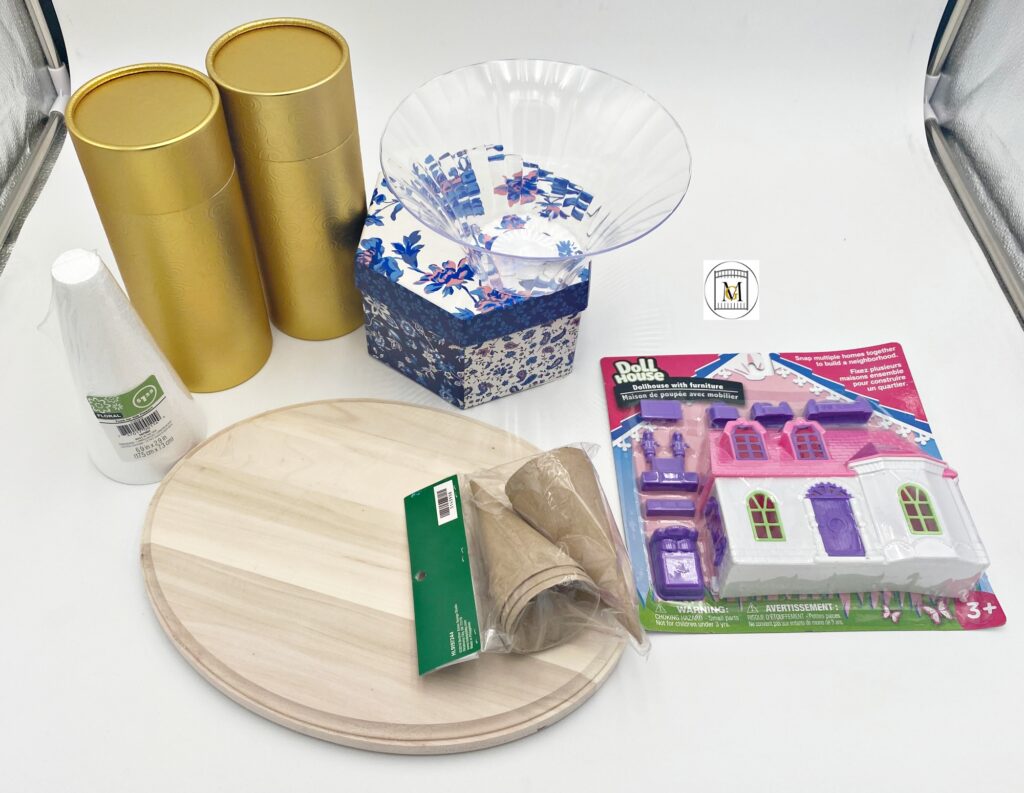
- Minimum height 42cm cylinder form (you can go taller but not shorter) – use 2 Pringles cans, or 2 cylinder gift boxes, or cut a 3 1/4″ or 3 1/2 inch PVC pipe.
- 18cm plastic bowl – I found at Dollar Tree in the shape that was more narrow at the bottom.
- 6.9″ x 2.9″ (17.5cm x 7.3cm) Cone Floral Foam
- 4″ (10.16cm) tall mini paper mache or foam tree
- Empty toilet paper roll
- Top of a Renuzit air freshner container
- 17cm hexagon gift box
- Mini doll house – this should be a cheap one since you are pulling it apart anyway.
- 9″ x 12″ wood plaque
- Mini all-temperature glue gun and mini glue sticks
- Super lightweight air dry clay (I use Hearty)
- Silicone molds – borders, windows, stones
- Mod Podge or Tacky Glue
- Green Moss
- White or grey acrylic paint or chalk paint or spray paint primer
- Cardboard
- Drop cloth
- Scissors
- 2 plastic chess pieces or wood pieces to go on top of towers
- Decorative filler pebbles or stones (I used 2 – 28oz bags from Dollar Tree)
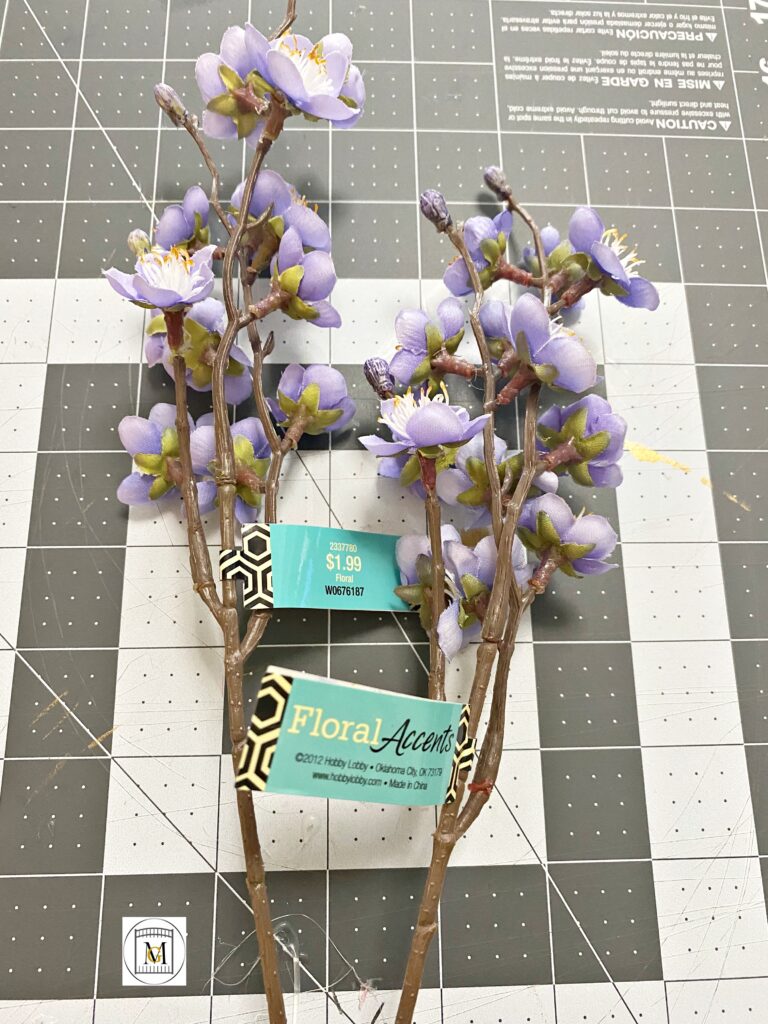
- Small silk flowers in the color of choice (optional) – I got 2 stems of lilac color flowers from Hobby Lobby
- 2oz Acrylic paints in the colors of your choice. I used:
-
-
-
- Roof – FolkArt Metallic 668 Plum, FolkArt Metallic 654 Amethyst, and DecoArt Morning Mist DA359
- Stone Walls – DecoArt Metallic Champagne Gold DA202, accented with FolkArt Metallic Chocolate Brown 2570, and Liquitex Metallic Bronze
- Windows & Doors – FolkArt Metallic 668 Plum
- Surrounding Windows & Doors area – FolkArt Metallic Chocolate Brown 2570
-
-
-
Affiliate links are in this post. So, I may receive a small commission at no extra cost to you if you make a purchase through my affiliate link. Therefore, I only recommend products that I use or would use and love! So, I have saved you the time of searching for good products for you. As an Amazon Associate I earn from qualifying purchases.
If you need 2-Liter/Wine Bottle Party Labels, see my download here: https://majorgates.com/product-category/2-liter-wine-bottle-labels/

Directions For Tangled-Rapunzel Tower Centerpiece
- Start by purchasing or gathering all the supplies.
- Break apart the doll house pieces. So I removed the roof and used utility scissors to cut apart the house in sections. Then I cut cardboard to cover all open sides.
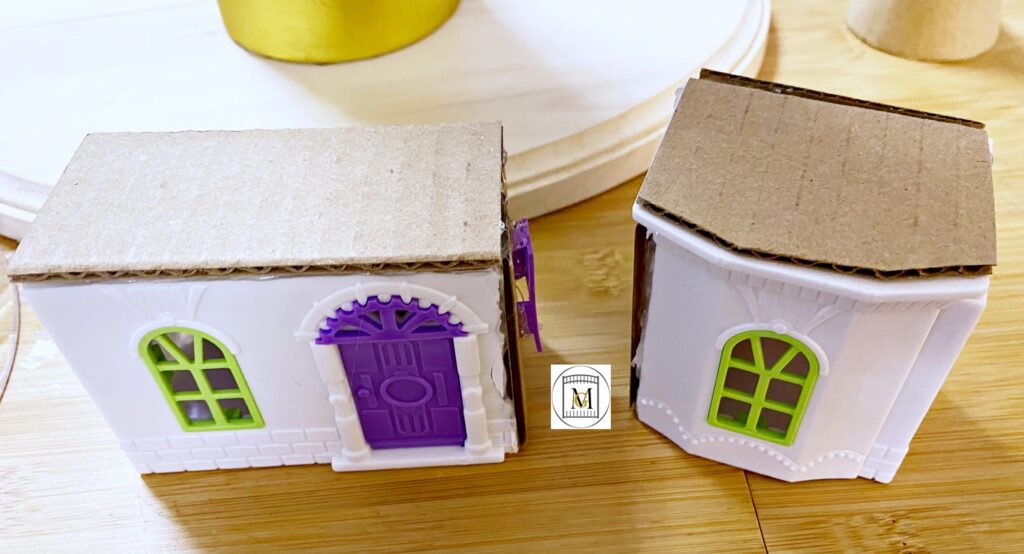
- Arrange the supplies and do a dry fit of how everything will be glued together. Then start gluing the pieces together with the hot glue gun.

- So, if you want an extra tower, I made the small one with a toilet paper roll, mini paper mache tree, and the top of a Renuzit air freshener lid.
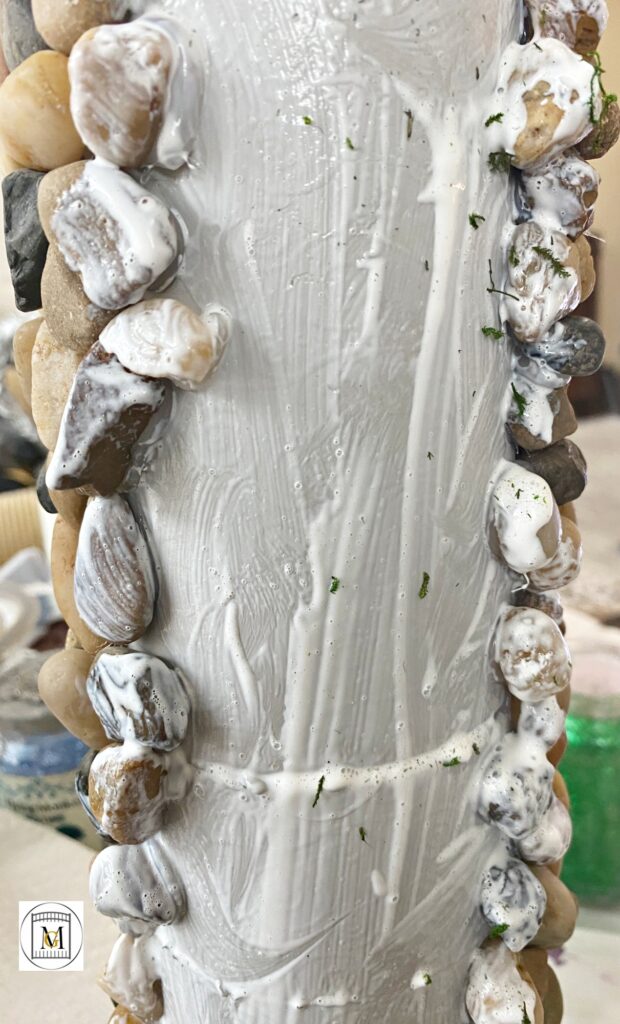
- Now, paint your structure with the base primer paint (I used grey chalk paint). So I like to use chalk paint on my projects because they have great coverage and most of the time you only have to do one coat. I also like how you can paint easily on different materials. It applies well to plastic and gloss covered materials. After you apply your base coat, allow it to dry fully (about an hour).
To see my available Potion/Apothecary Bottle Party Labels, click here: https://majorgates.com/product-category/potion-apothecary-labels/


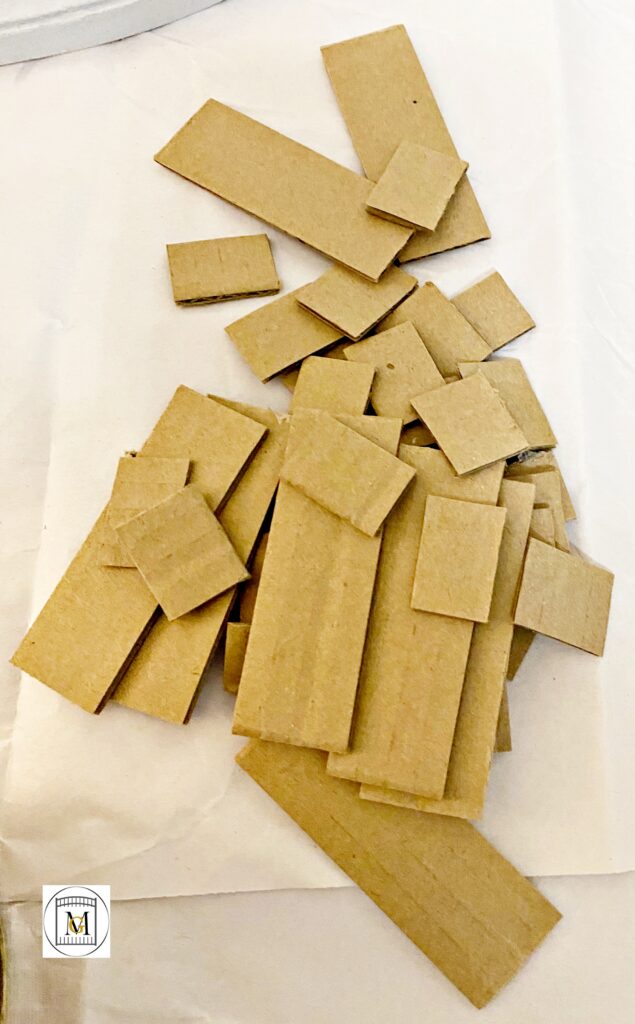
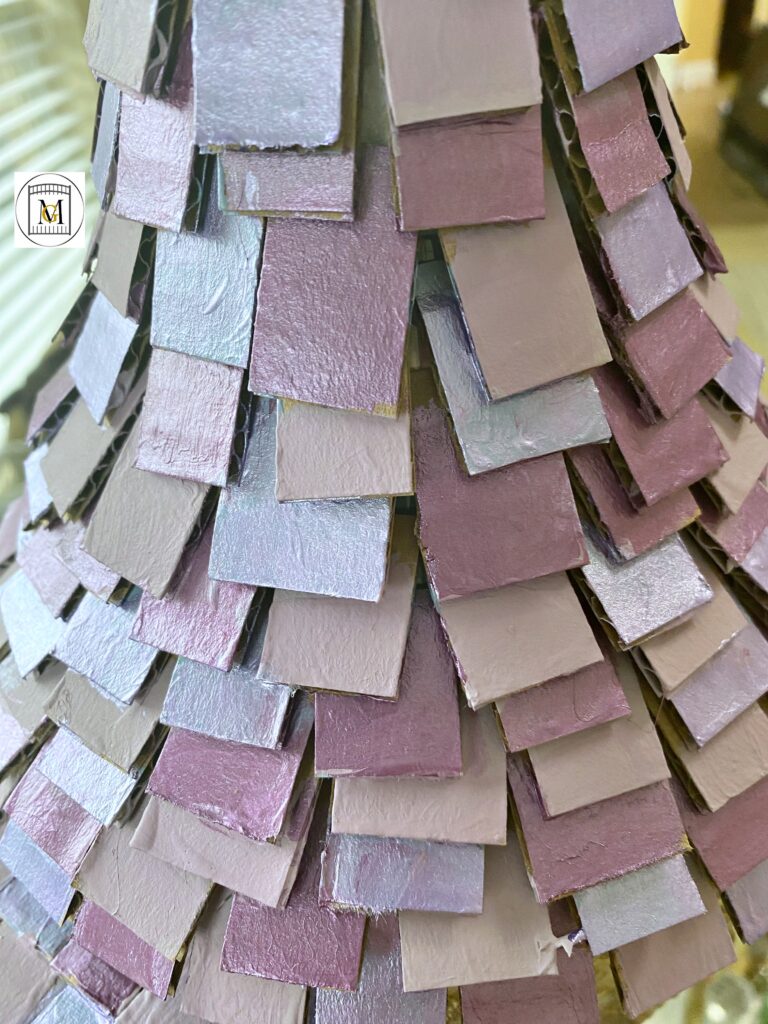
- Next, cut your roof shingles into rough rectangles. Then, starting from the bottom of the roof, add the shingles with hot glue in a circular motion.

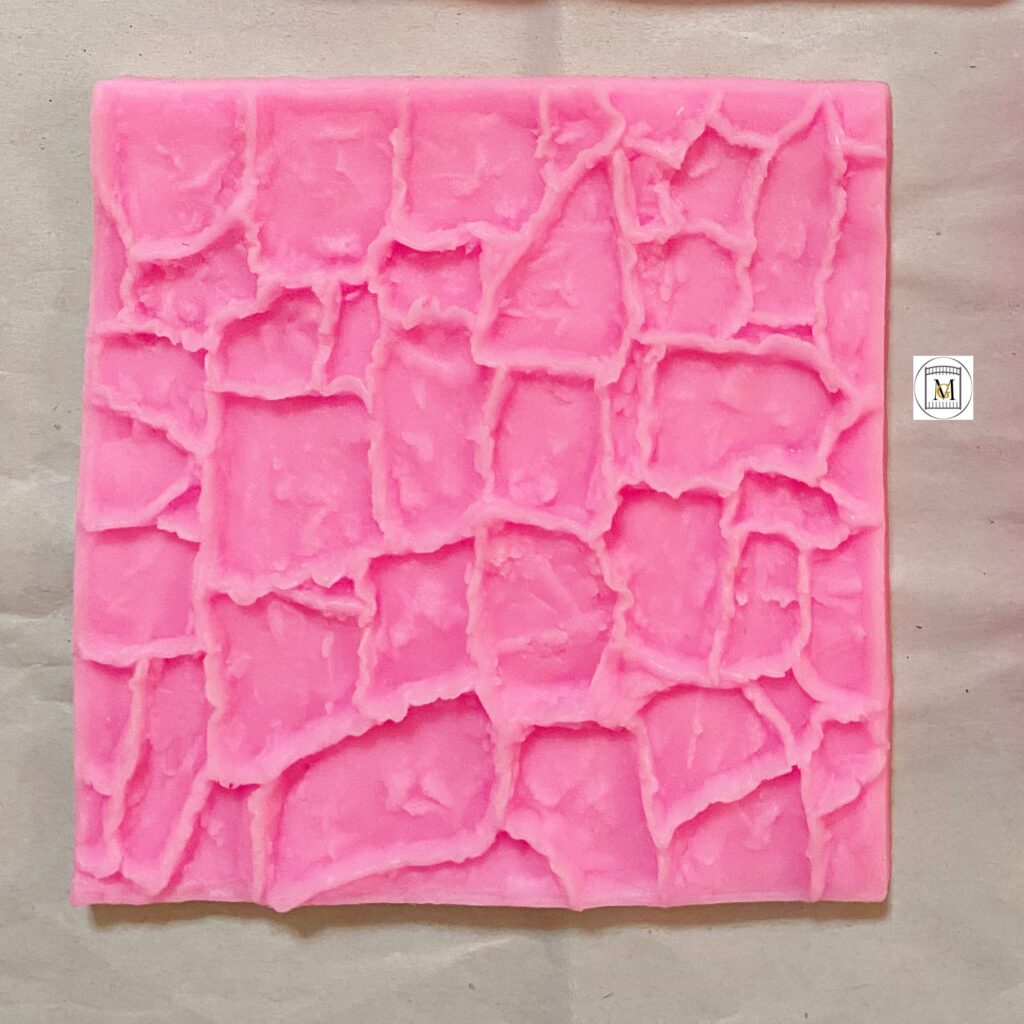
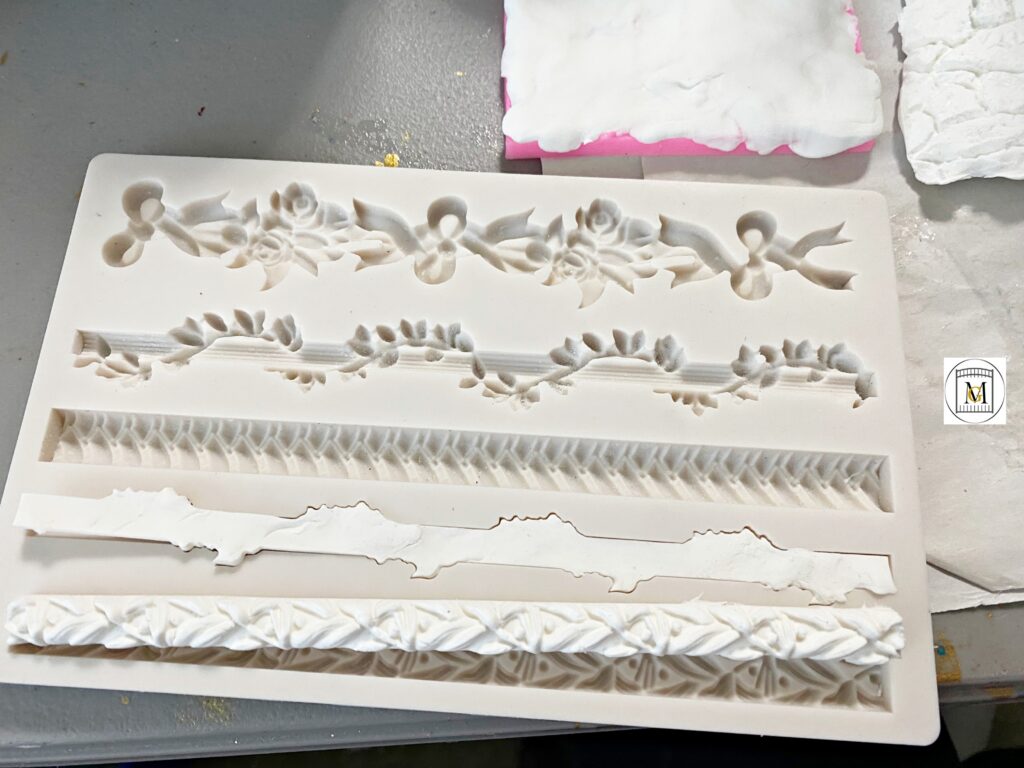
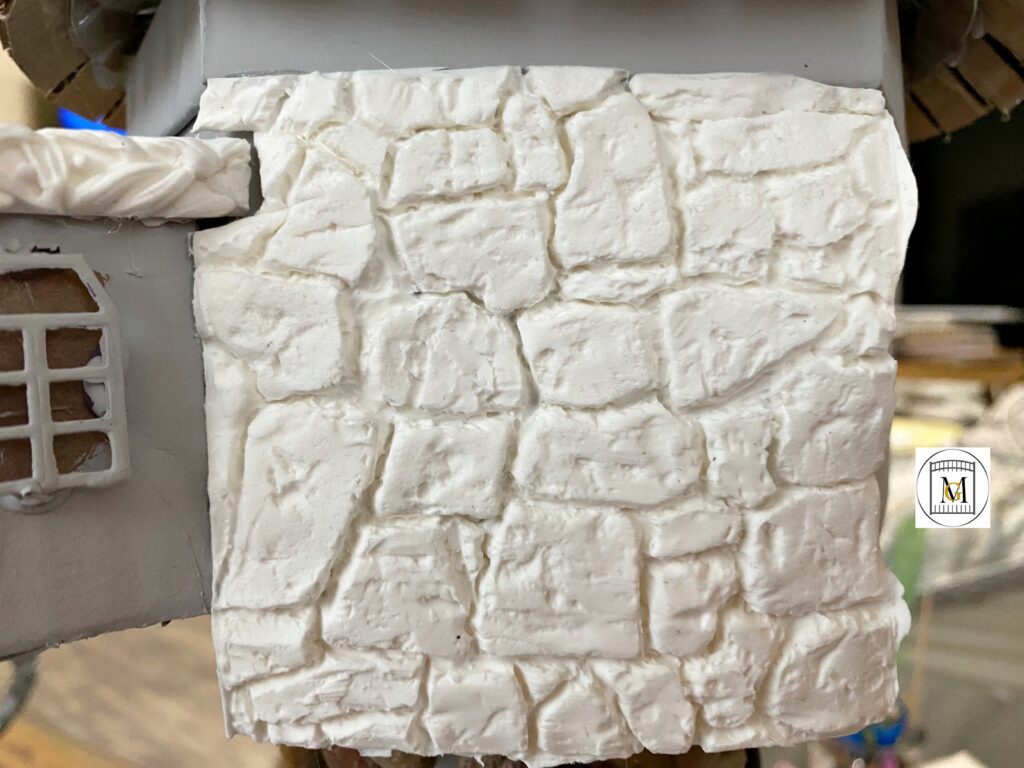
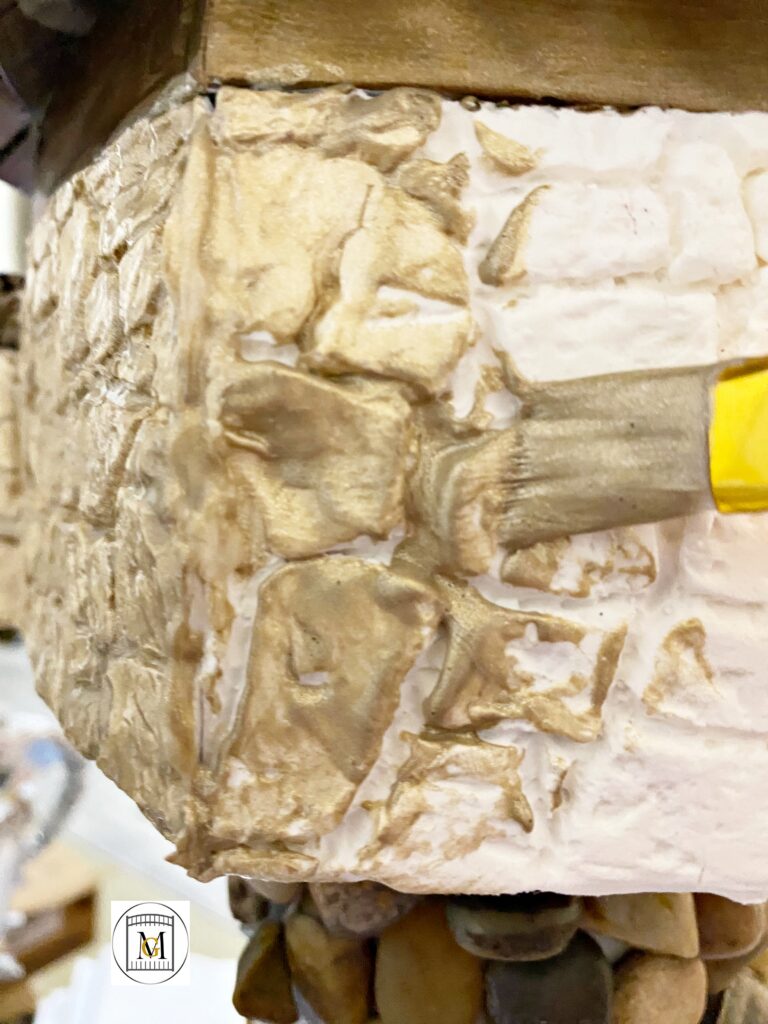
- So if you are using clay on your centerpiece and have to make multiple pieces using the same mold, you can start this first. I allow the molds to dry about 2 hours before handling. That way I can handle the clay without smudging the image. So I made several impressions to do the stones walls around the house. I also used a border mold to go around the door and window area.
- Attach the clay walls with hot glue or use Mod Podge or thick Tacky Glue.
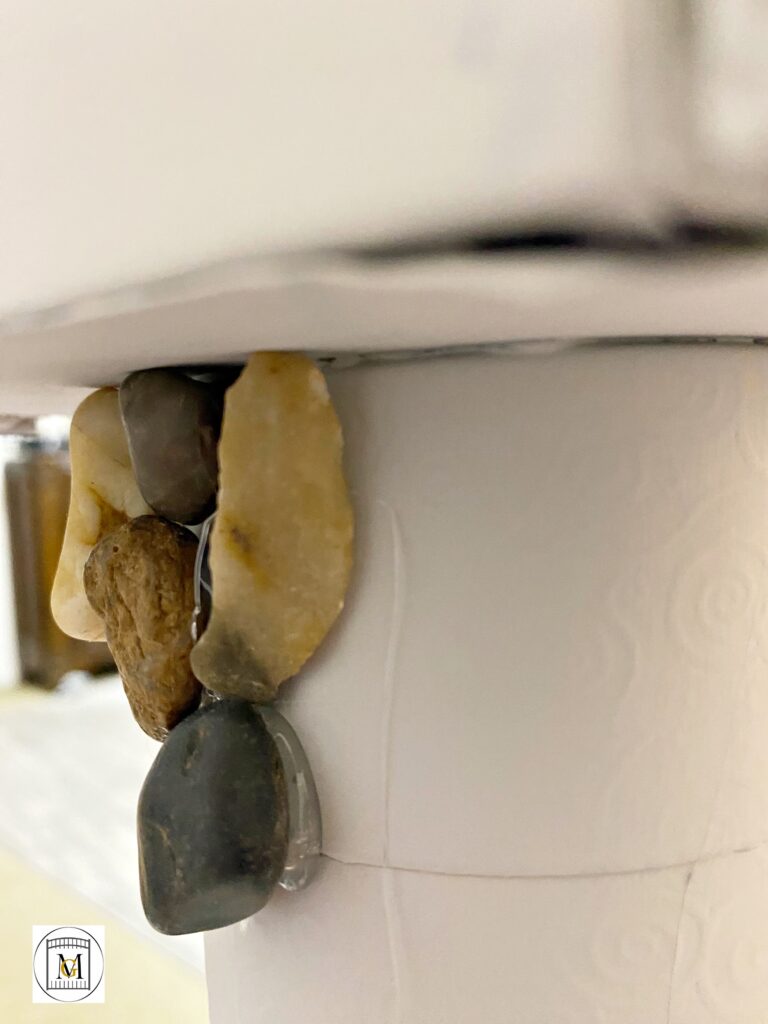
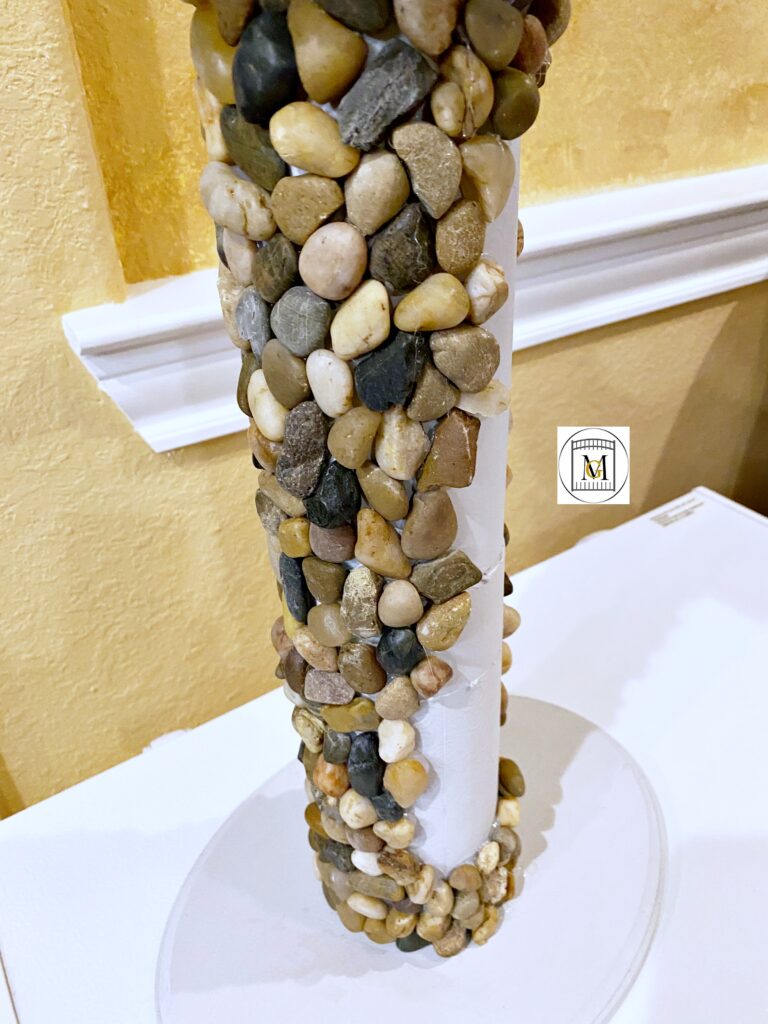
- Then, hot glue on the stones to the cylinder structure, starting at the top. So I left a portion blank because I covered that area with moss but if you don’t want to use moss, you can cover this area with stones too. You have to buy 3- 28oz bags instead of 2.
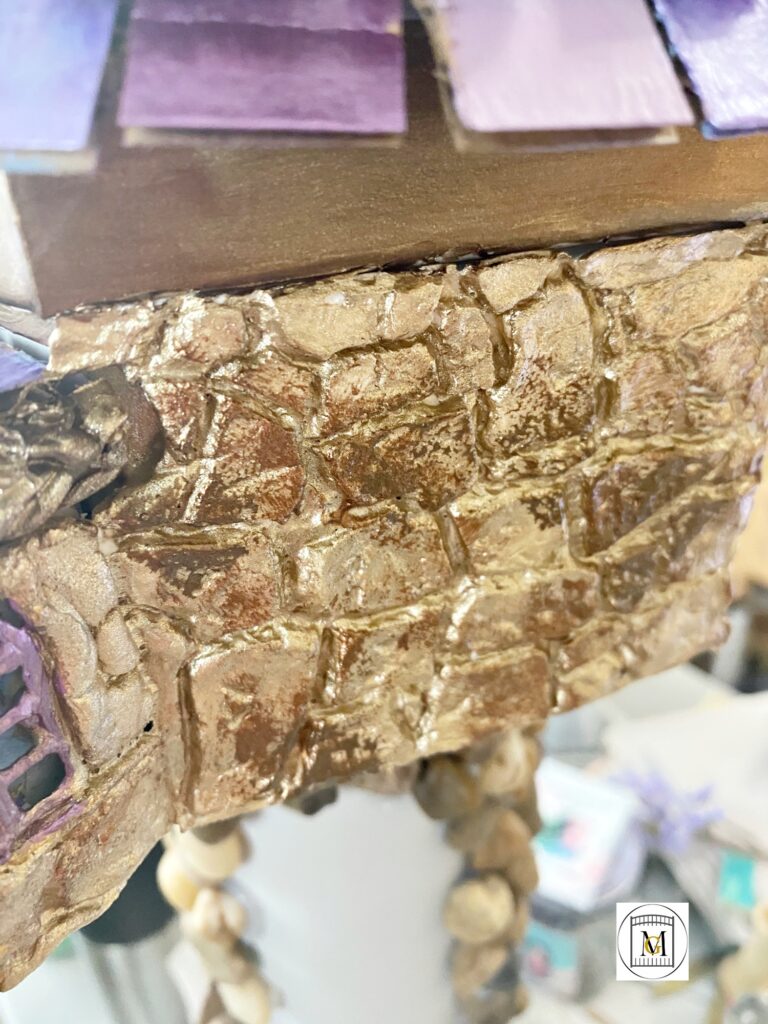
- Now, paint the roof and house with acrylic paints and allow to fully dry. I painted the roof roughly at first and then went over the pieces I got extra paint on and cleaned them up. Then, I added chess pieces that I painted gold and covered in gold glitter to the top of the roof points.
- Then continue to paint the house. Paint the faux clay stones. I painted a base coat of metallic gold, then sponged on brown and bronze to make the stones look more real. Then I painted the trim and parts surrounding the door and windows. Finished with accenting the door and window frames in purple.

- Next, add the moss to the cylinder structure and around the base with tacky glue or Mod Podge.
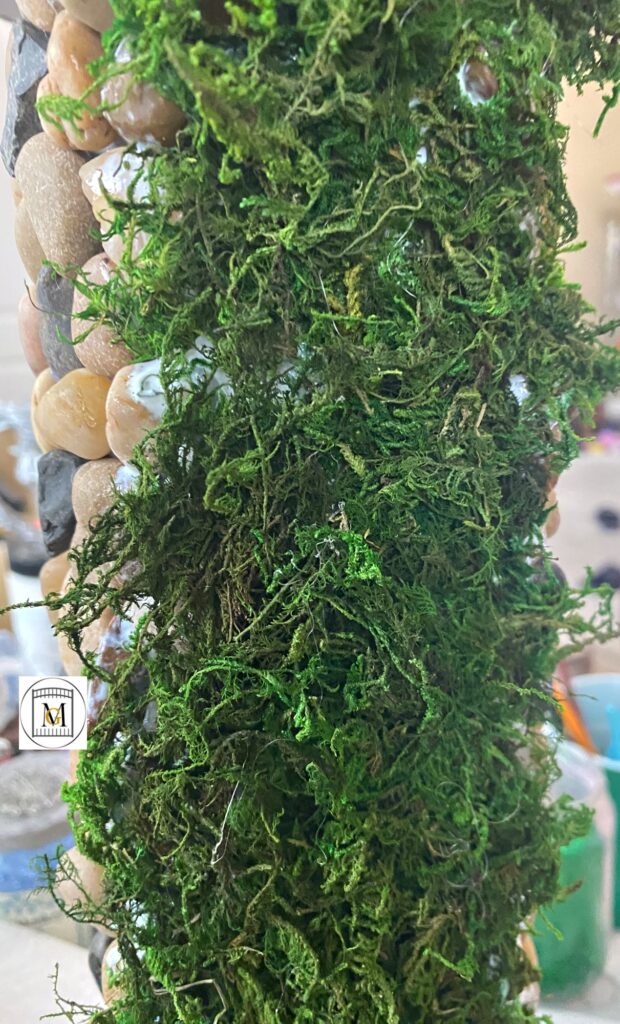
- Next, add on the flowers to the moss.

- The centerpiece is ready! After the event, you can keep the decoration for a room decoration. This is a beautiful, fun craft that little ones can also help with.

Check out my available Jeopardy/Trivia Party Game Downloads here: https://majorgates.com/product-category/jeopardy-trivia/
