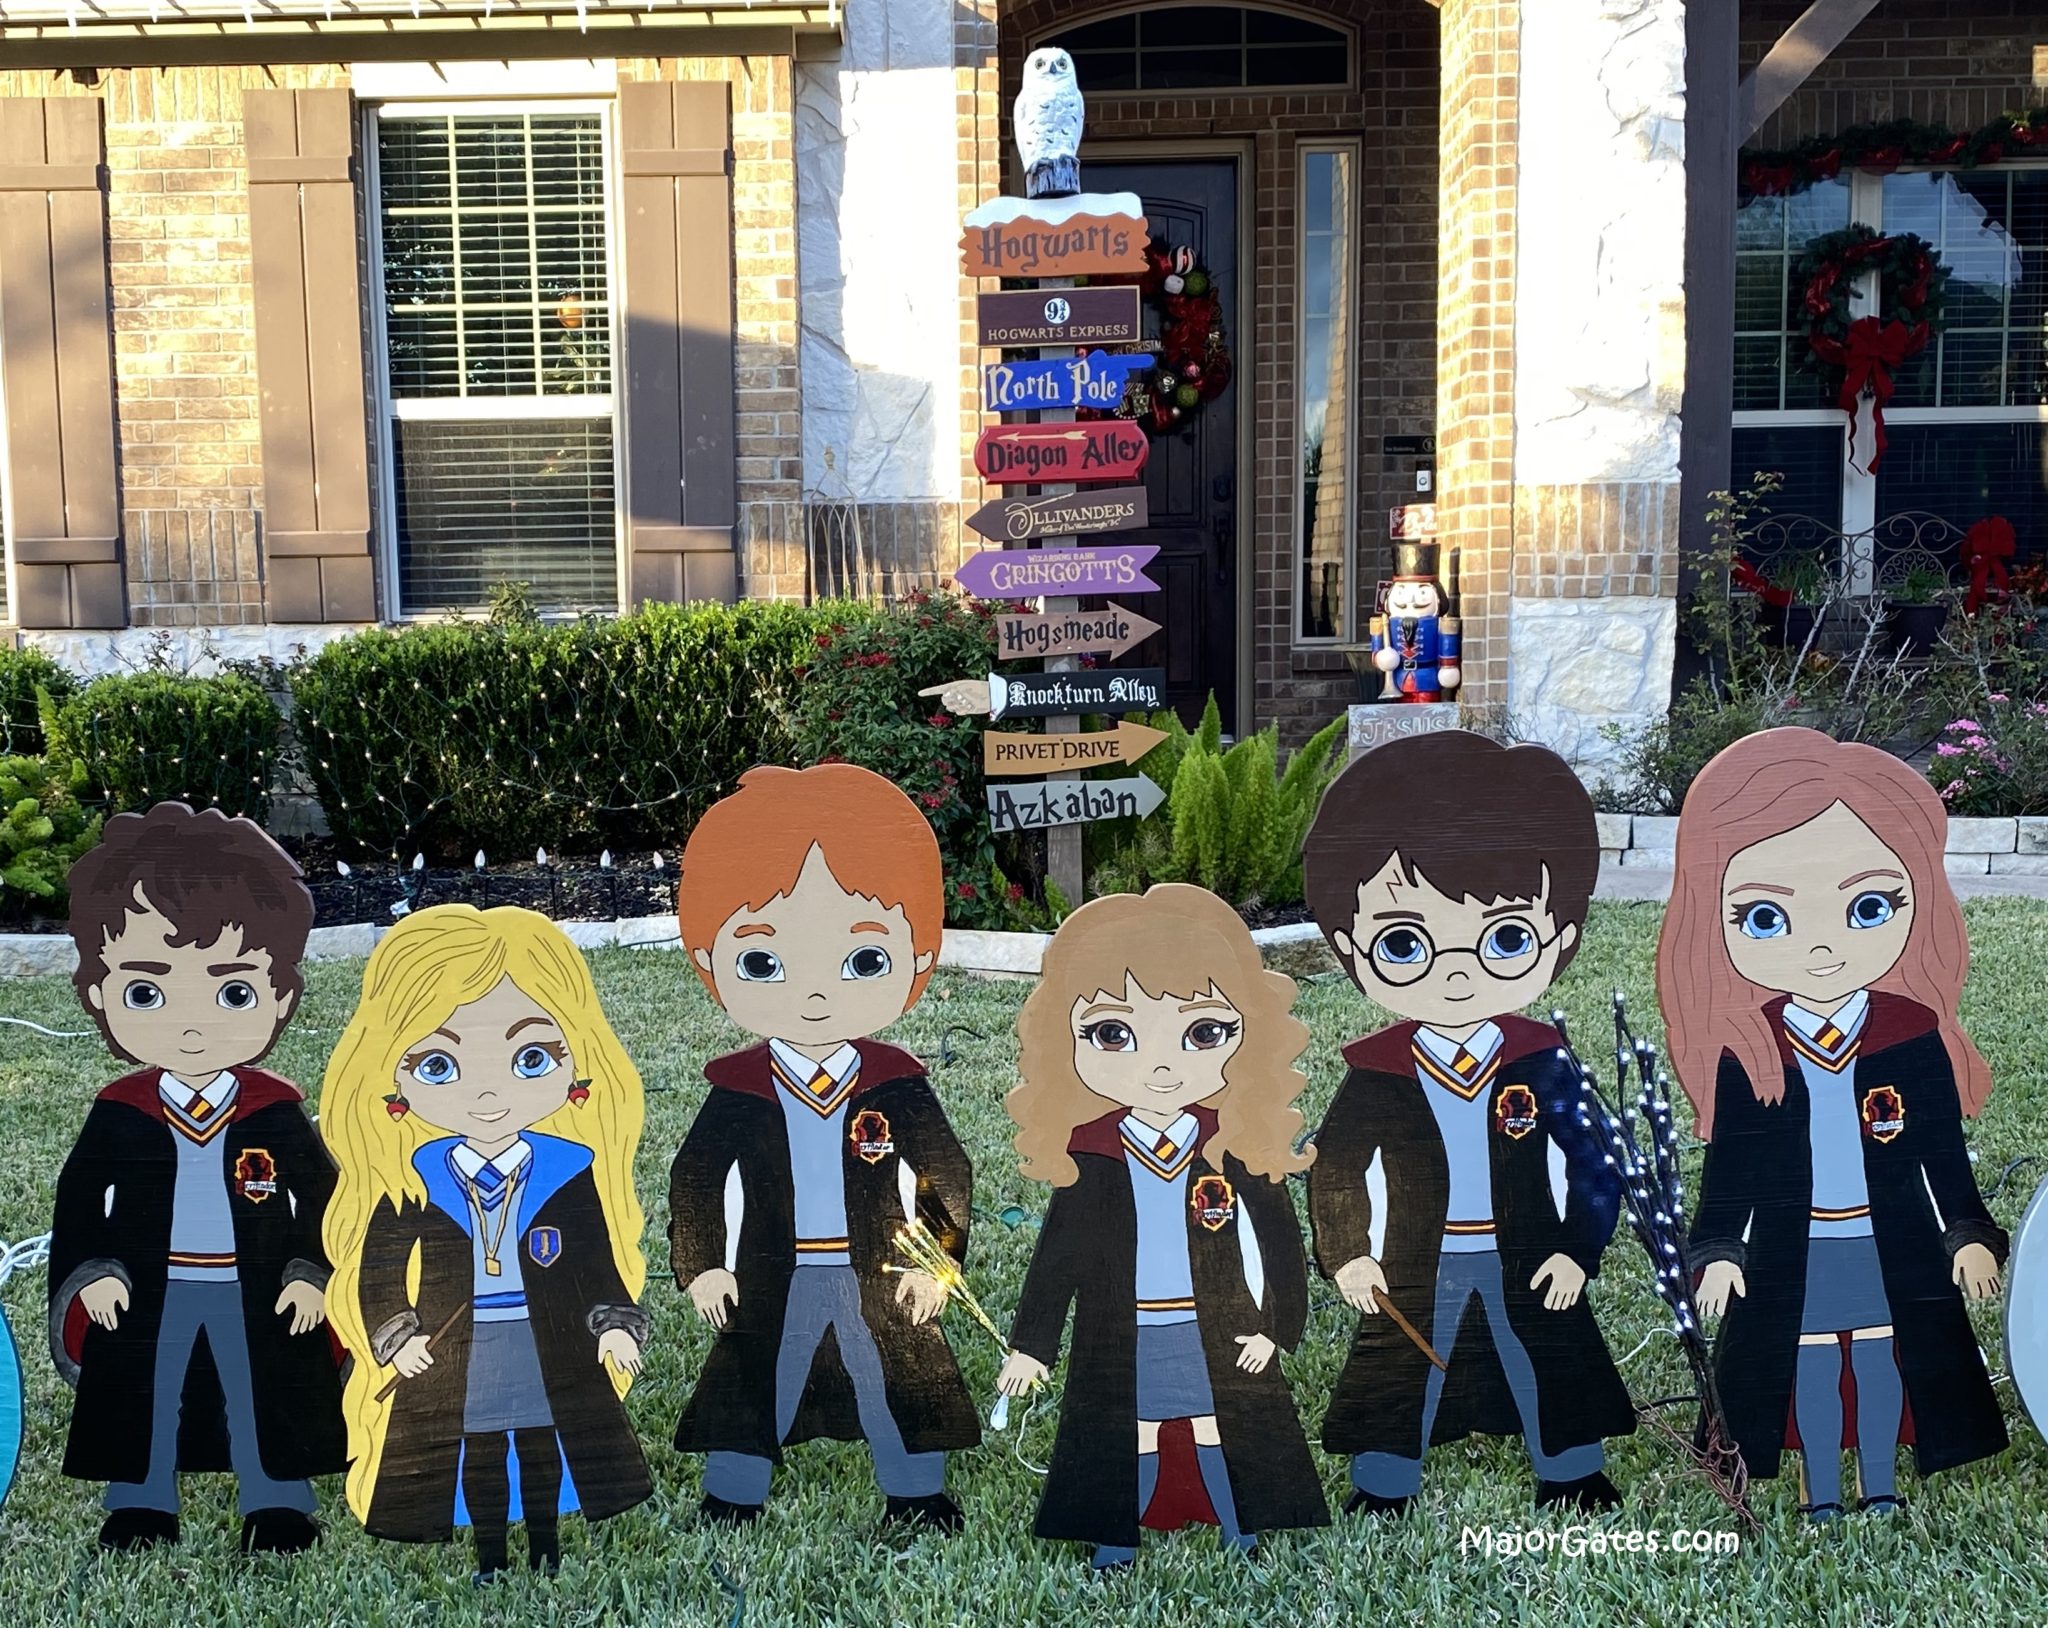
Harry Potter Directional Sign
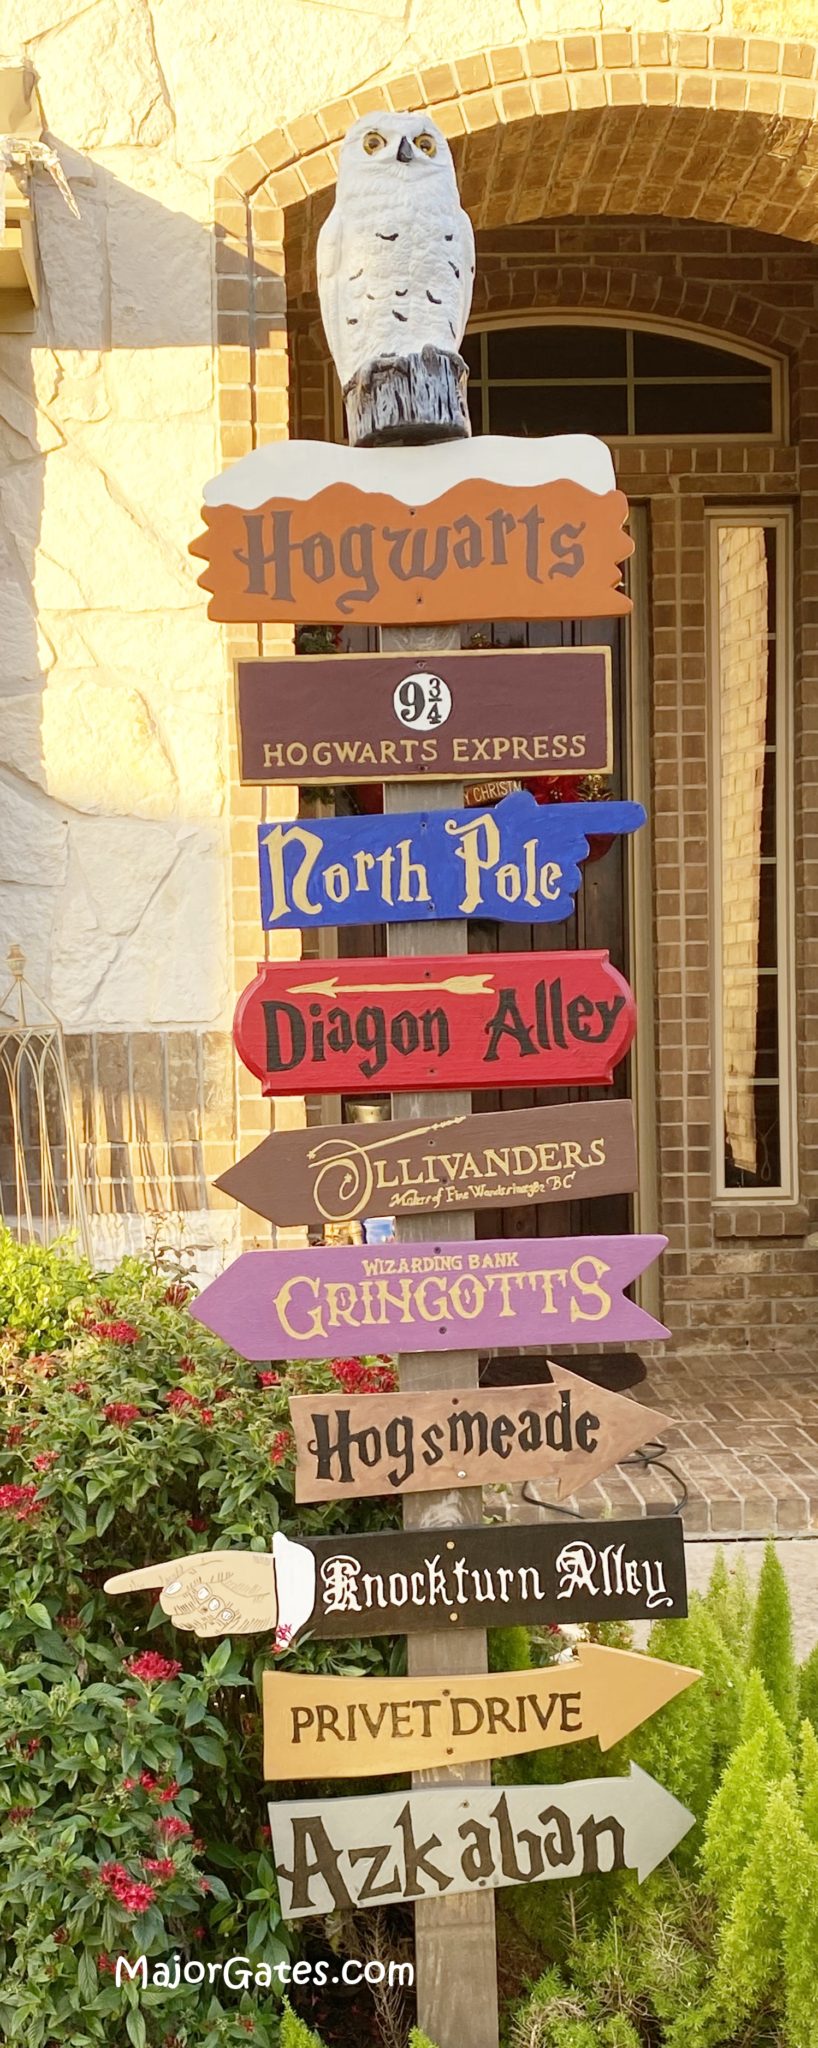
Make a Harry Potter Directional Sign for a birthday party, wedding, event or Christmas. I will share how I made my Harry Potter Directional Sign for my yard display for Christmas. I get so many compliments on the directional sign.
The sign was time consuming but easy to make overall. So the longest time was the painting. The wording came from templates that I created from using different fonts, including a free Harry Potter one. I mixed the signs with places from Harry Potter and Christmas. So I made 10 signs for the sign post.
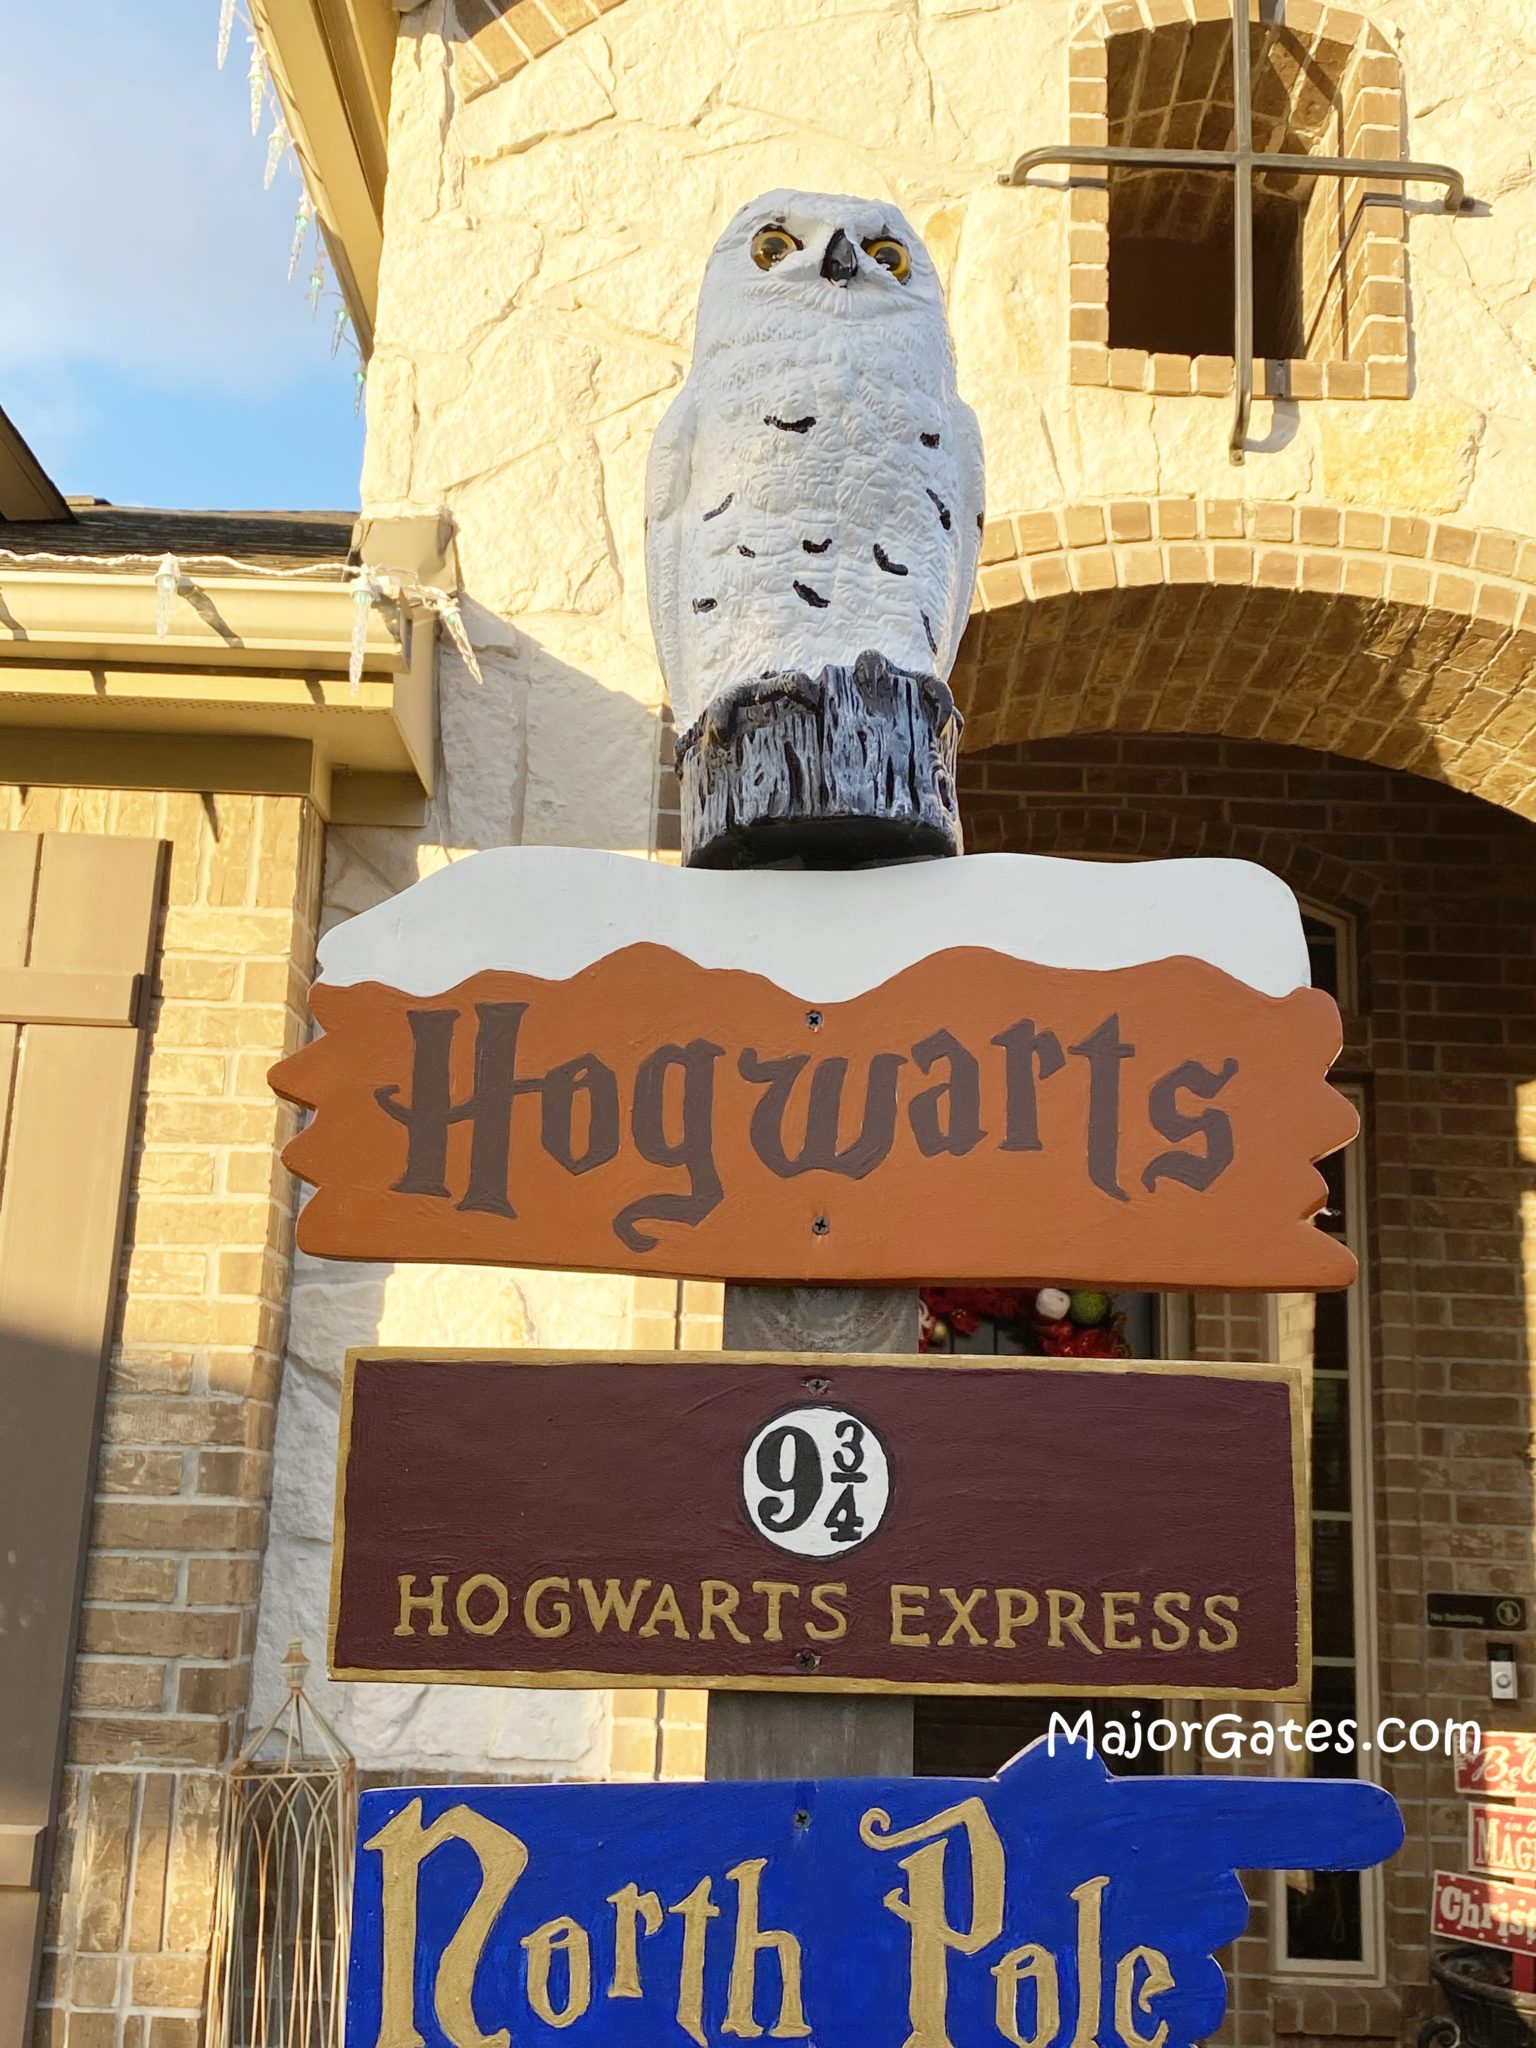
I also added Hedwig to the top of the sign post. I made the owl from a regular garden owl, cut off the ears, sealed the area with clay and hot glue, then painted it white with black feather accents. So I will explain in detail how I did this.
To see my available Party Label Bundle Downloads, click here: https://majorgates.com/product-category/party-bundles/
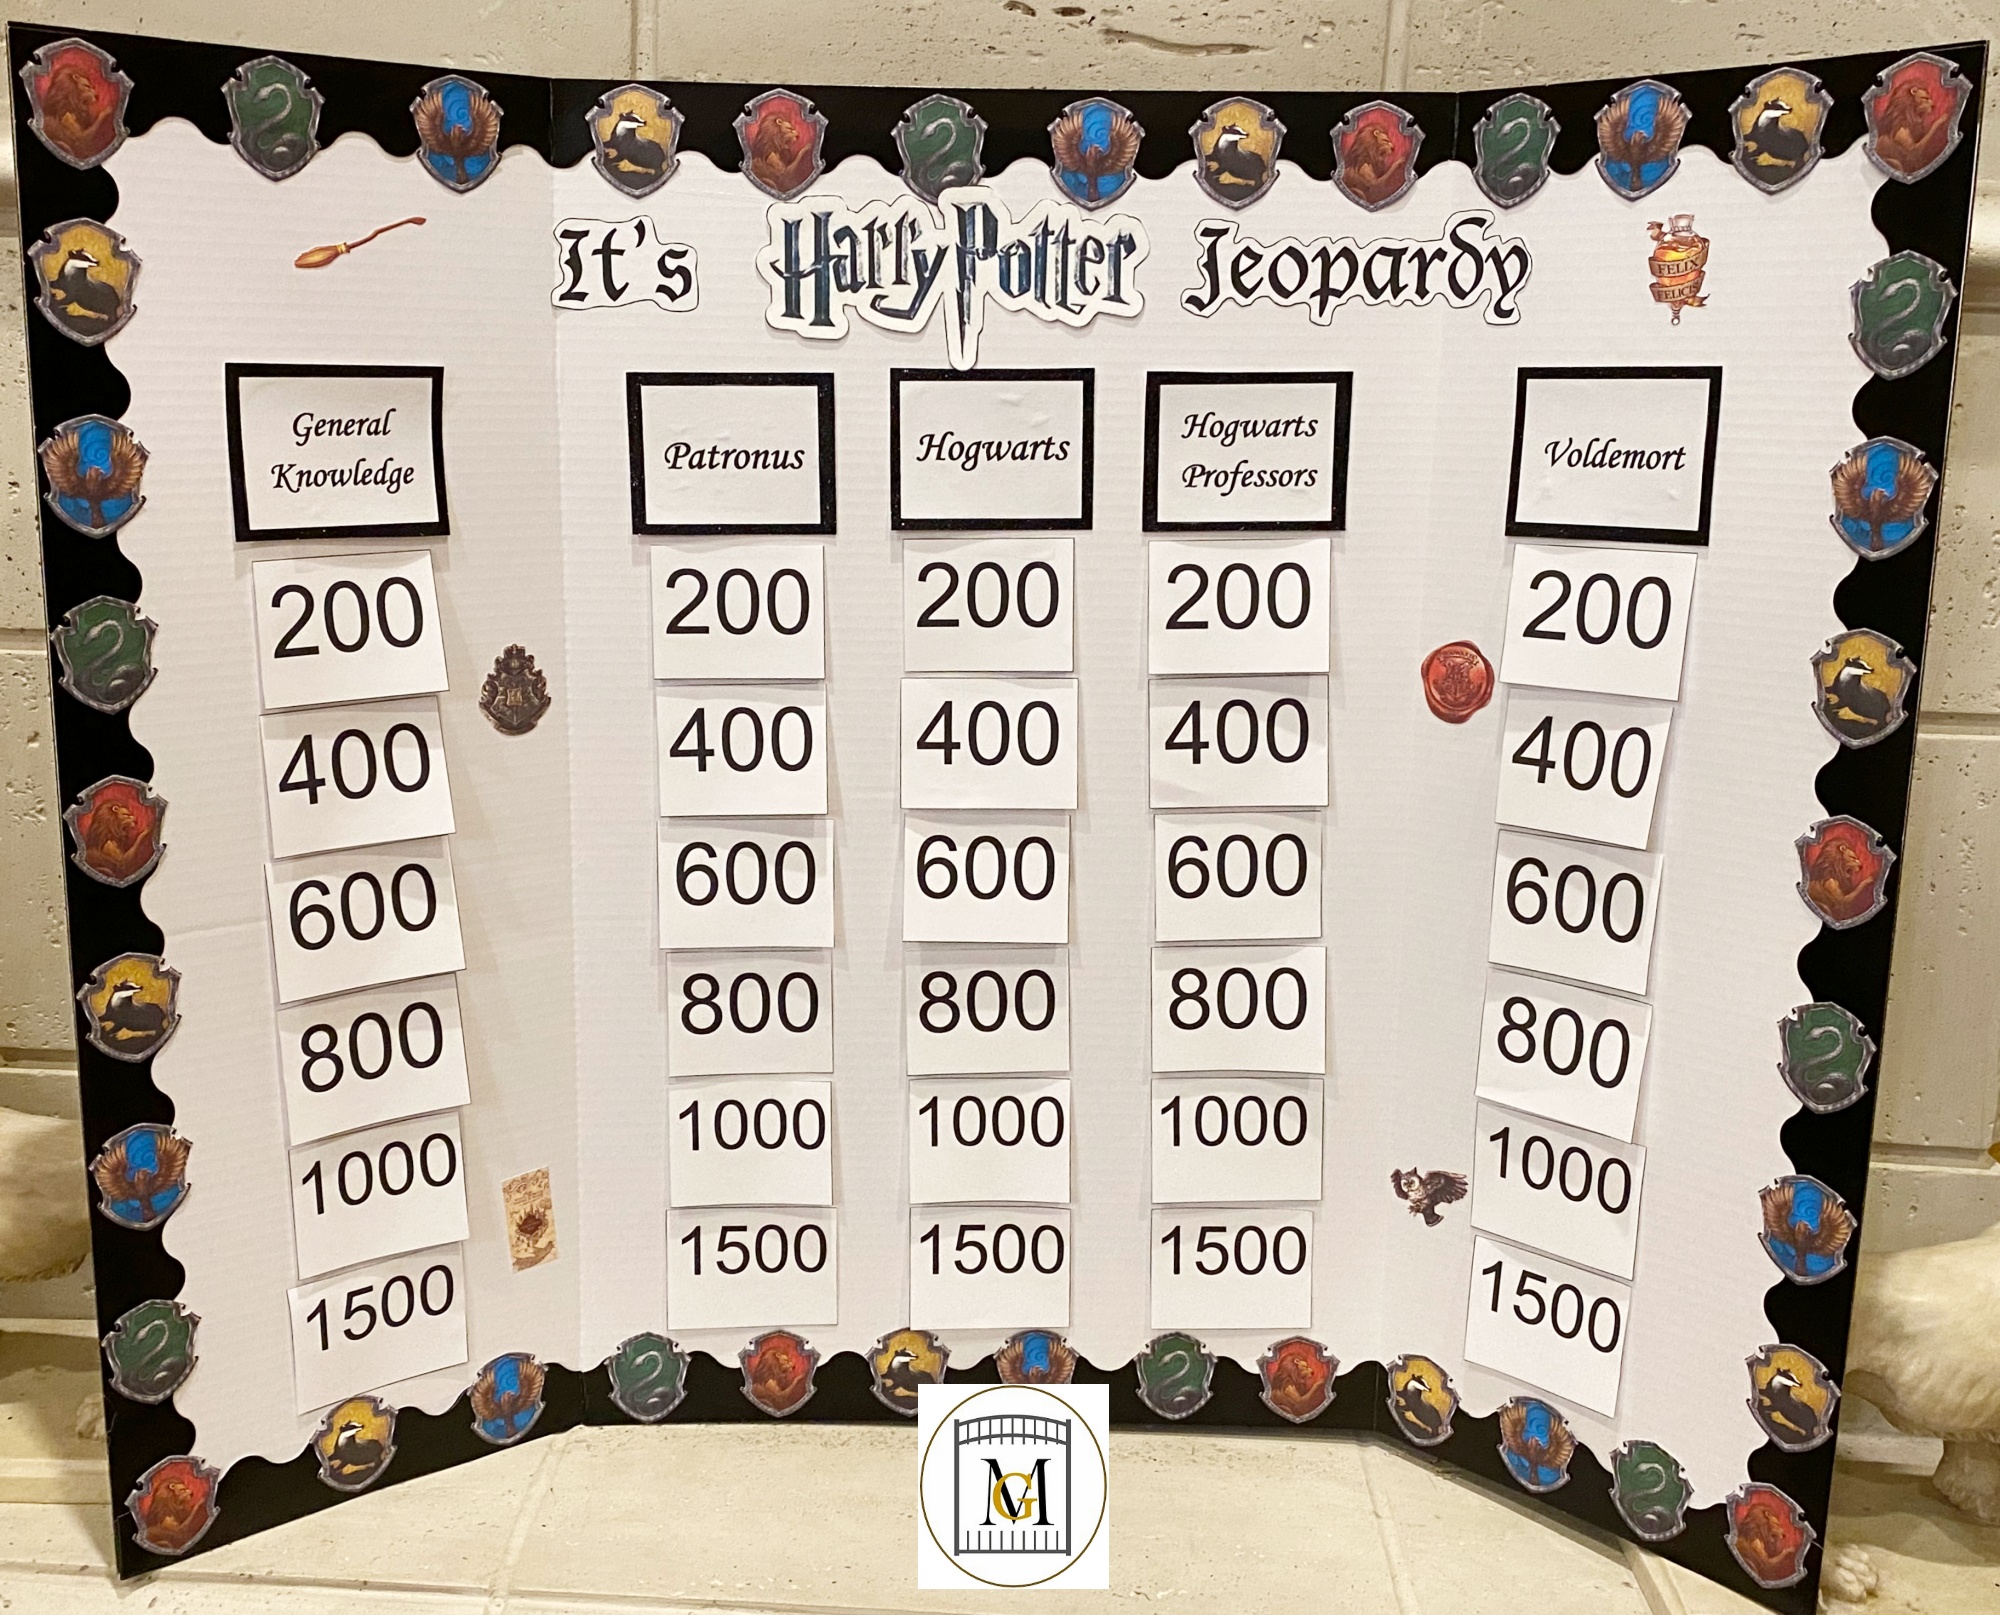
Need a great game for your party or event? Get the download to make a super fun Harry Potter Jeopardy Game here: https://majorgates.com/product/harry-potter-jeopardy-game-download/
Check out my other available Jeopardy/Trivia Party Downloads here: https://majorgates.com/product-category/jeopardy-trivia/

Don’t Forget To Follow Me On Pinterest!
For more Harry Potter craft ideas or other craft ideas, visit my DIY section here:https://majorgates.com/category/do-it-yourself/
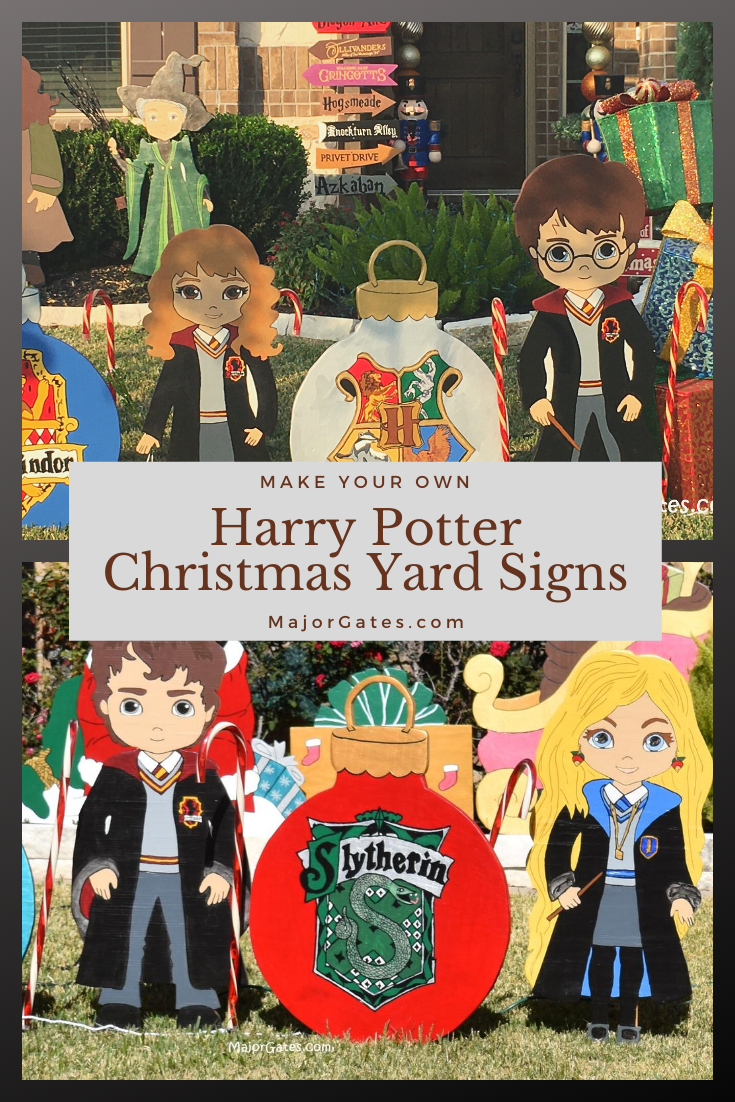
Learn how to make more Harry Potter Outdoor Wood Signs here: https://majorgates.com/do-it-yourself/harry-potter-christmas-yard-signs/
Supplies Needed
- Garden Owl – check with your local hardware store first. They are about $10 if they have them in stock. But if you can’t find them there, here is a link on-line. Also, be sure to get the large owl and not the small one.
- 3/4 inch thick exterior plywood (need about a half sheet) – get at your local hardware store
- Exterior 3/4 in x 8 ft wood plank
- Jigsaw
- Power Sander and sanding discs
- Wood Horses
- 1 1/4 inch wood screws
- Screw Driver and drill bit (to pre-drill holes – optional)
- Transfer Paper
- Tracing Stylus ball pens
- Black Paint Pen
- Wood yard Stake
- Acrylic Paints – I purchased 2 oz bottles at my local craft store but they also sell on-line. Main colors to buy: White, Black, Burgundy, Gold, Grey, Brown(s), Orange, Flesh, Tan, Grey, Deep Red, Deep Purple, Royal Blue
- Outdoor project sealer Hydrocote Polyshield Clear – I purchased from The Winfield Collection and the link is below
- Drop Cloth
- Paint Brushes and paint tray
- Mini paint roller for the sealer
- Printer
- Paper – 11″ x 14″ and/or 11″ x 17″ – you can also print on regular copy paper 8 1/2 x 11 and just print a few letters and then tape them together to make a larger template
To see my available 2-Liter/Wine Bottle Party Label Downloads, click here: https://majorgates.com/product-category/2-liter-wine-bottle-labels/

Directions For Making The Harry Potter Directional Sign
I purchased the directional sign templates from The Winfield Collection. http://www.thewinfieldcollection.com/
It is the North Pole Sign Pattern #W1811. I also purchased a plain wood plaque from my local craft store for the Diagon Alley sign. The Knockturn Alley sign I made with a printed image off the internet and printed it on 11 x 17 paper.
All the signs (except Diagon Alley) are made with 3/4 inch exterior plywood. If you are making other wood signs then purchase a whole sheet. Stores like Home Depot and Lowes will cut the large sheets into smaller pieces so that you can get them into your vehicle.
They are all sealed with outdoor project sealer Hydrocote Polyshield Clear that I also purchased from The Winfield Collection. This is the only sealer I have tried in which the white paints do not turn yellow over time. You don’t want to go through all this work and then it gets damaged by the elements because you did not seal your work.
- Trace the outer edges of your patterns onto the plywood and cut them out with the jigsaw.
NOTE: Make sure you follow all safety rules that come with power tools. Make sure you are alert, sober and protected before operating power tools, especially saws.
- Sand the wood cutouts with medium sand paper and then fine sand paper. Then wipe off the excess dust with a damp rag and allow to dry.
- Trace the details of the paper onto the wood with the tracing pen and carbon transfer paper.
- Then once completed, go over the tracing details with the black paint pen.
- Paint the sign in the desired colors and allow to dry for at least 24 hours before applying the sealer.
- Repeat until all signs are painted.
- Paint the long wood piece and allow to dry for at least 24 hours before sealing.
- Do a dry fit on the long wood piece for placement.
- Pre-drill holes into sign and then screw with the nails.
TIP: Write down or type in a location you will remember the colors you painted each sign with. That way if you have to do any touch ups later, you will know what colors you used. I learned this the hard way.
Harry Potter Directional Signs Details
NOTE: Any images or fonts found on-line are for personal use only and not for re-sale. If you plan to sell items made from images found on the internet, you must get permission of the image/font owner before you can sell items. Major Gates only recommends and posts instructions for personal use only.
Hogwarts
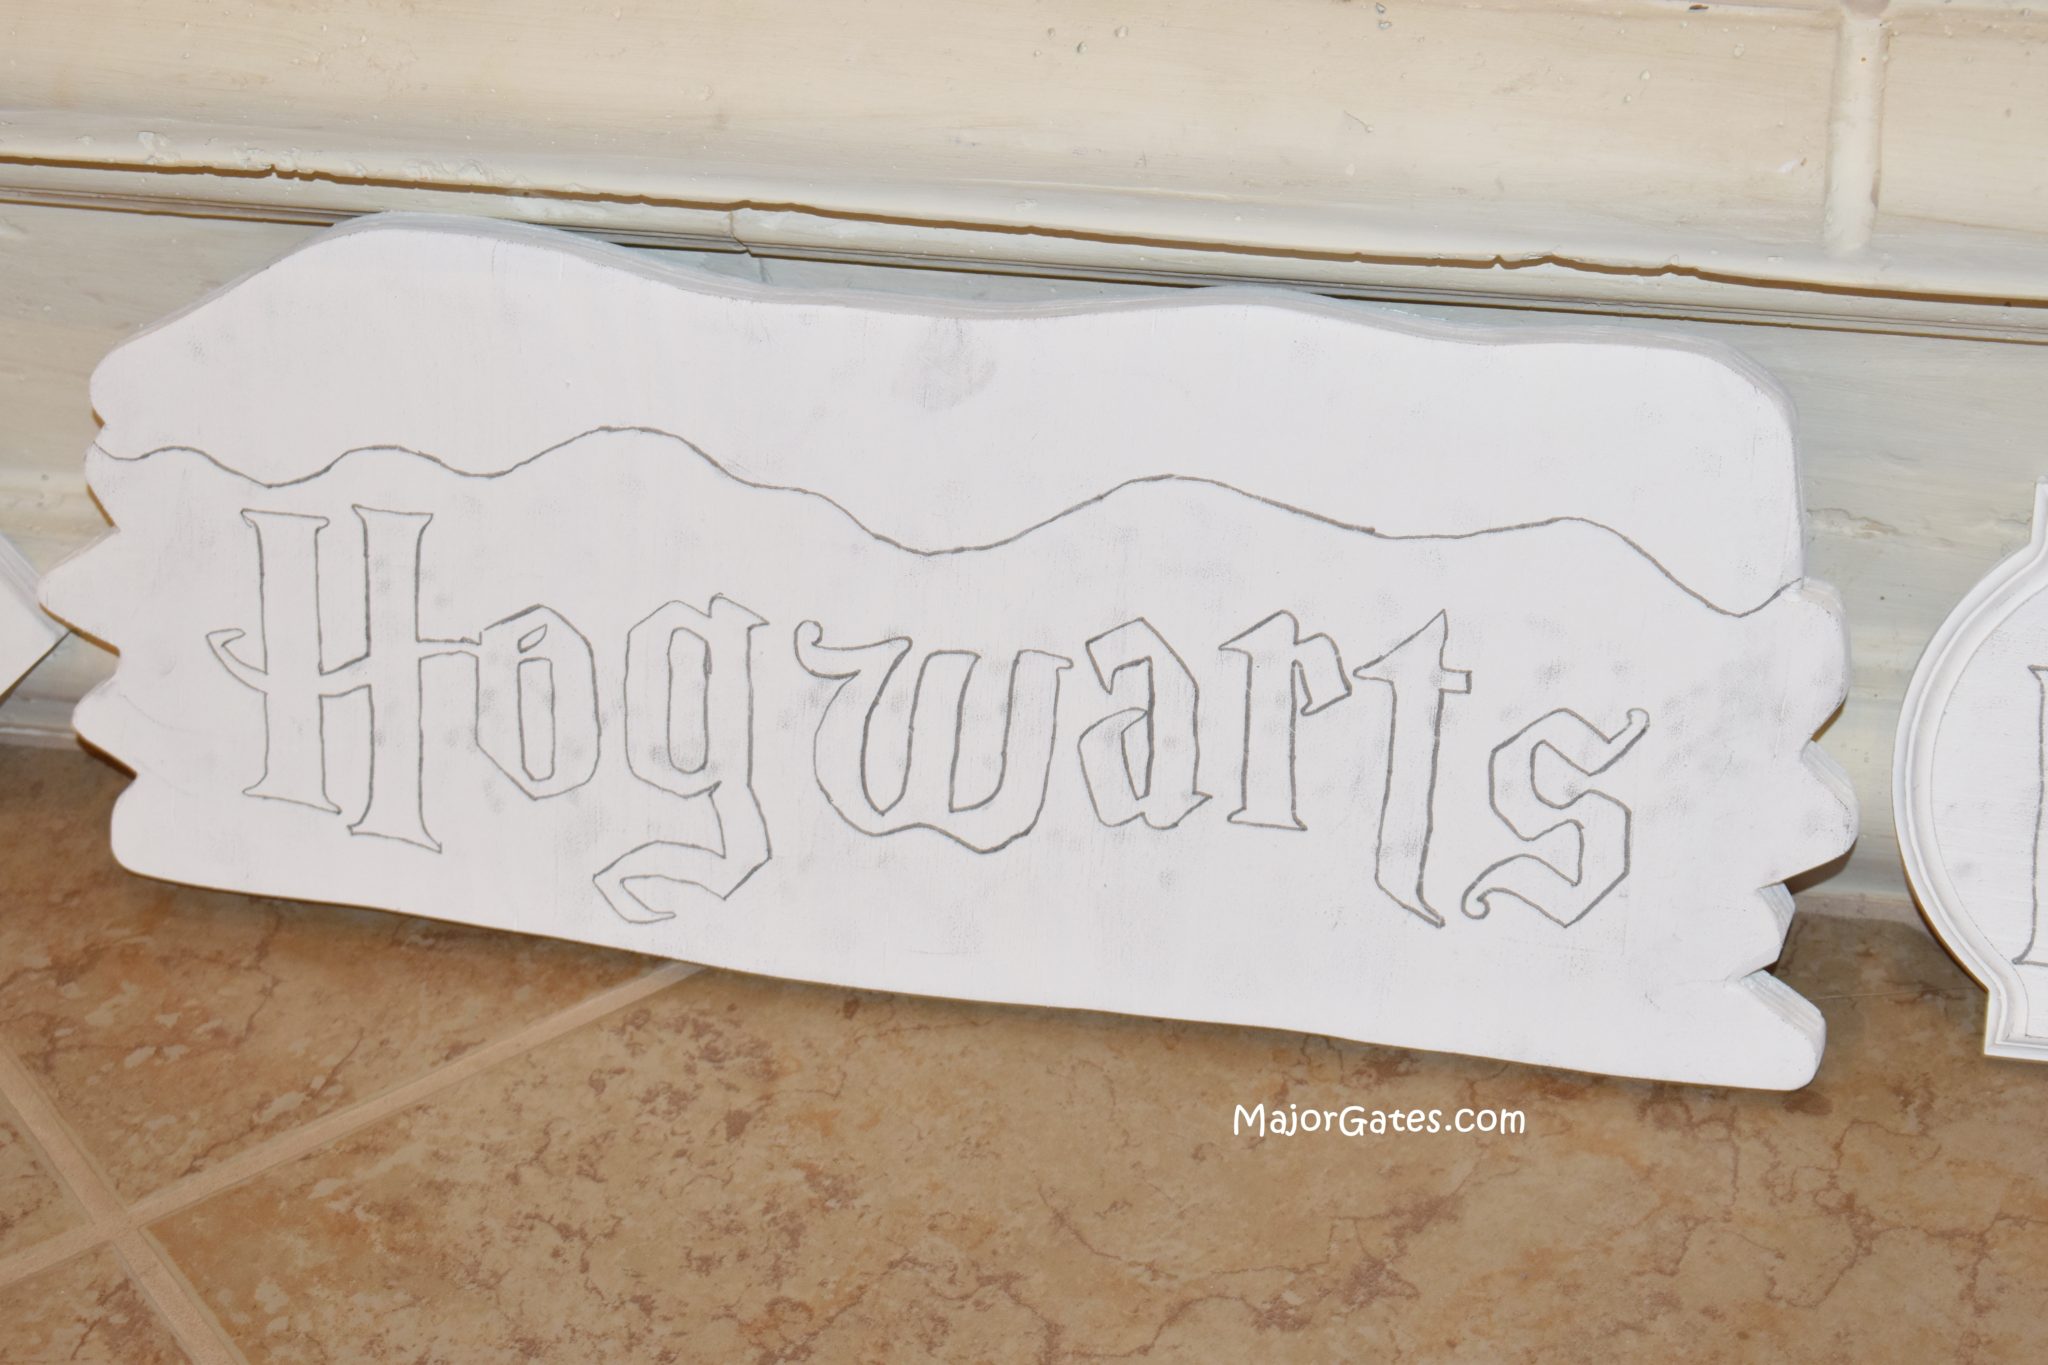
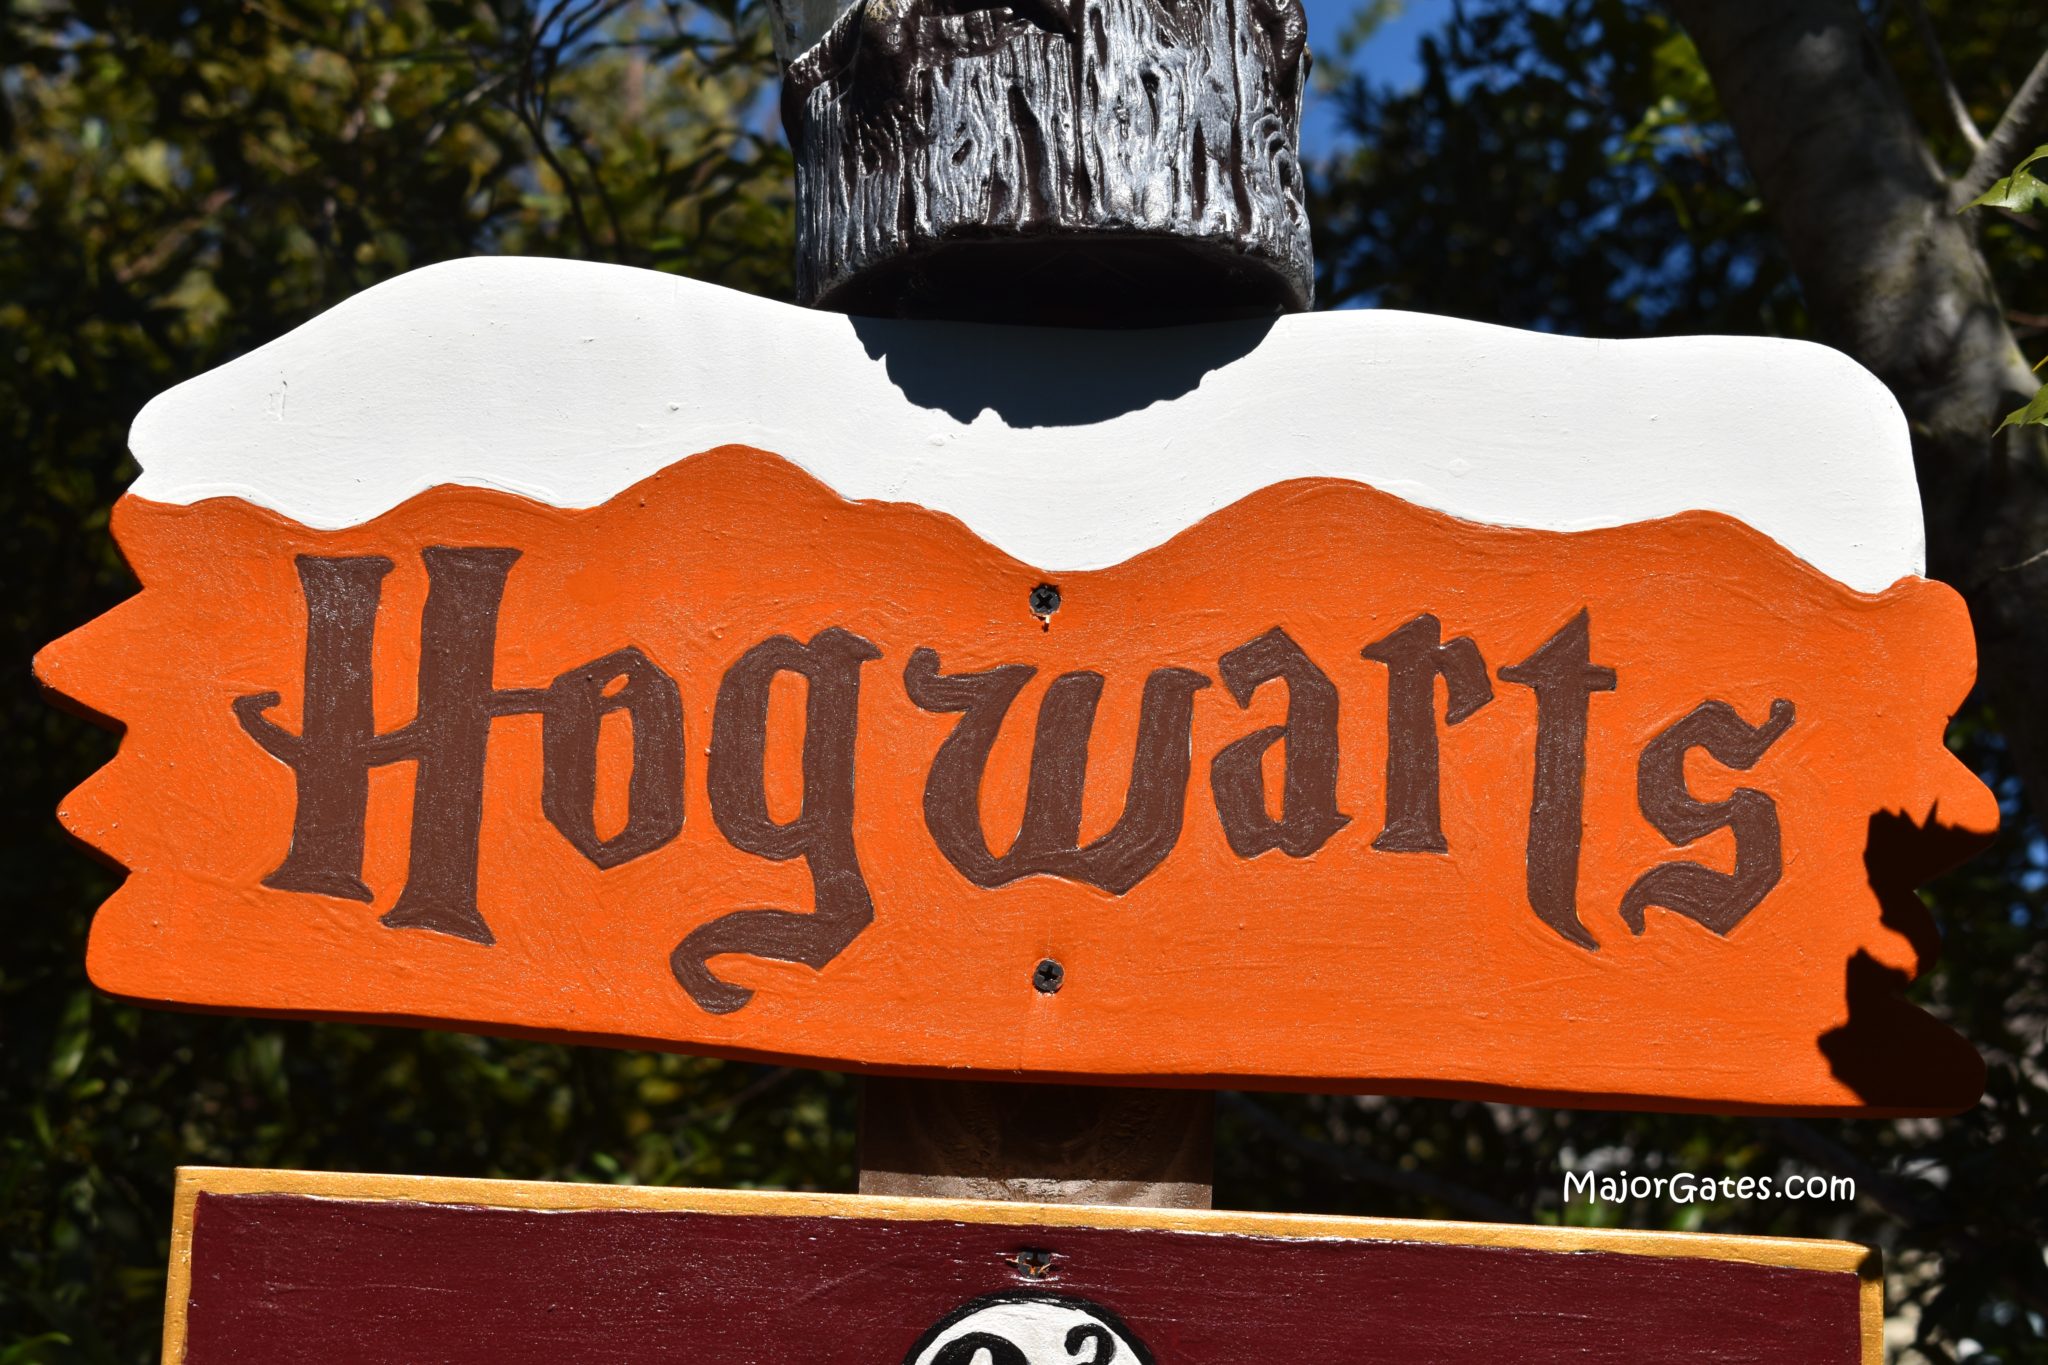
For the Hogwarts sign I used the North Pole template from Winfield Collection. I used a free Harry Potter font by doing an internet search and printed on 11 x 14 paper. Then I applied the copy paper image to the sign with transfer paper and tracing pen. Next, I traced the transferred image with the paint pen. Then painted the background with a pumpkin color orange, dark brown for the lettering and white on the snow cap.
Hogwarts Express
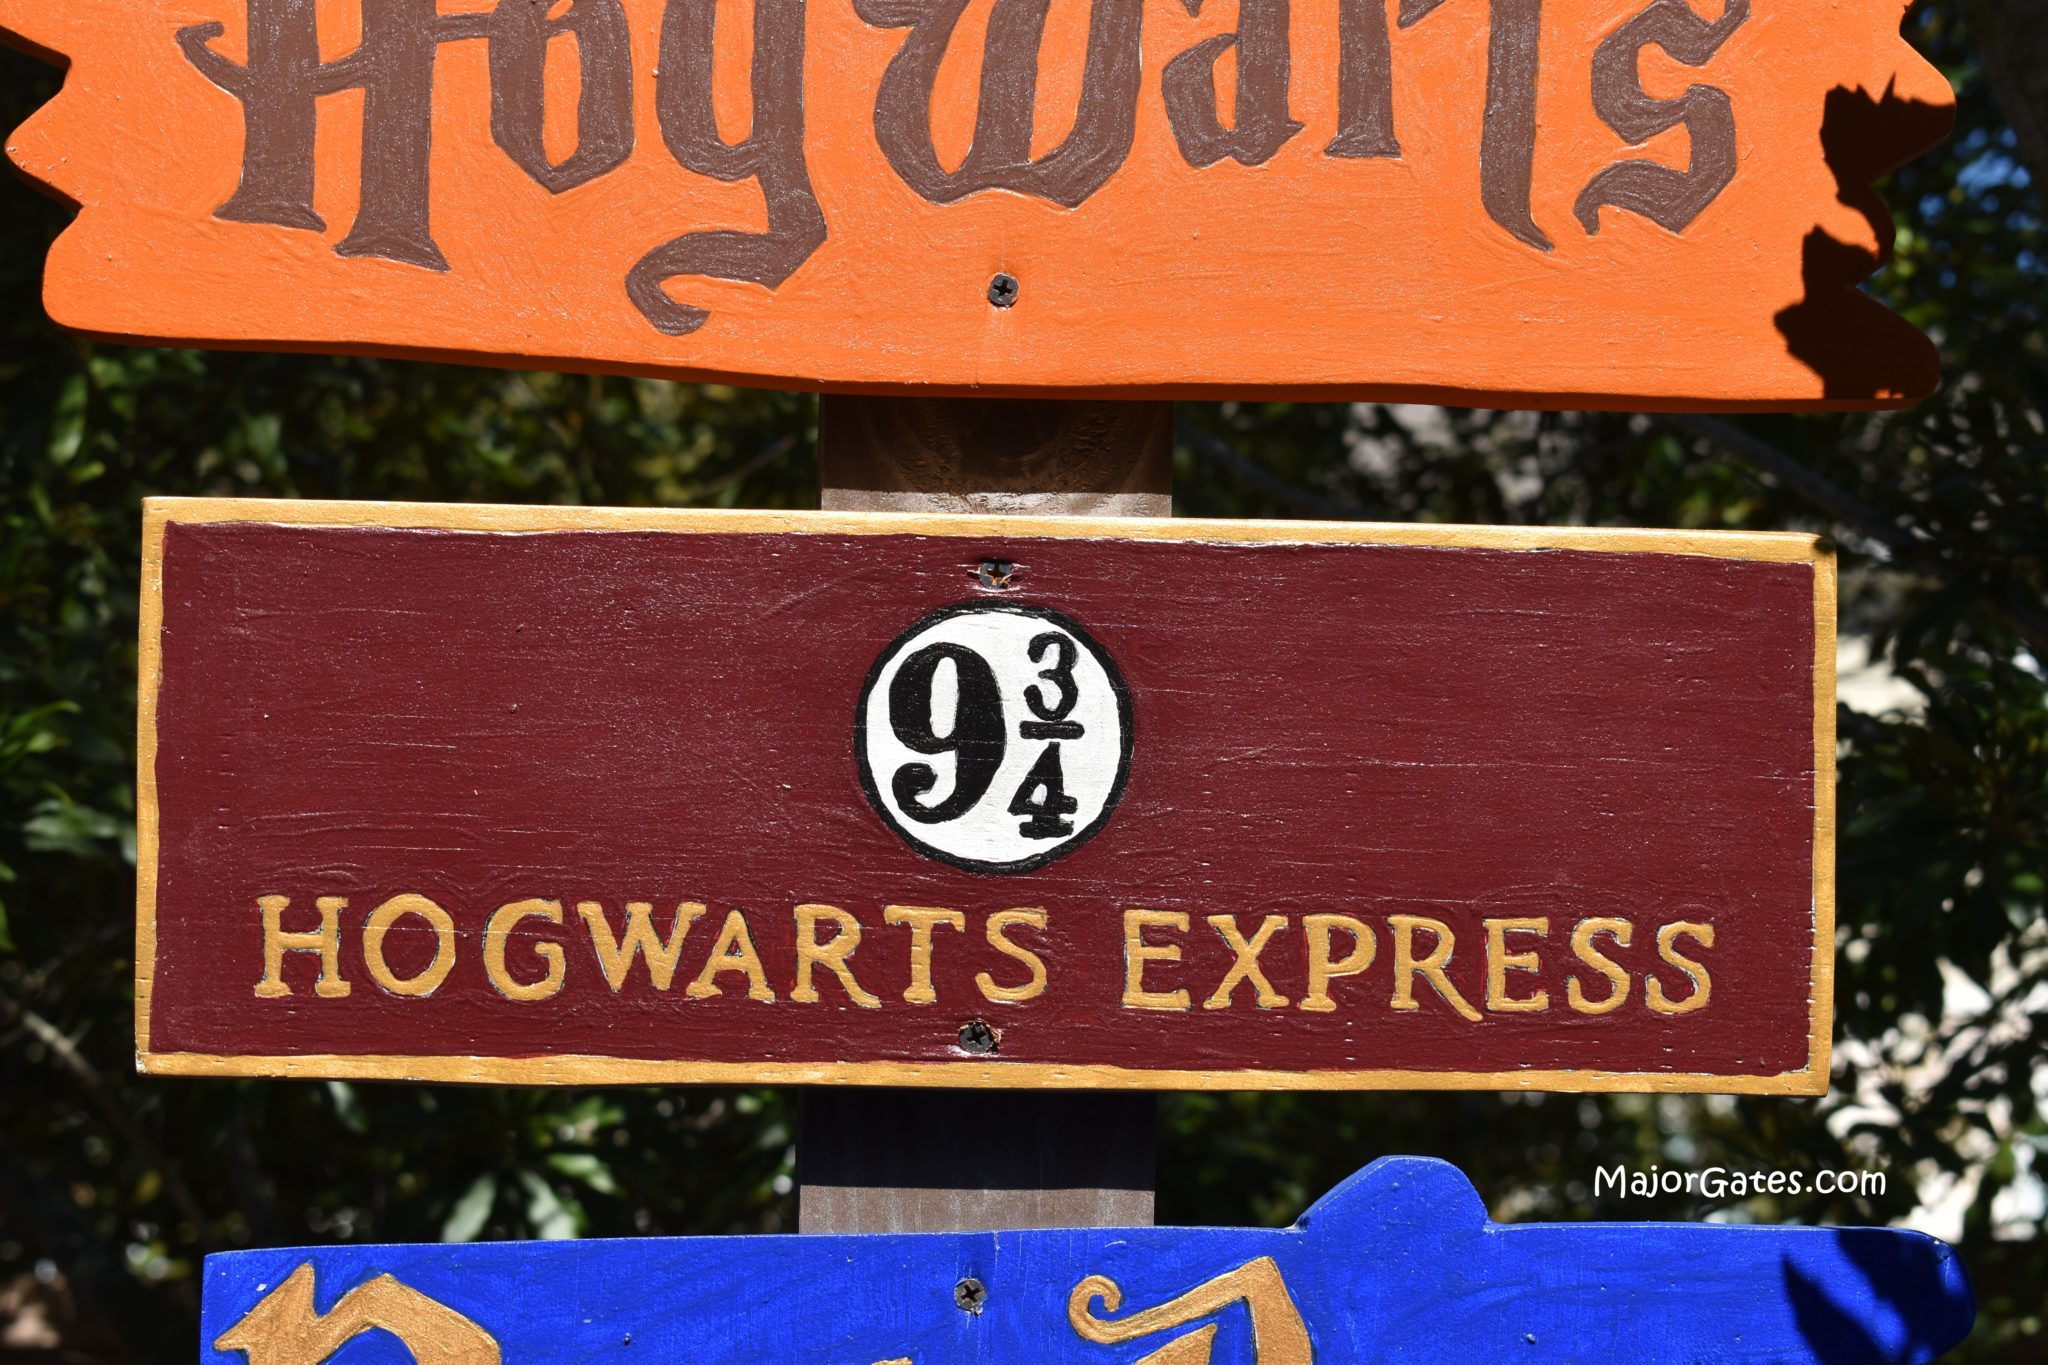
I measured out this sign on the plywood as a large rectangle 16 in x 5 1/2 in. This pattern was found by looking at on-line images and then printing on 11 x 14 paper. Then I applied the copy paper image to the sign with transfer paper and tracing pen.
You have to use the small side of the tracing pen to trace the details of this image. Next, I traced the transferred image with the paint pen. Then painted the background with a deep burgundy or wine color, antique gold for the trim and lettering, black and white for the 9 3/4 image.
North Pole Directional Sign
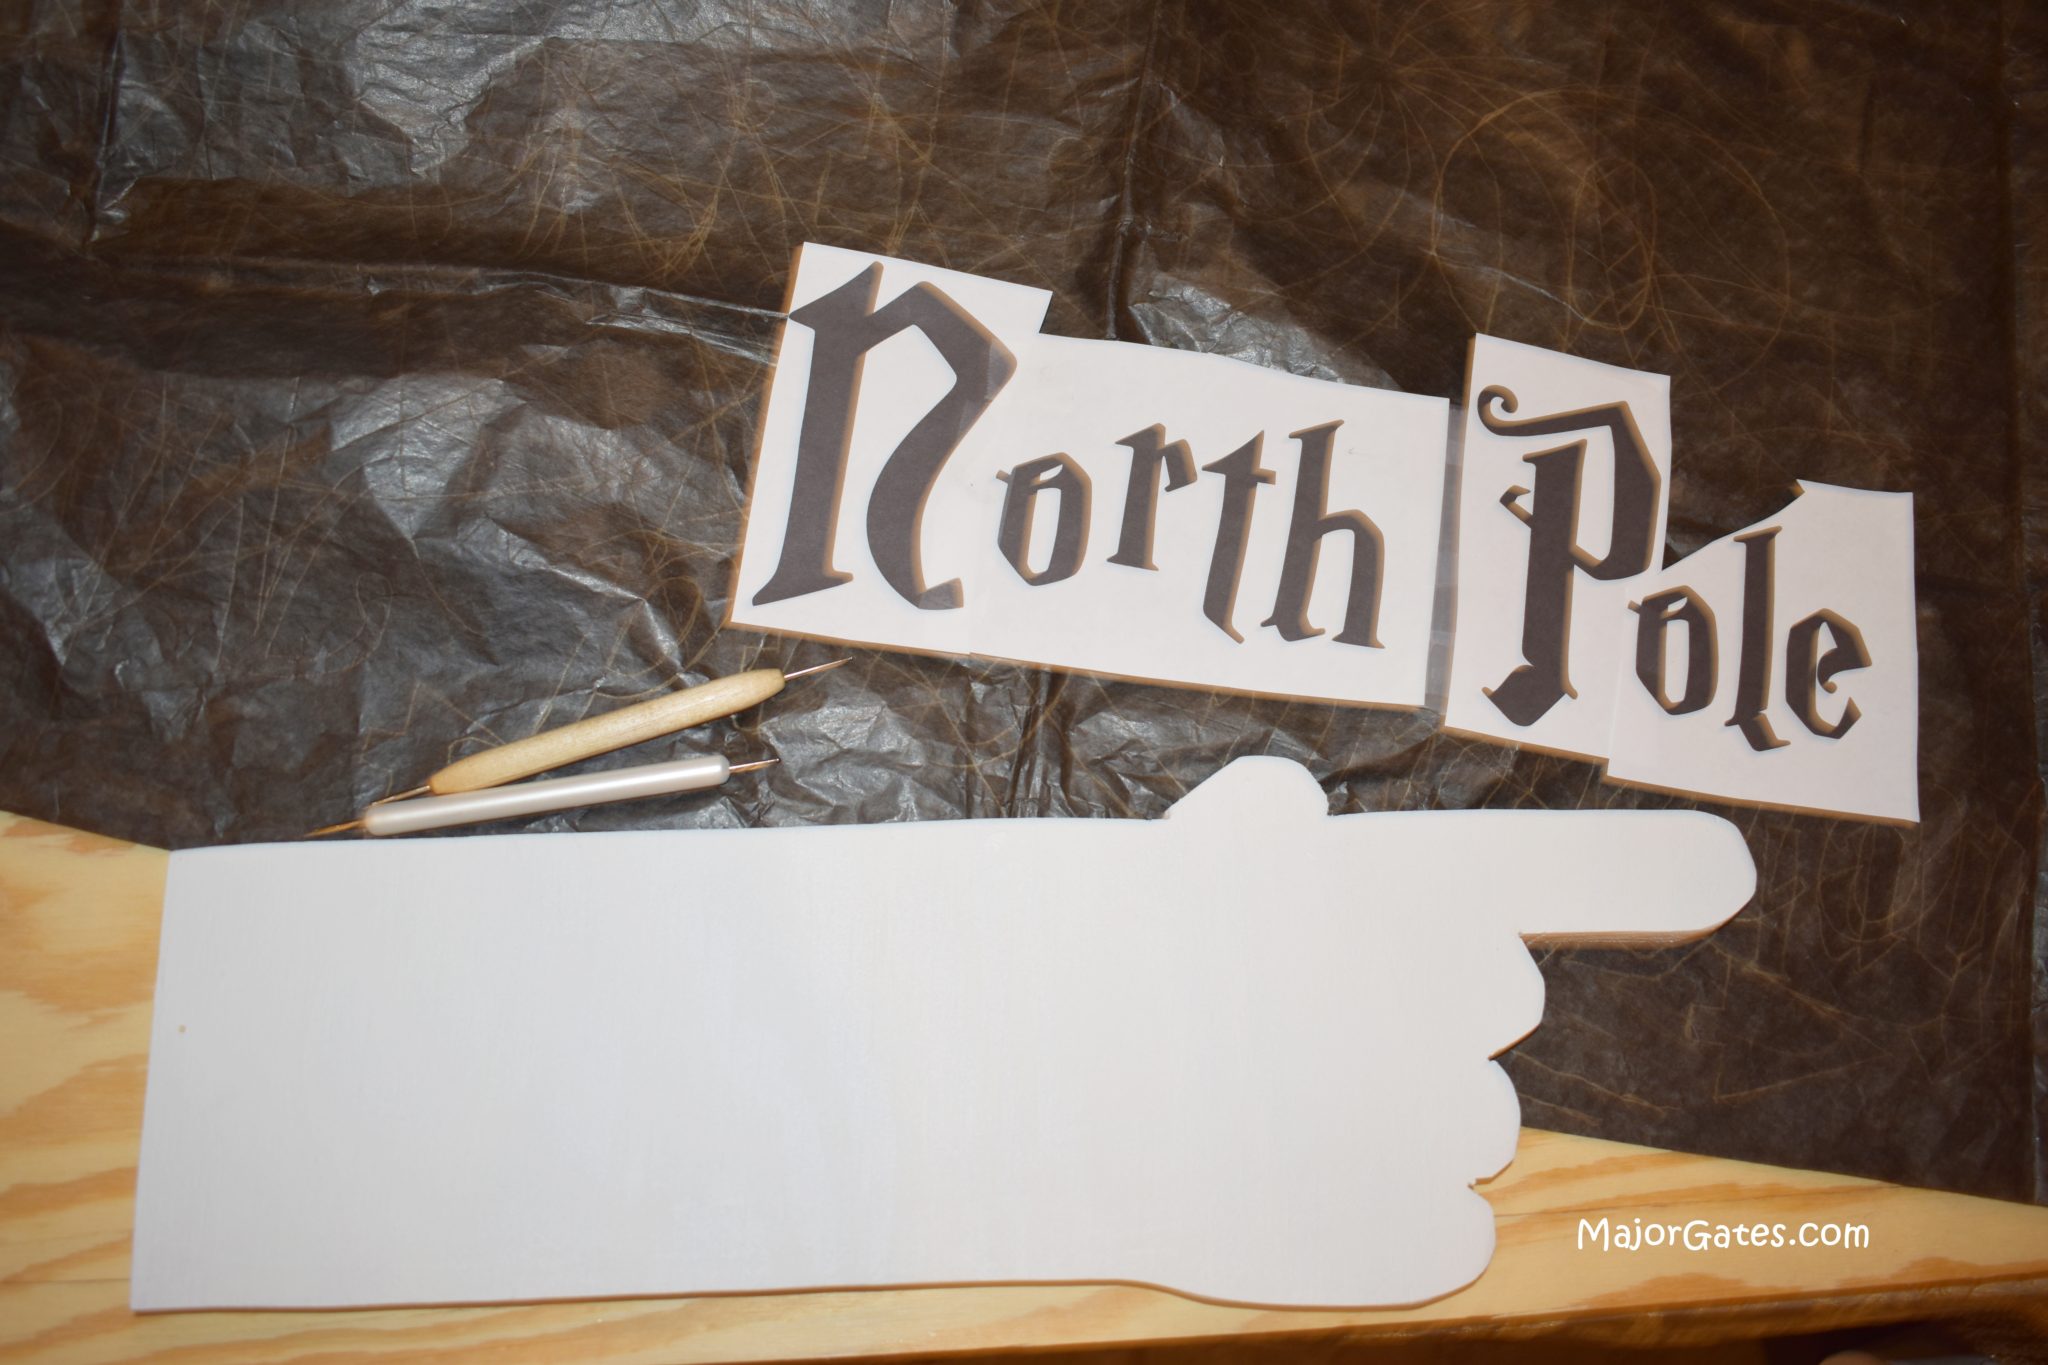
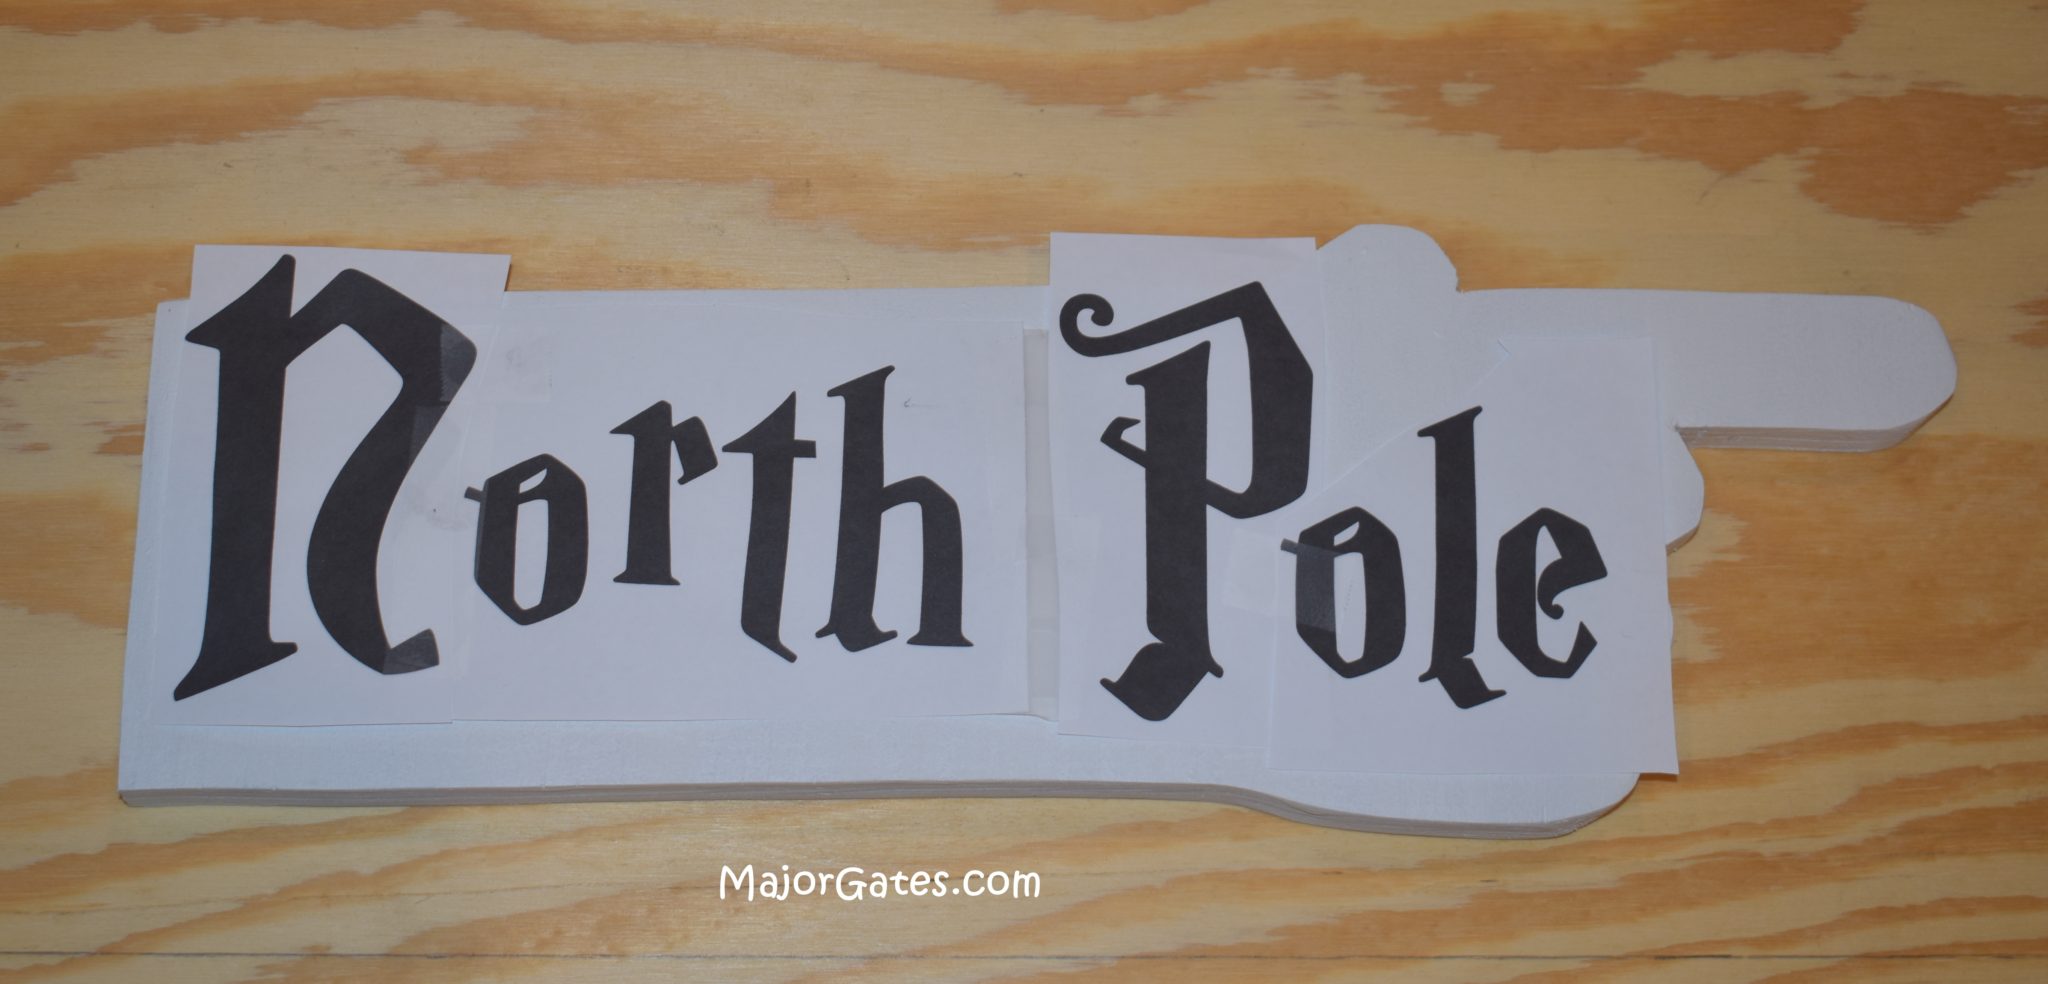
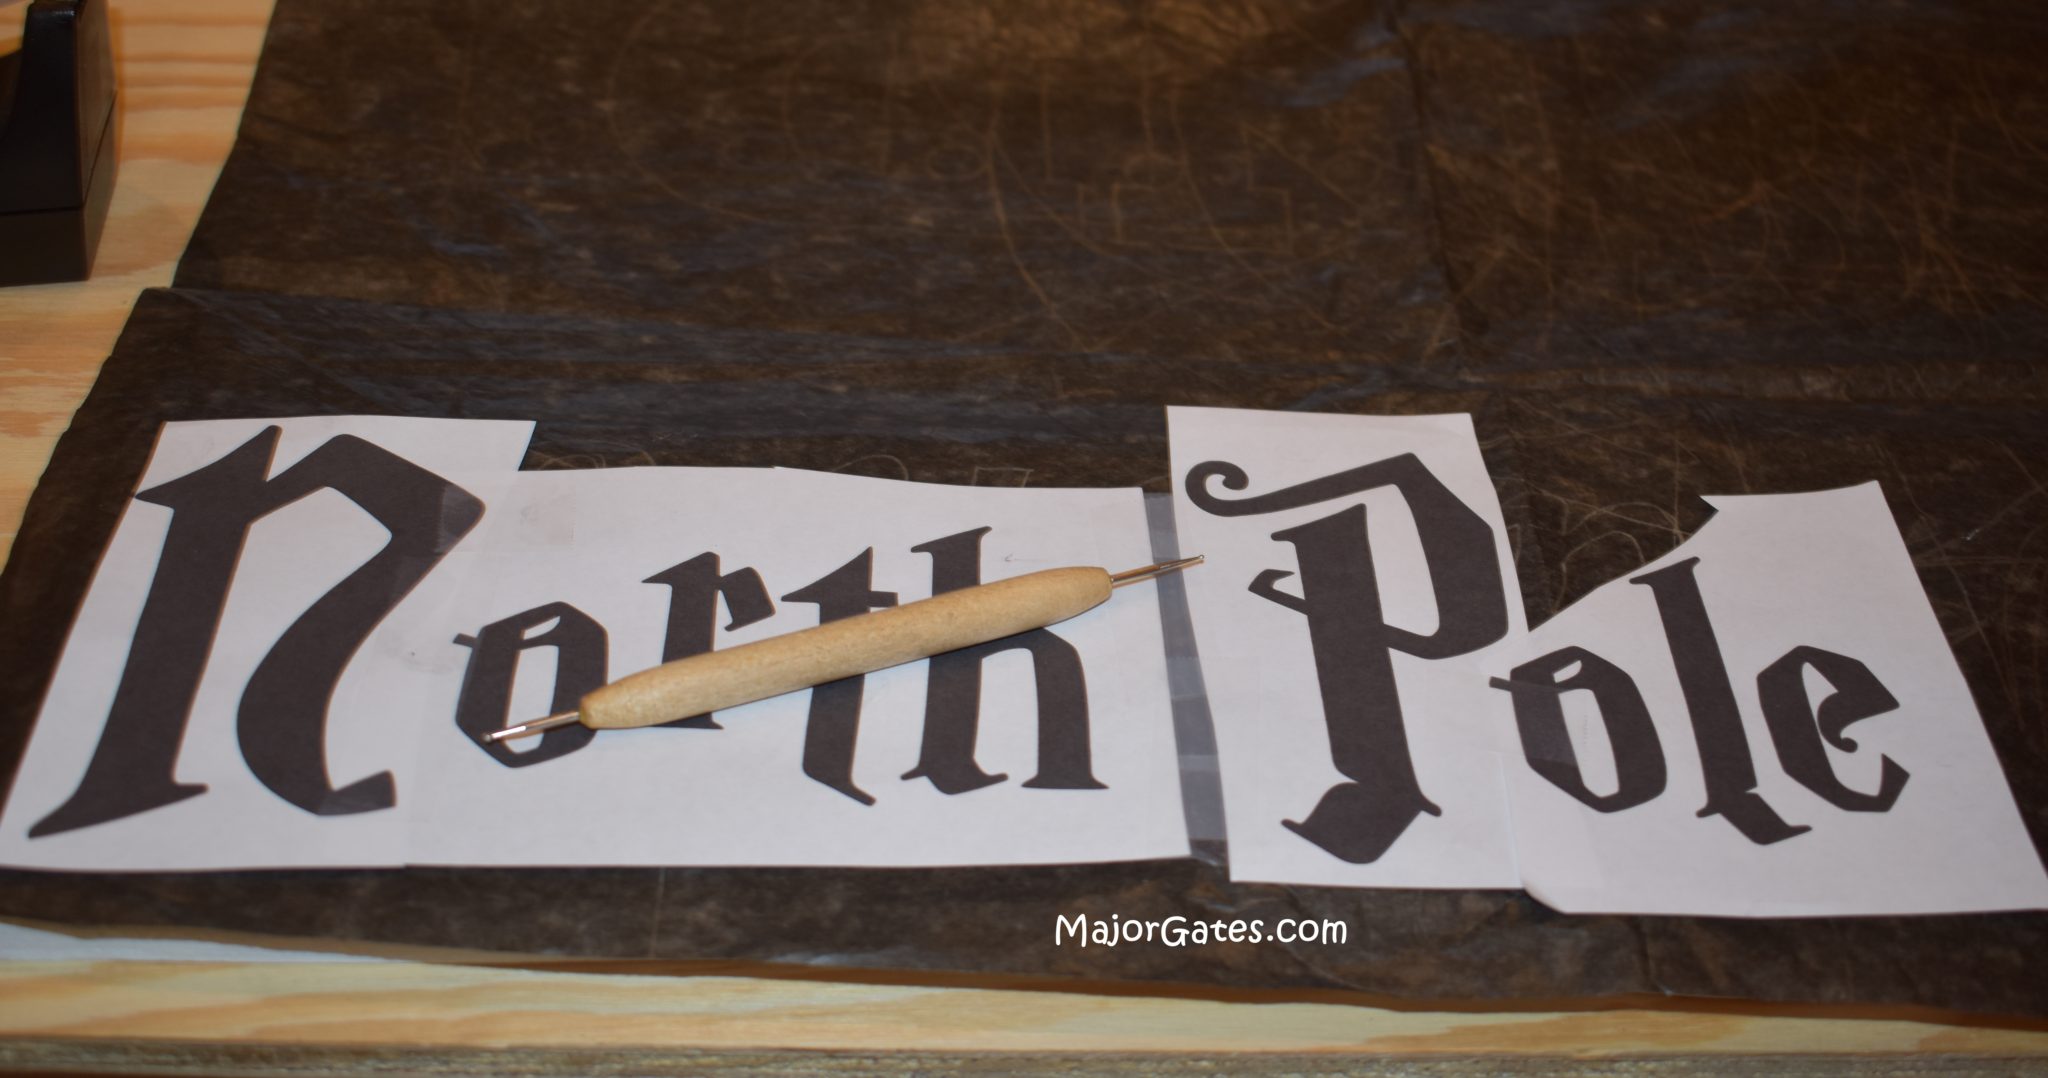
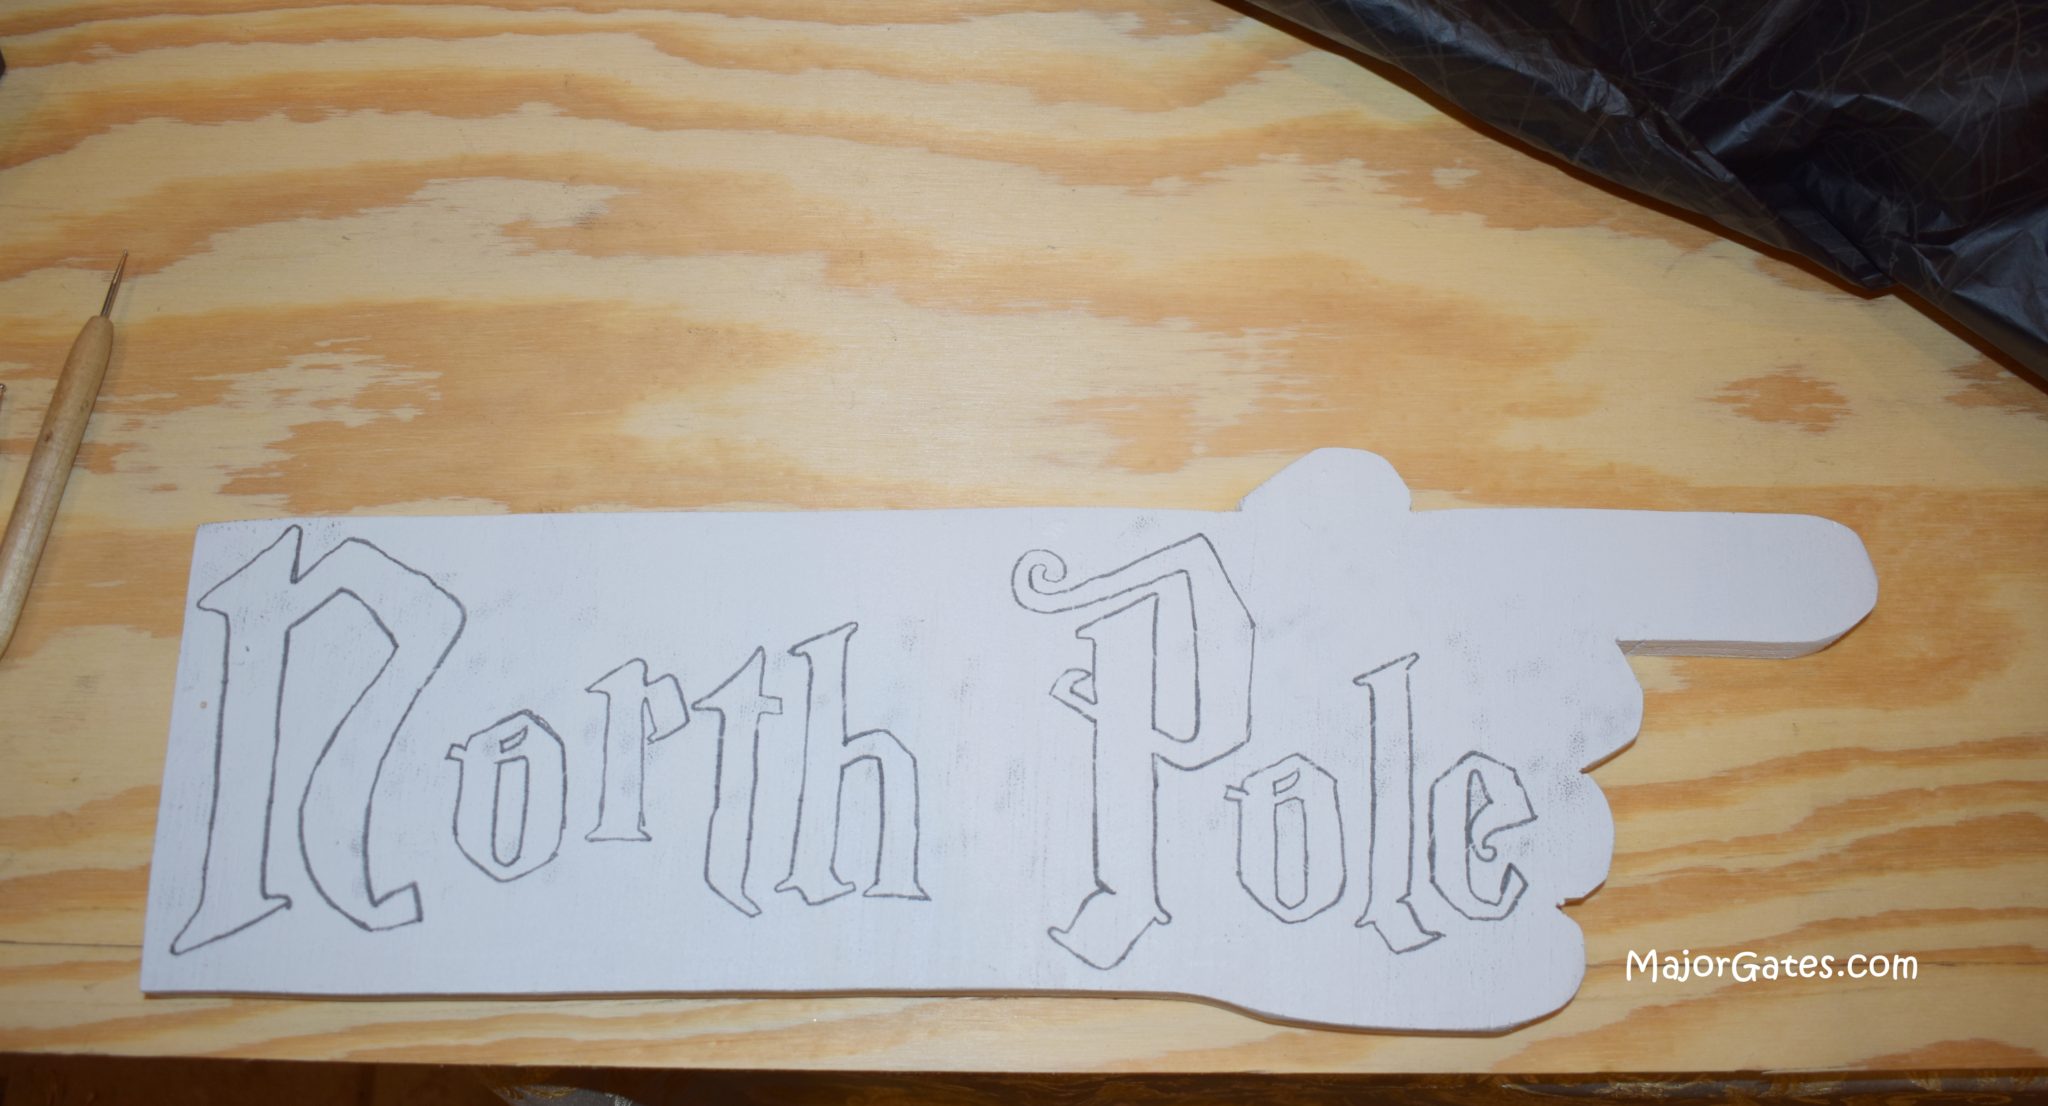
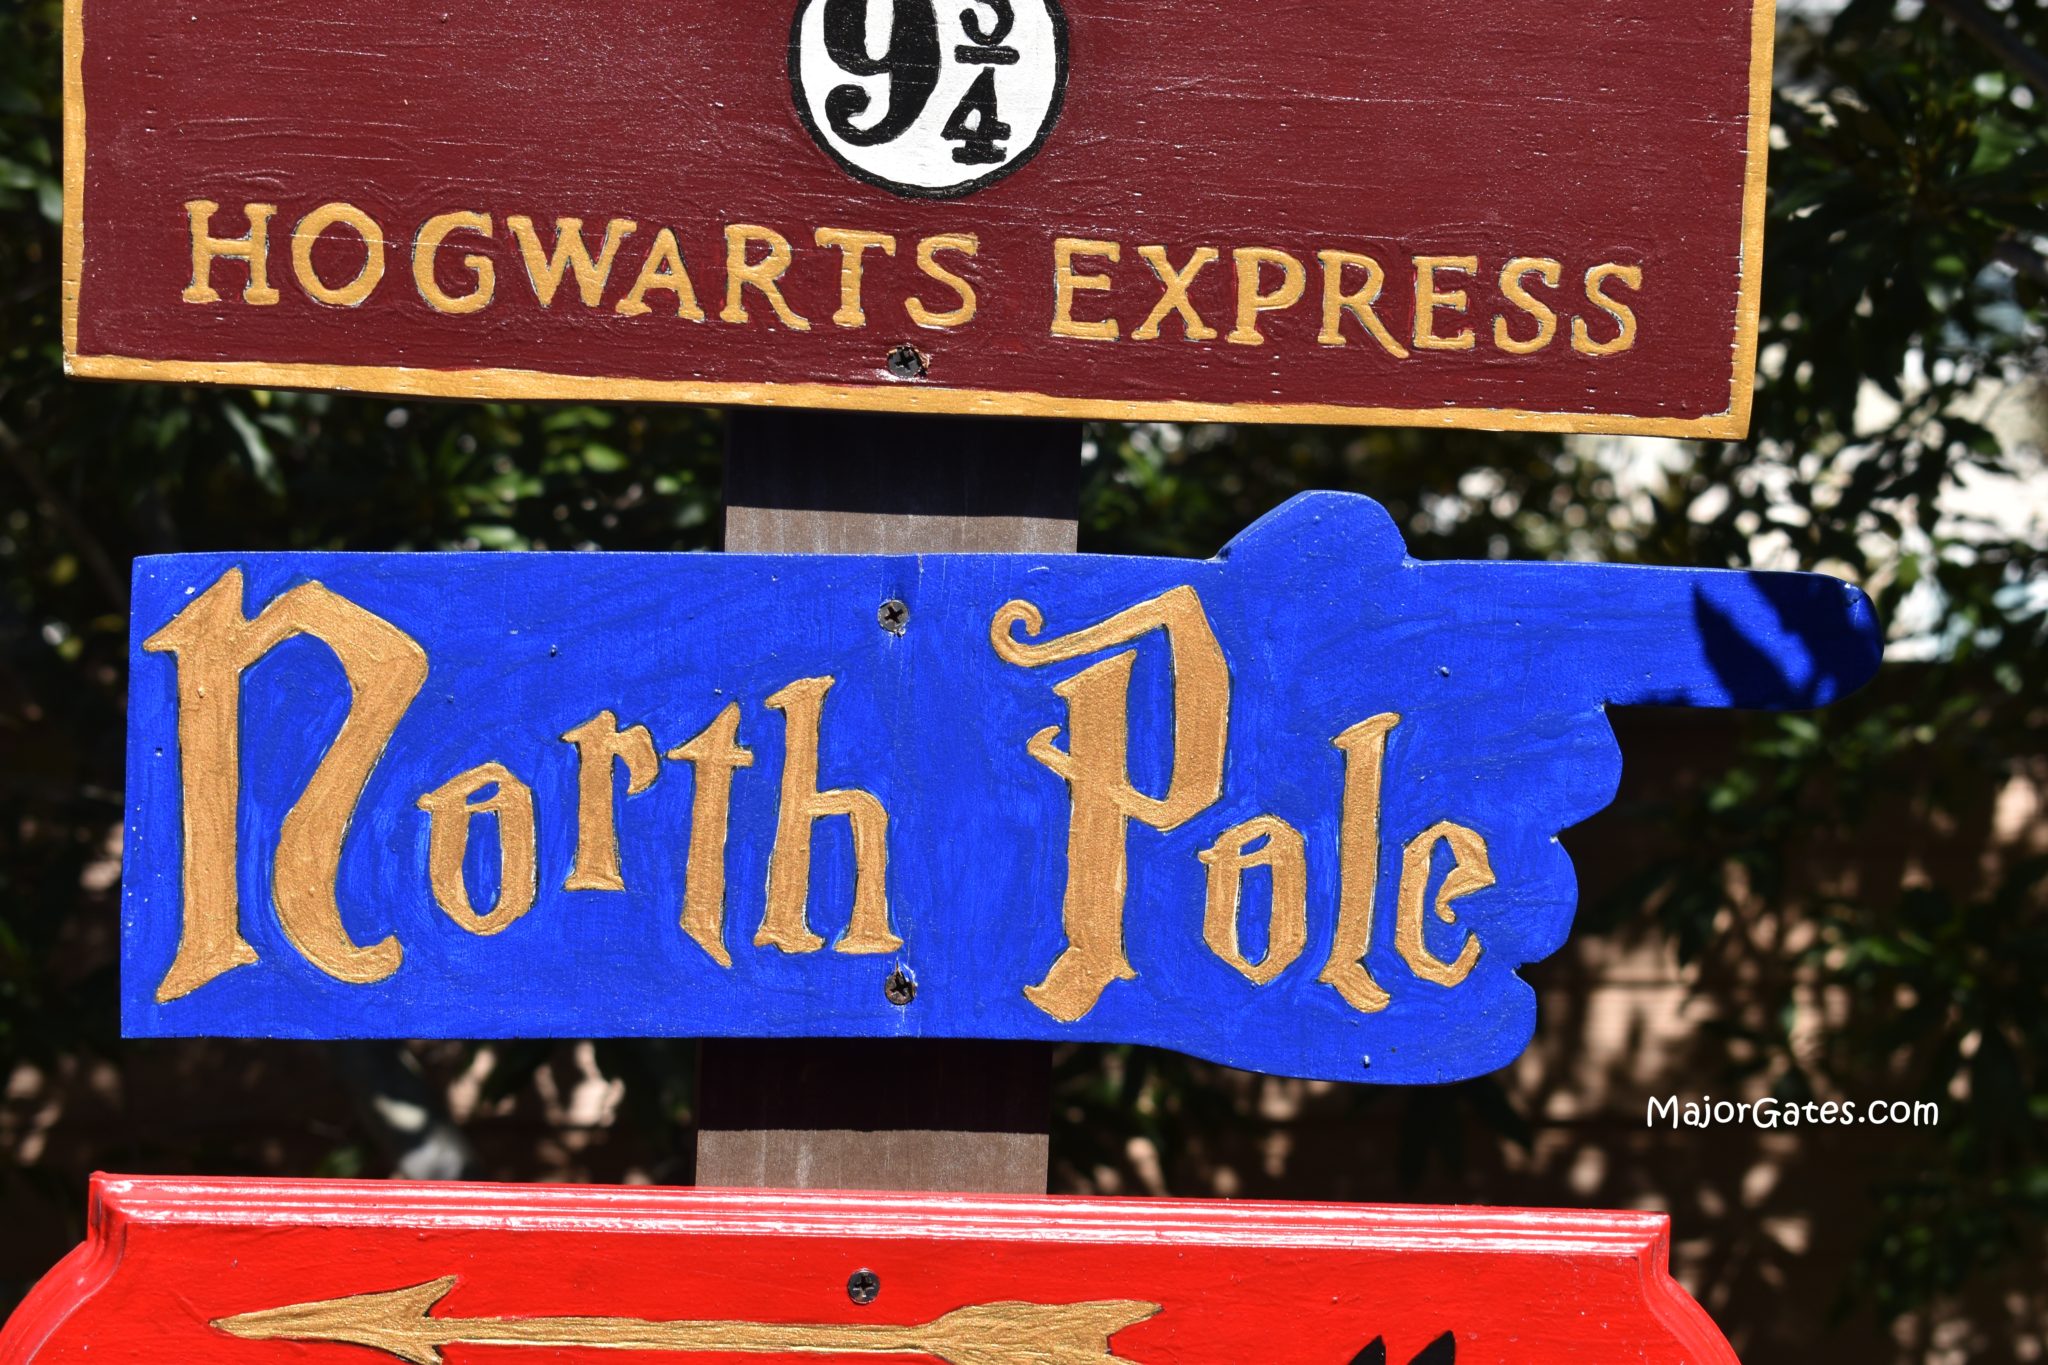
This directional sign I made from the Elf Village pattern from Winfield Collection. I used a Disney font that I downloaded for free. I printed the word North on 8 1/2 x 11 copy paper and then Pole on another sheet of paper. So I had to cut and tape the papers to make a template.
Then I applied the copy paper image to the sign with transfer paper and tracing pen. Next, I traced the transferred image with the paint pen. Then painted the background with a royal blue color and the lettering with a bright gold.
Diagon Alley
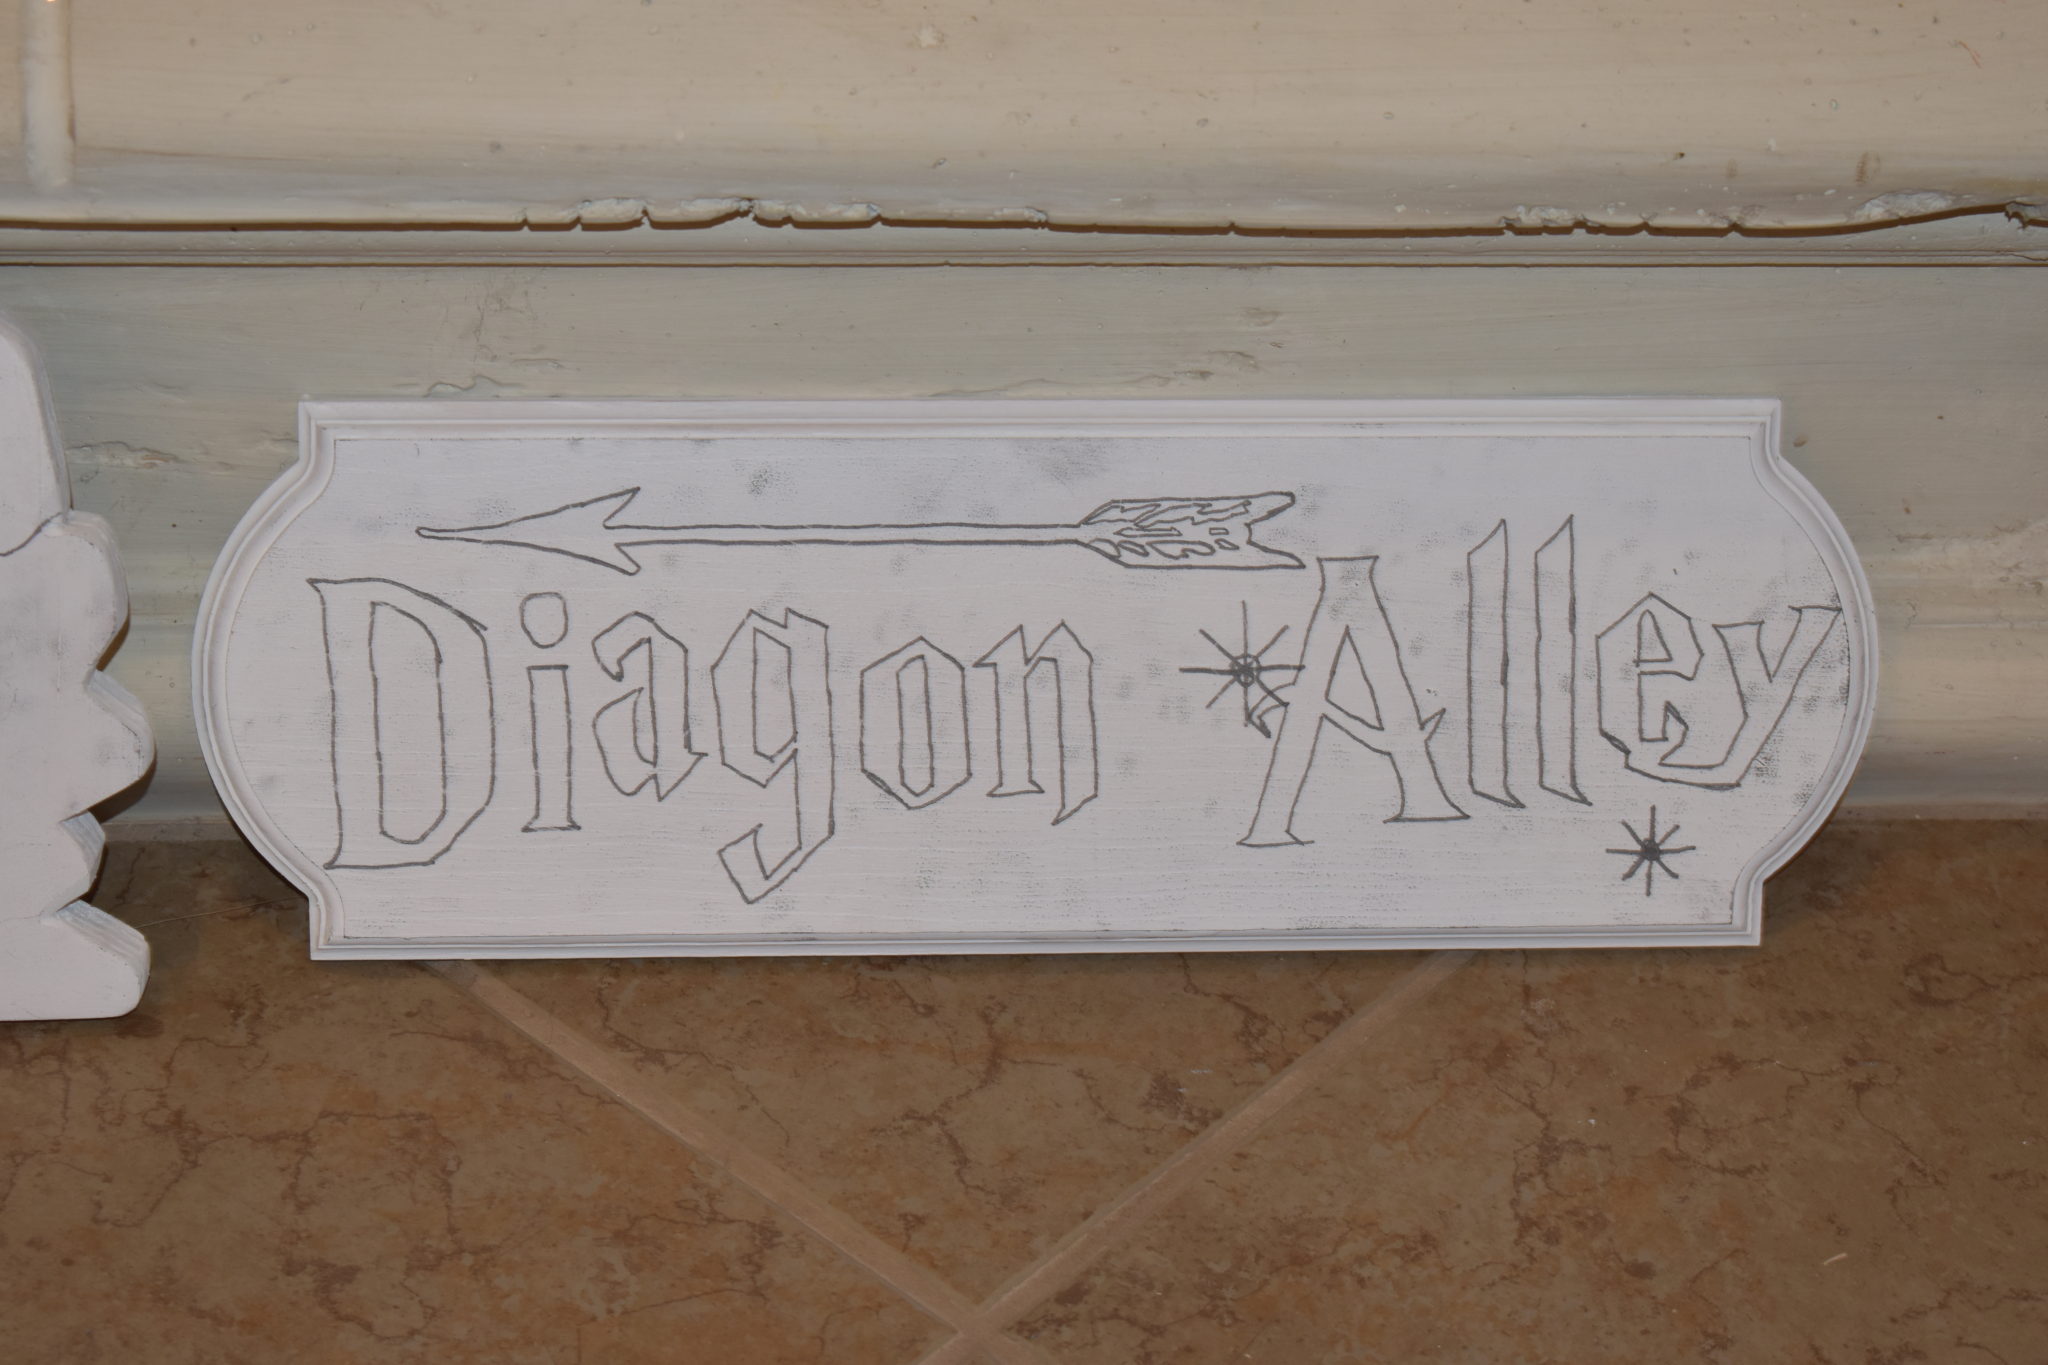

I purchased this wood plaque at my local craft store. Then I used another free Harry Potter font for the letters. I also searched for an on-line image of an arrow and transferred it to the plaque with the tracing paper.
Next, I traced the transferred image with the paint pen. Then painted the background with a tomato red color and painted the lettering with metallic black. The arrow is painted with a bright gold.
Ollivander’s

This is one of my favorite directional signs because the look is old world. I used the Reindeer Stables template from Winfield Collection. I searched the internet for the image and printed it on 11 x 14 paper. Then I applied the copy paper image to the sign with transfer paper and tracing pen.
You have to use the small side of the tracing pen to trace the details of this image. Next, I traced the transferred image with a small tip paint pen. Then I painted the background with a deep dark brown and painted the lettering and wand with a bright gold.
Gringotts
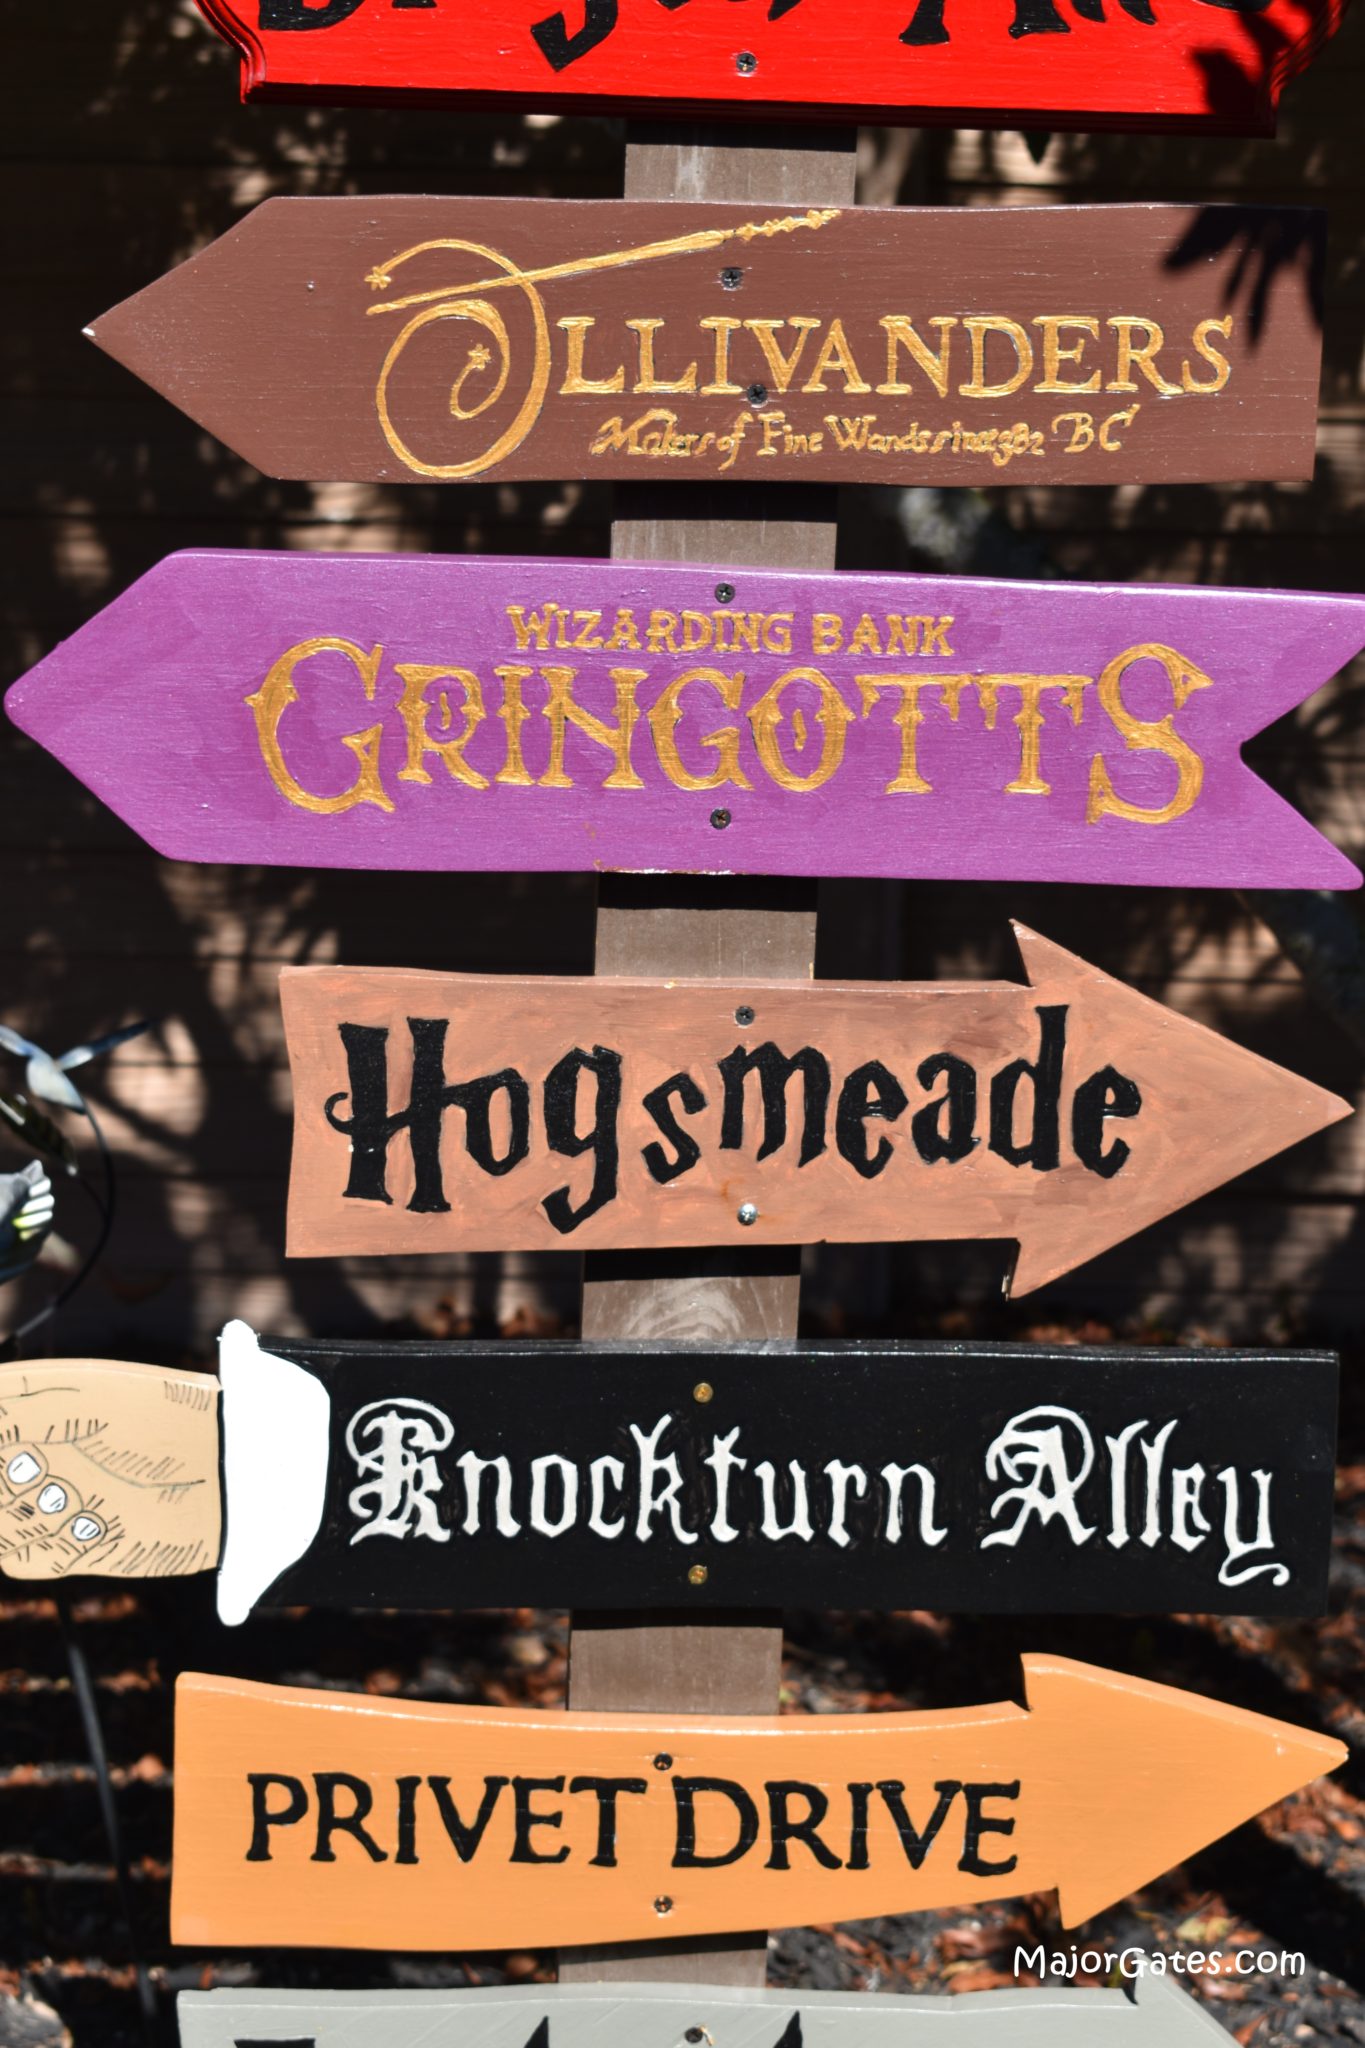
For this directional sign, I used the Mrs. Claus’s Kitchen template from Winfield Collection. This image was also found on-line and printed it on 11 x 14 paper. Then I applied the copy paper image to the sign with transfer paper and tracing pen.
You have to use the small side of the tracing pen to trace the details of this image. Next, I traced the transferred image with a small tip paint pen. Then I painted the background with a metallic purple and painted the lettering and wand with a bright gold.
Hogsmeade
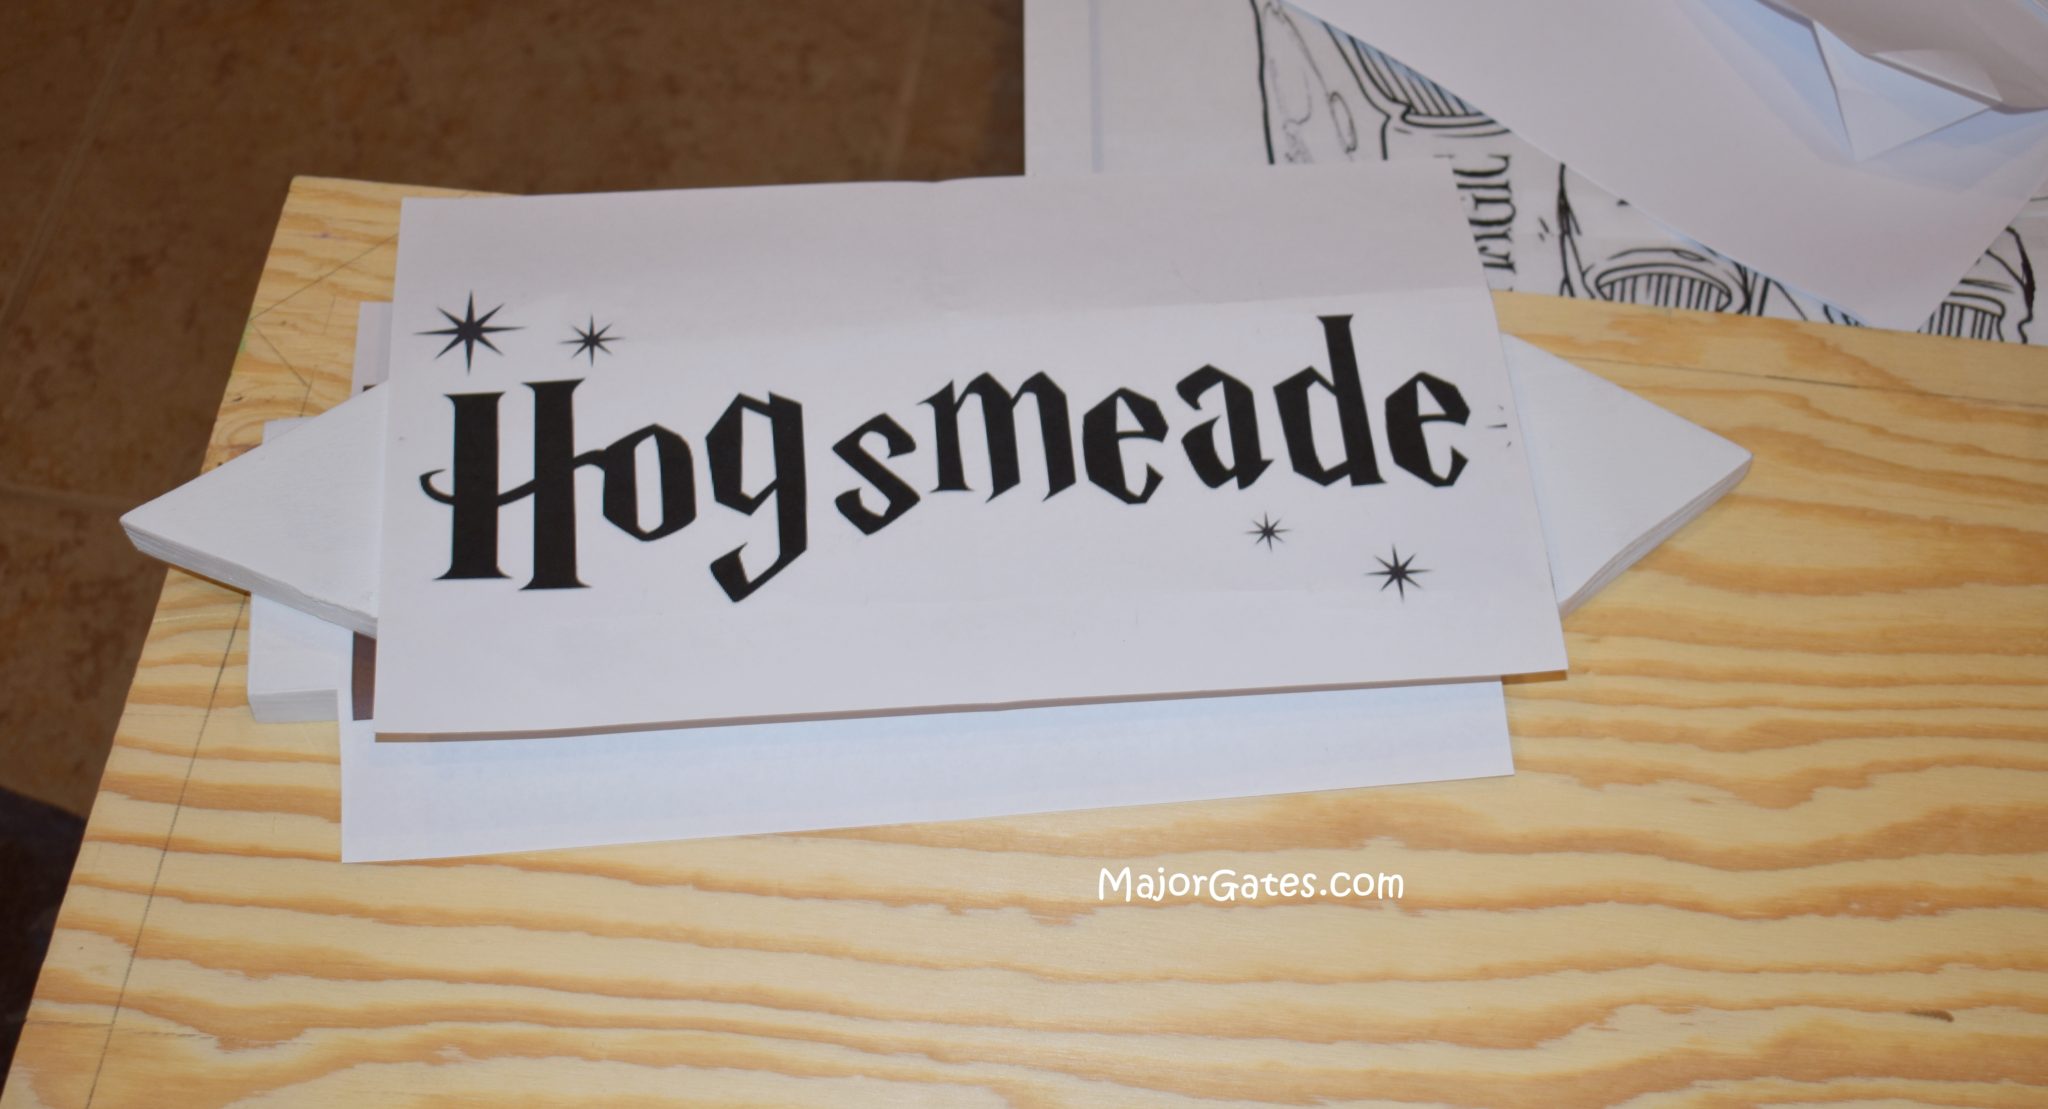
I used a free Harry Potter font and the Santa’s House template from Winfield Collection. I printed on 11 x 14 paper and traced to the wood sign with the tracing pen. Next, I traced the transferred image with the paint pen.
Then I painted the background with a mixture of two medium brown colors to give it an aged brown effect. Then I painted the lettering with metallic black.
Knockturn Alley
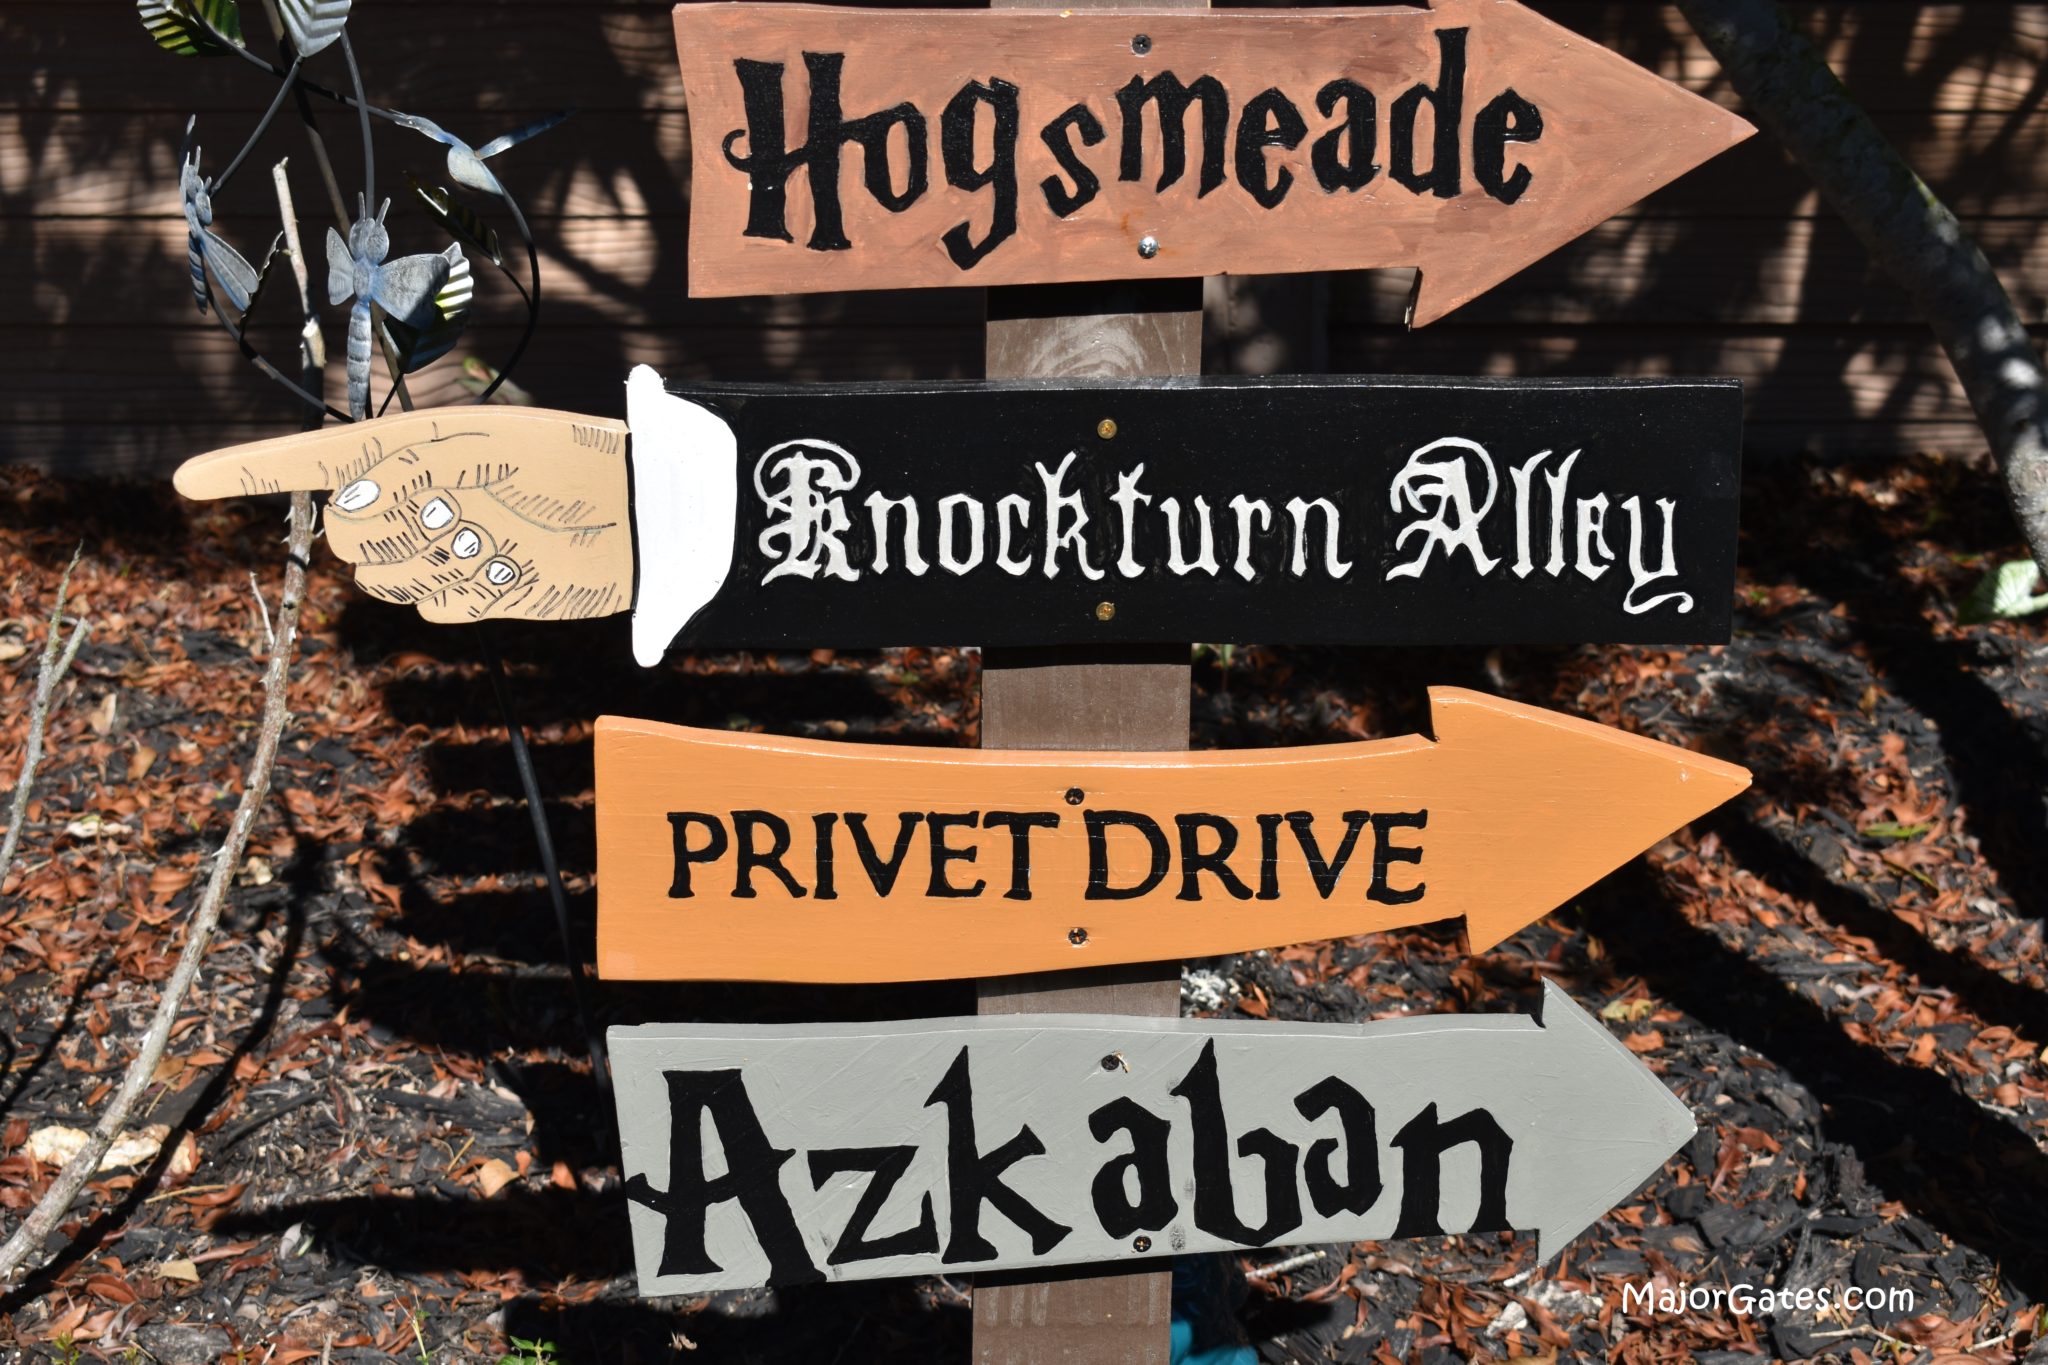
This is my other favorite sign. After finding the image on-line, I printed on 11 x 17 inch paper. Because of the detail, this one took a little while to trace and paint. I applied the copy paper image to the sign with transfer paper and tracing pen. You have to use the small side of the tracing pen to trace the details of this image.
Next, I traced the transferred image with a small tip paint pen. I painted the background with a metallic black and painted the lettering with a bright white. The hand is painted with the color flesh. The sleeve cuff and fingernails are painted with bright white.
Privet Drive
I made this sign from the Sleigh Rides pattern from Winfield Collection. I used a regular font in caps. Then I applied the copy paper image to the sign with transfer paper and tracing pen. Next, I traced the transferred image with the paint pen. Then I painted the background with a tan color and the lettering with metallic black.
Azkaban
This sign was made by extending the Santa’s House template from Winfield Collection. So I just made it longer before cutting. I used a free Harry Potter font for the lettering.
Then I applied the copy paper image to the sign with transfer paper and tracing pen. Next, I traced the transferred image with the paint pen. Then I painted the background with a grey color and the lettering with metallic black.
Hedwig
Saw off the ears from the garden owl. Then seal the holes where the ears were with air dry clay and allow to dry overnight.
Now, hot glue around the clay and make a few random streaks so that when it is painted it will look like flattened feathers.

Then paint your owl white and allow to dry. Once the white paint dries, add a few black streaks on the tips of the feathers to look like Hedwig. For extra protection, spray with clear spray paint.
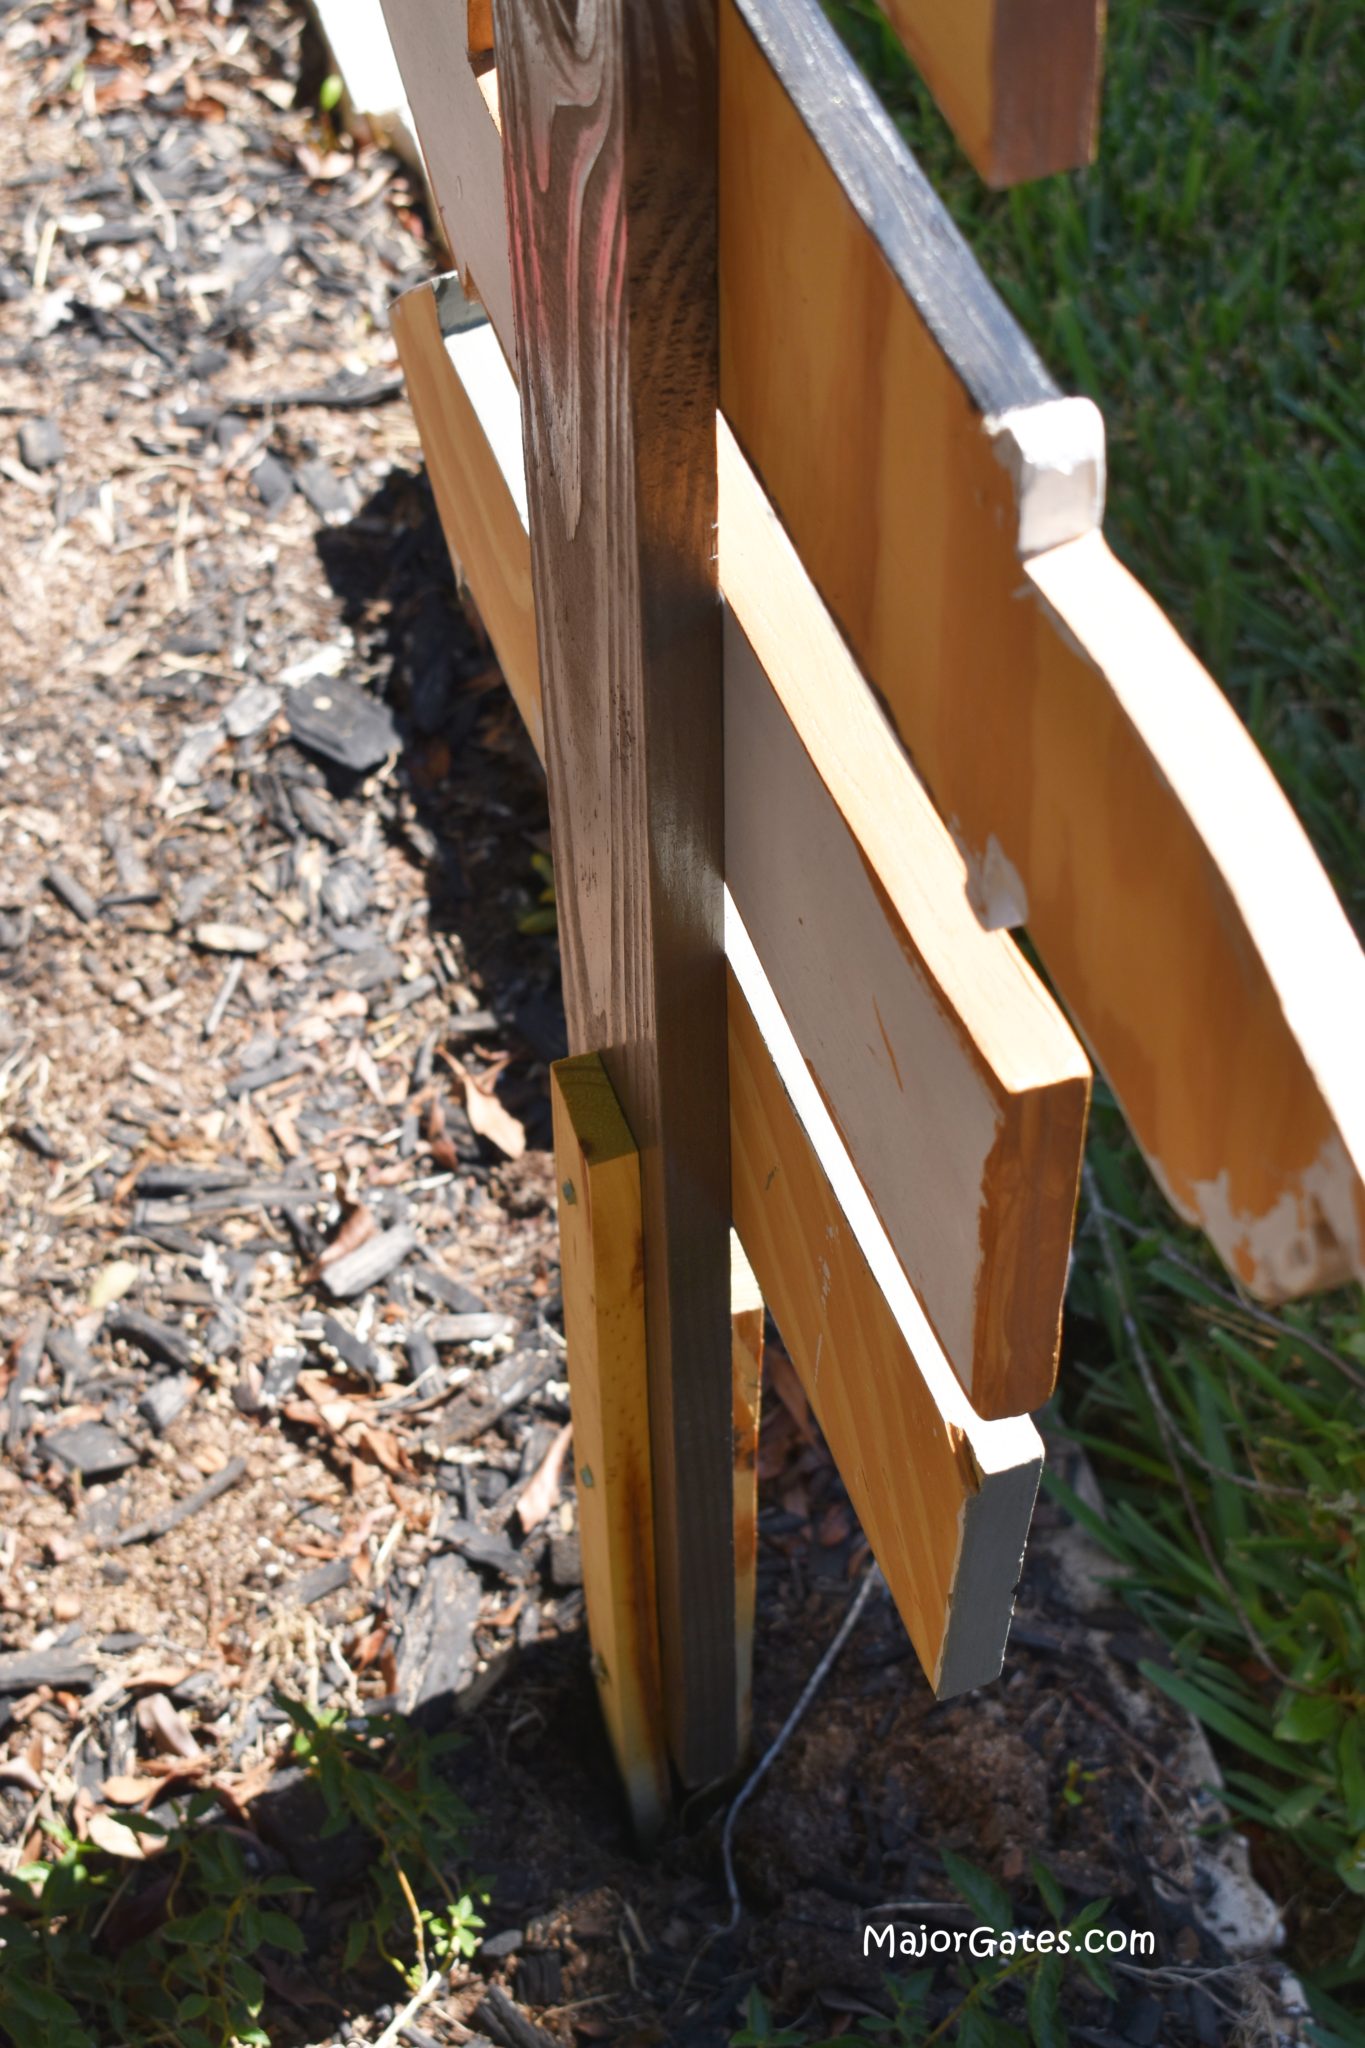
Assemble The Harry Potter Directional Sign
Now it is time to assemble the sign. Paint the long piece of wood, allow it to dry and then seal it with the poly coat.
I pre-drilled holes in the signs with the corresponding drill bit to make it easier to get the screws in.
Then screw the signs to to the long piece of wood. Affix the ground wood stakes to the back of the sign with the screws.
Next, secure the owl. I put a ground wood stake at the top of the Harry Potter directional sign and then secured it with hot glue. It is now ready to place in the yard.
NOTE: If the sign sways in the wind once you put it into the ground, secure with clear fishing line to a tree, bush or ground stake.
Also learn how to make Harry Potter Christmas Ornaments by visiting my DIY page here: https://majorgates.com/category/do-it-yourself/

To see my available Potion/Apothecary Party Label Downloads, click here: https://majorgates.com/product-category/potion-apothecary-labels/
