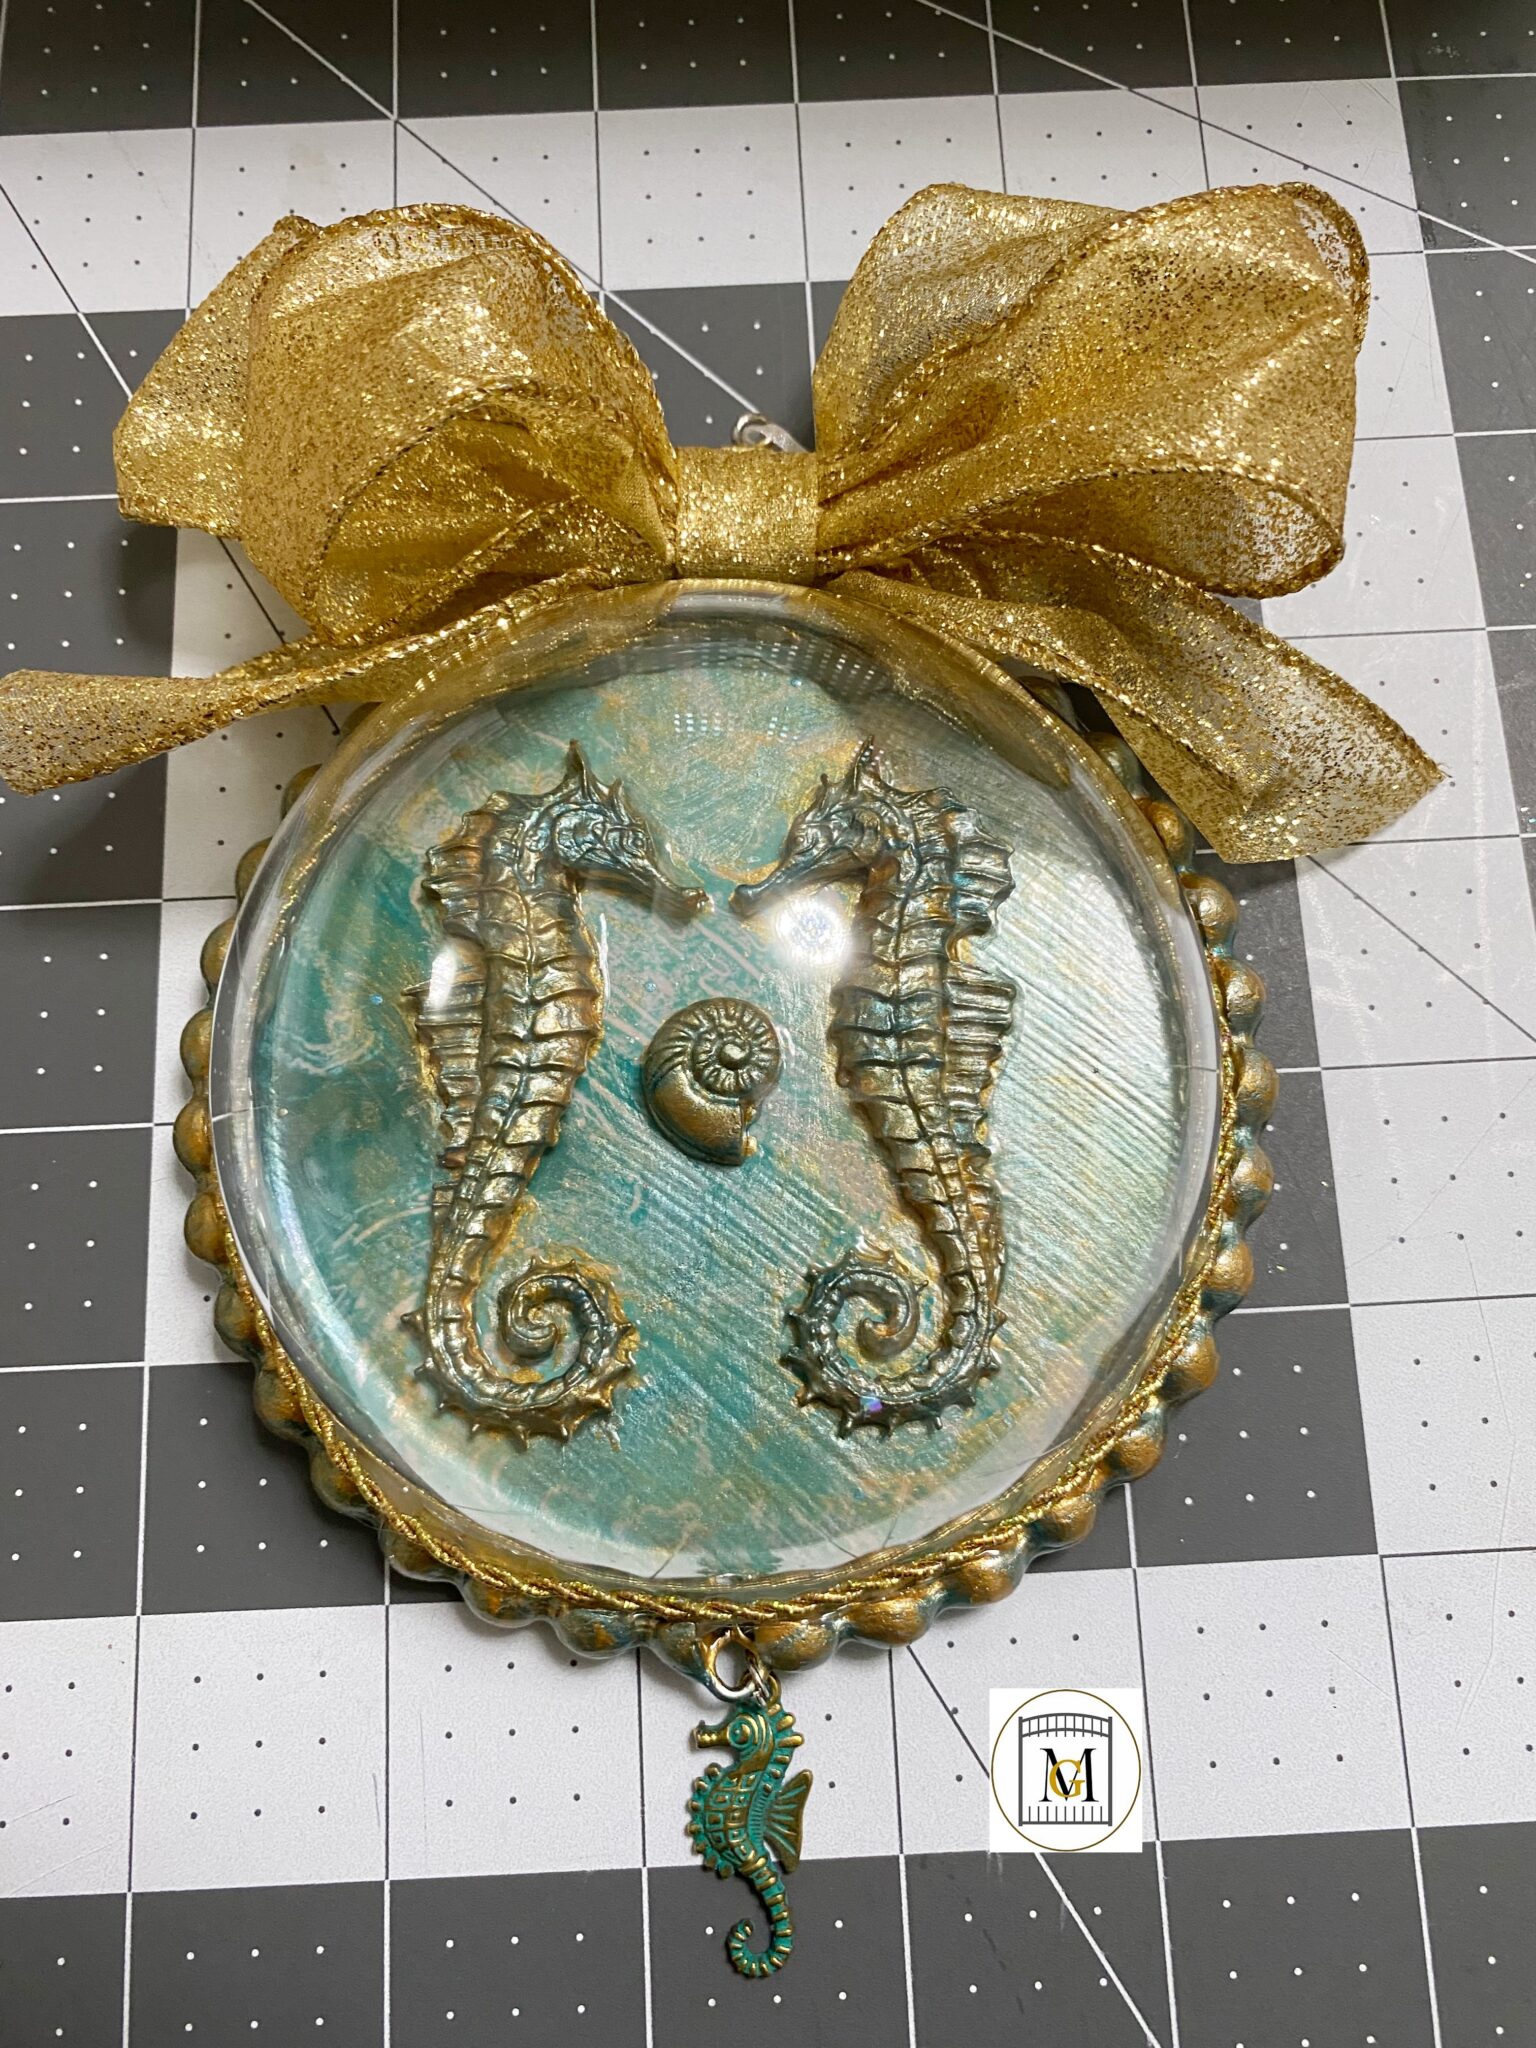
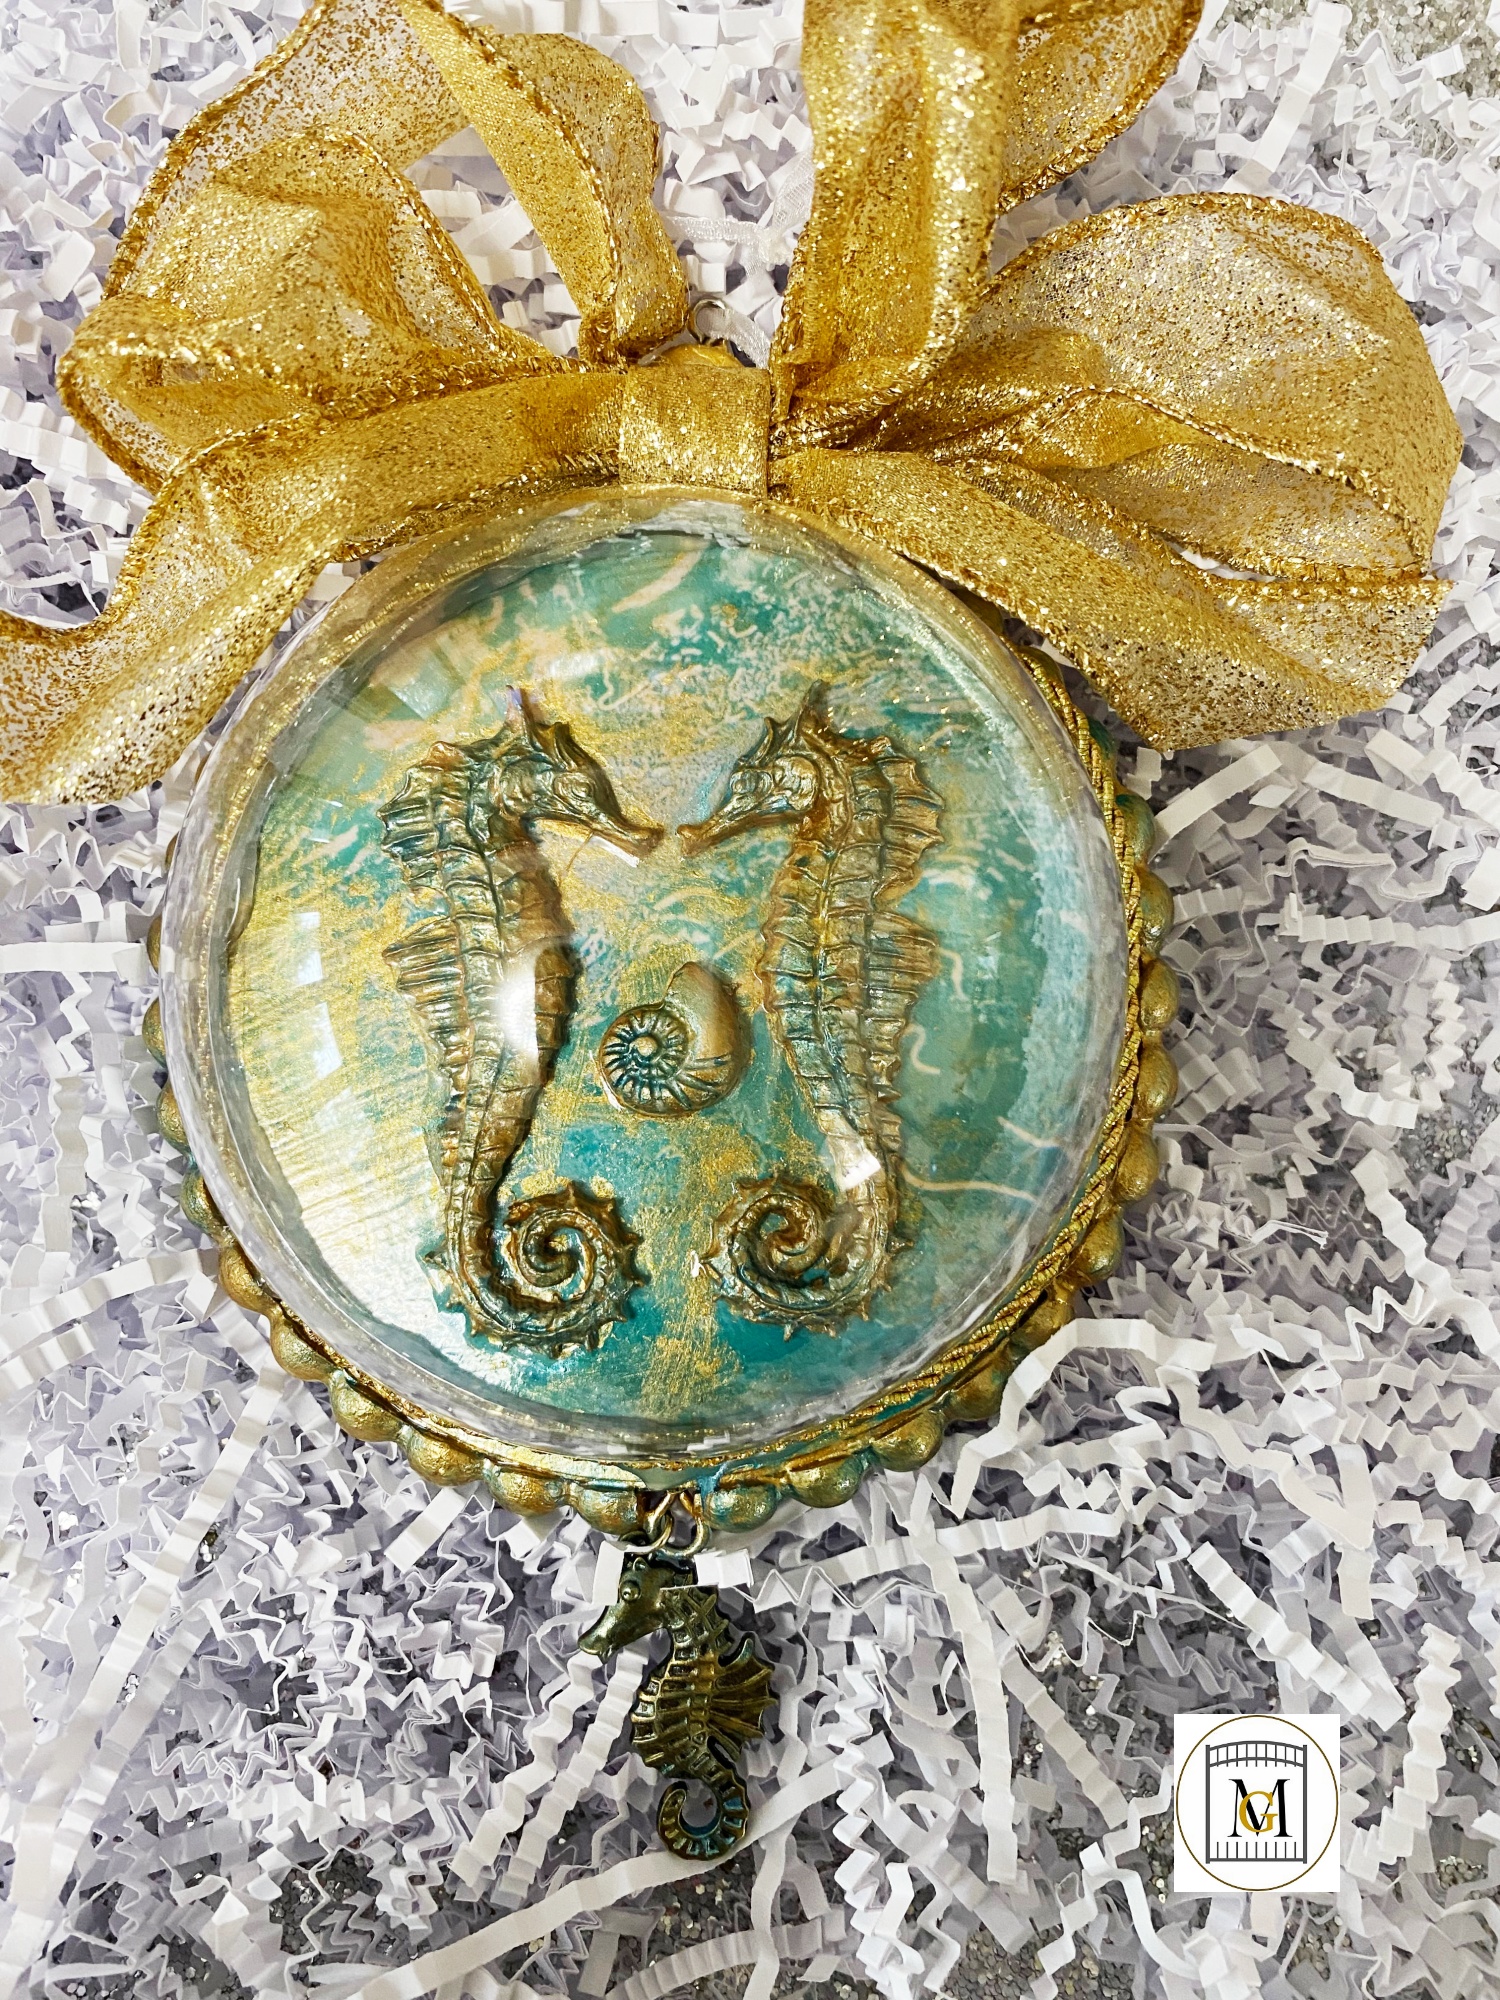
Half Bulb Ornament

To make these lovely half bulb ornaments takes time but the end result is just gorgeous. Making ornaments is one of my favorite things to do. However I realize there are people that just do not have the patience or time to make such a detailed ornament. So I decided to sell a few each year for the lucky ones that snatch them up. I typically make handmade ornaments to give as gifts to special people. I started making ornaments because it was so hard to find music ornaments and themed ornaments. So I decided to just make them myself. I would get so many positive comments and people would ask me to make them one or two. I did not decide to sell these until 2022.
When I started making ornaments, it was hard to find instructions that were truly step-by-step. For example, they did not show the type of air dry clay or explain how the clays differ. Also, every video I saw, never mentioned the drying times for each phase. For those that want to attempt making these, I will cover the complete process.
It is difficult to determine how long it takes to make a half bulb ornament like this because it is done in phases. For example, the time it takes for the clay to dry, paint to dry, sealer to dry, etc. I tend to work in groups of 10 at time to maximize my efforts. Another thing to consider when making these ornaments are the supplies needed. This can get expensive if you are not already a crafter. That is another reason I decided to sell a few that I make. So just visit my shop to see what I have available to own one of these rare ornaments. They are great as gifts or special addition to any tree.
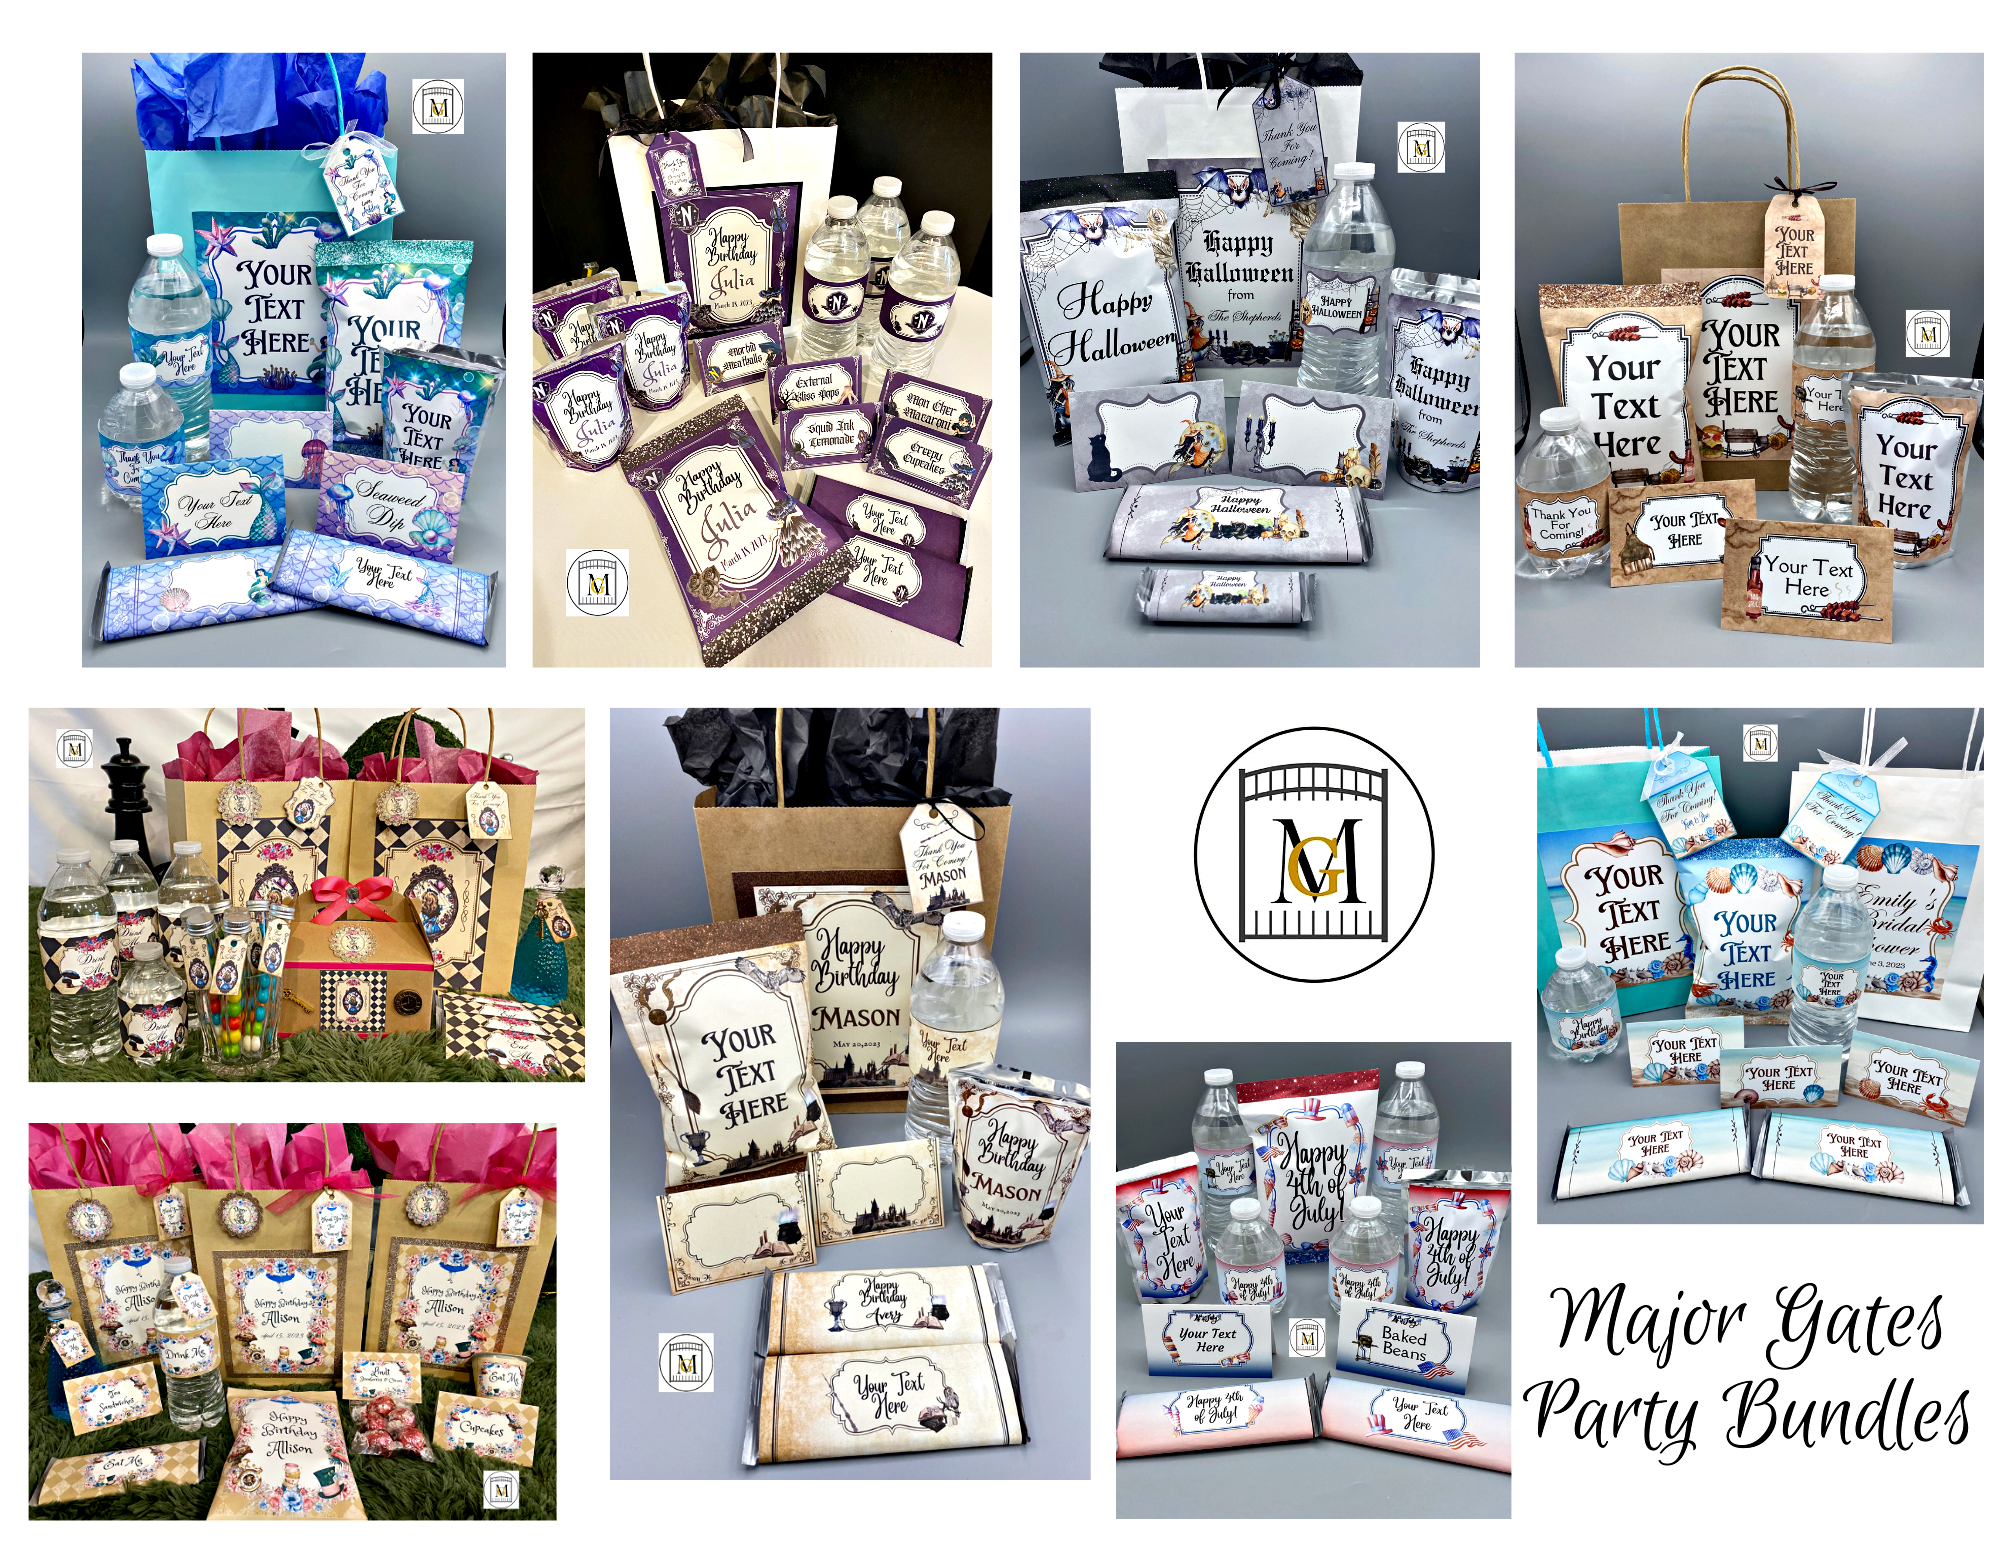
To see my available Party Label Bundle Downloads, click here: https://majorgates.com/product-category/party-bundles/
Don’t Forget To Follow Me On Pinterest!
For more ornament or other craft ideas, visit my DIY section here: https://majorgates.com/category/do-it-yourself/
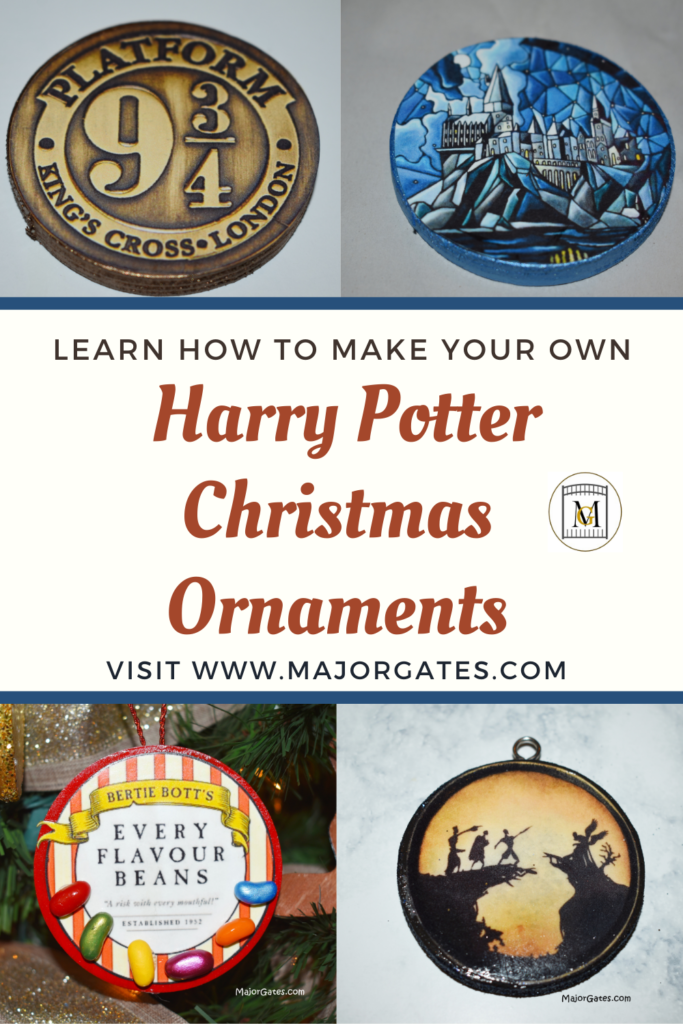
For another ornament idea, learn how to make my Harry Potter themed ornaments here: https://majorgates.com/do-it-yourself/diy-harry-potter-ornaments/
To see my available 2-Liter/Wine Bottle Party Label Downloads, click here: https://majorgates.com/product-category/2-liter-wine-bottle-labels/

Supplies
If you are new to crafting, the supplies list can be quite long. But if you are an existing crafter, you probably have most of these supplies already. It may be more economical to just purchase one I have made if you just want a custom handmade half bulb ornament to enjoy or give as a gift.
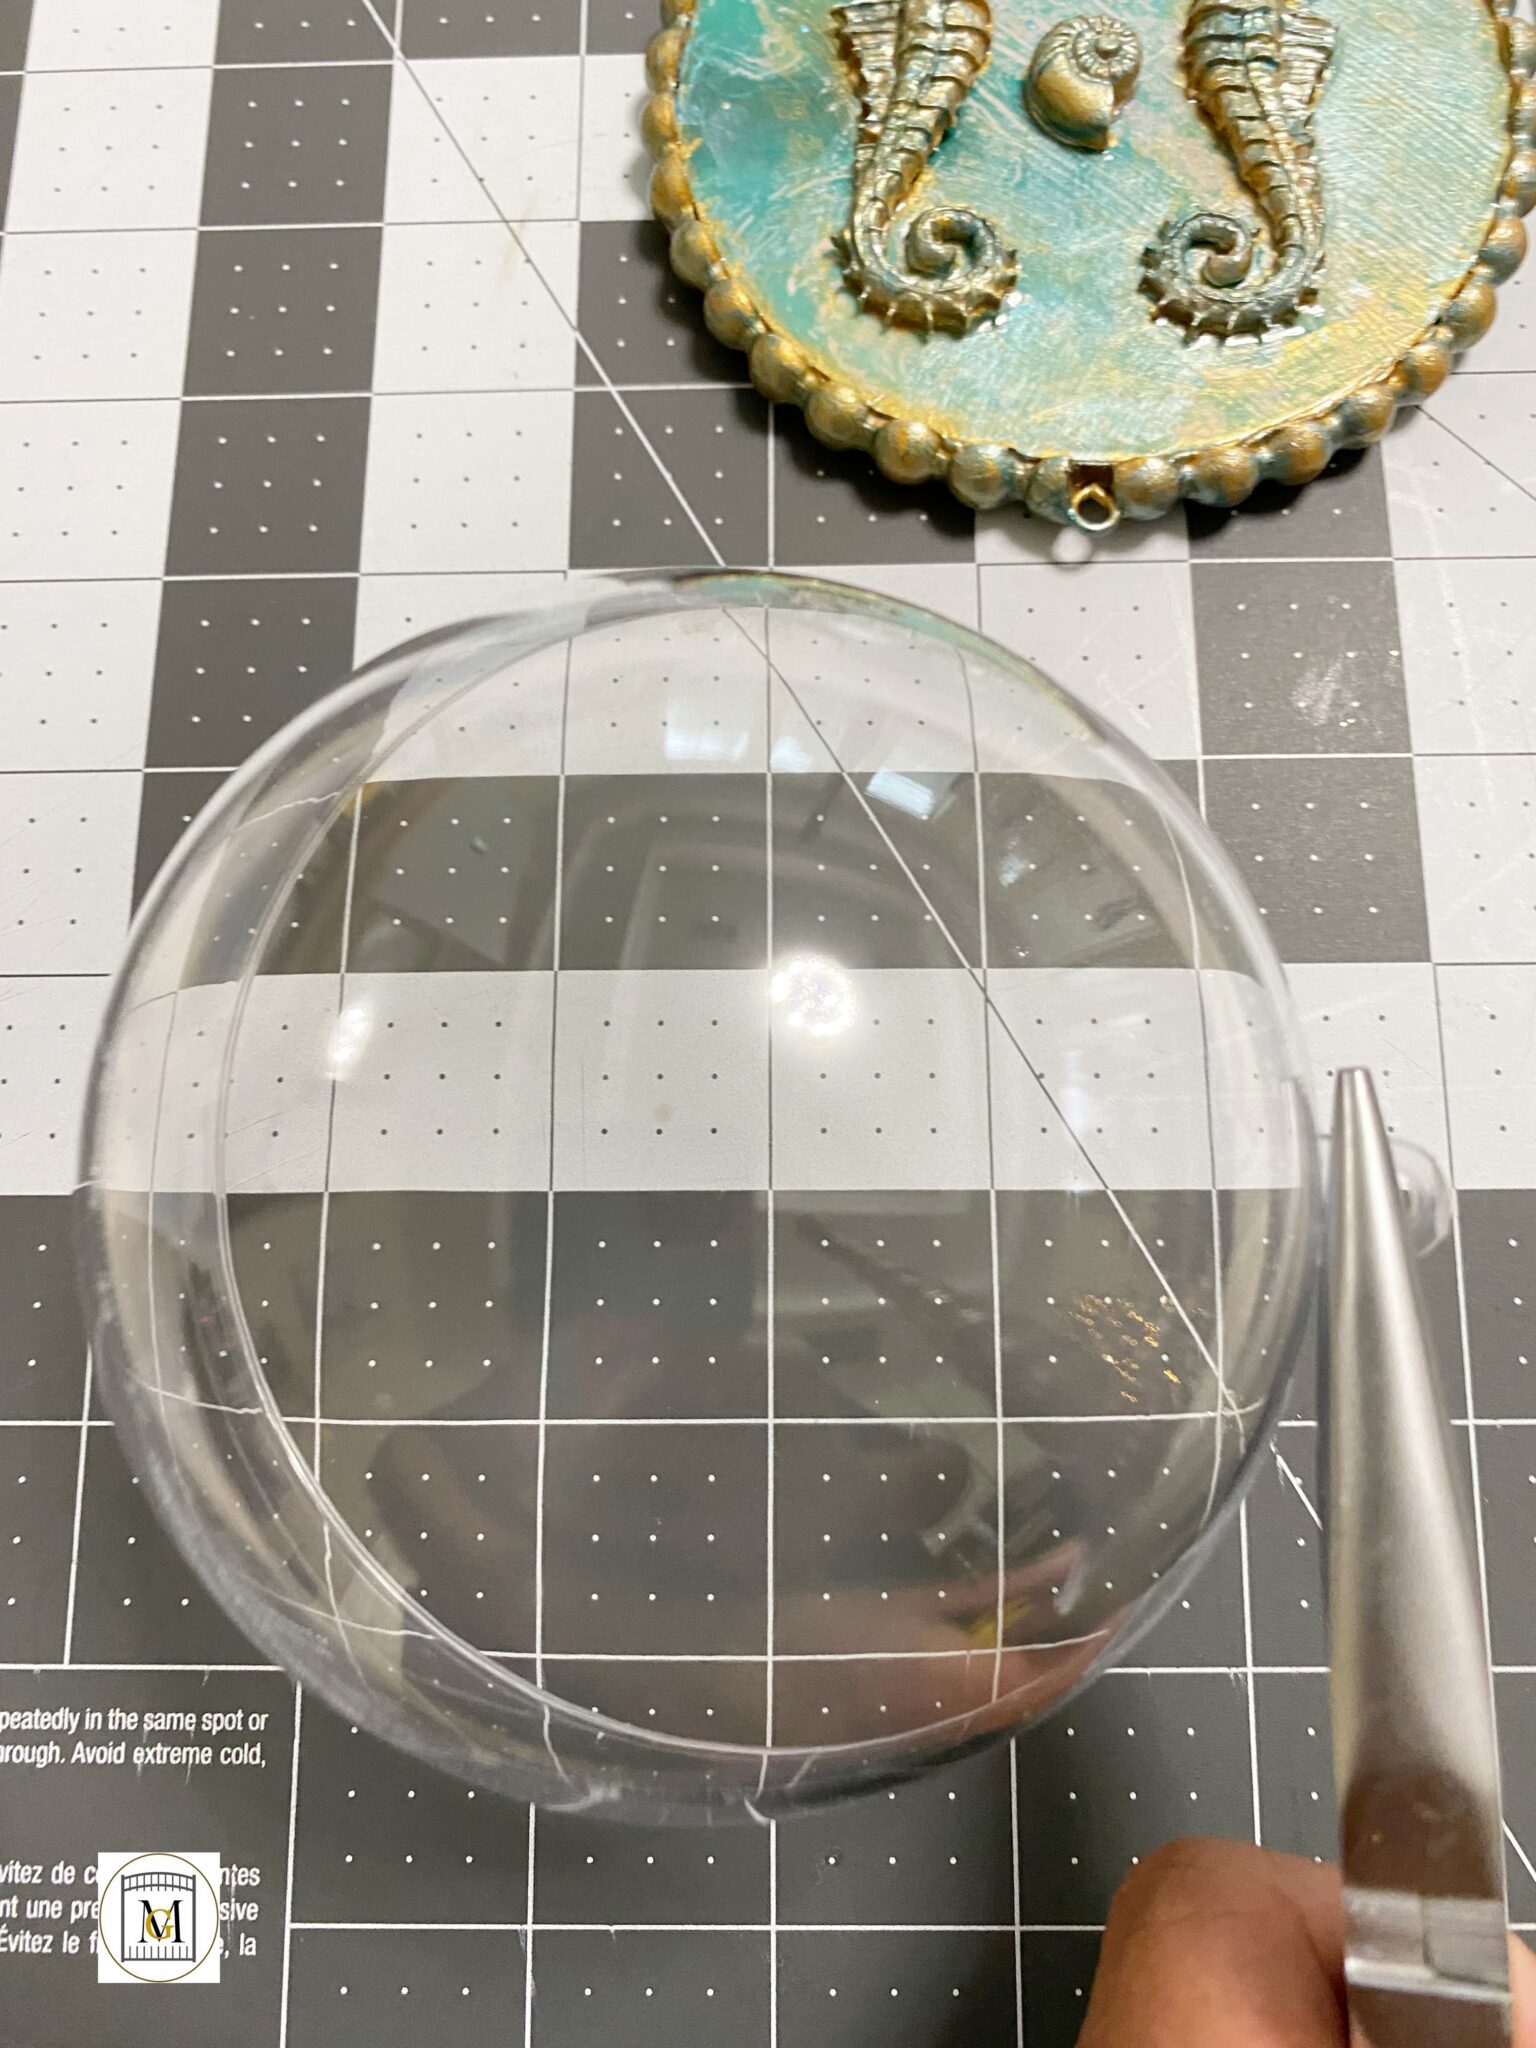
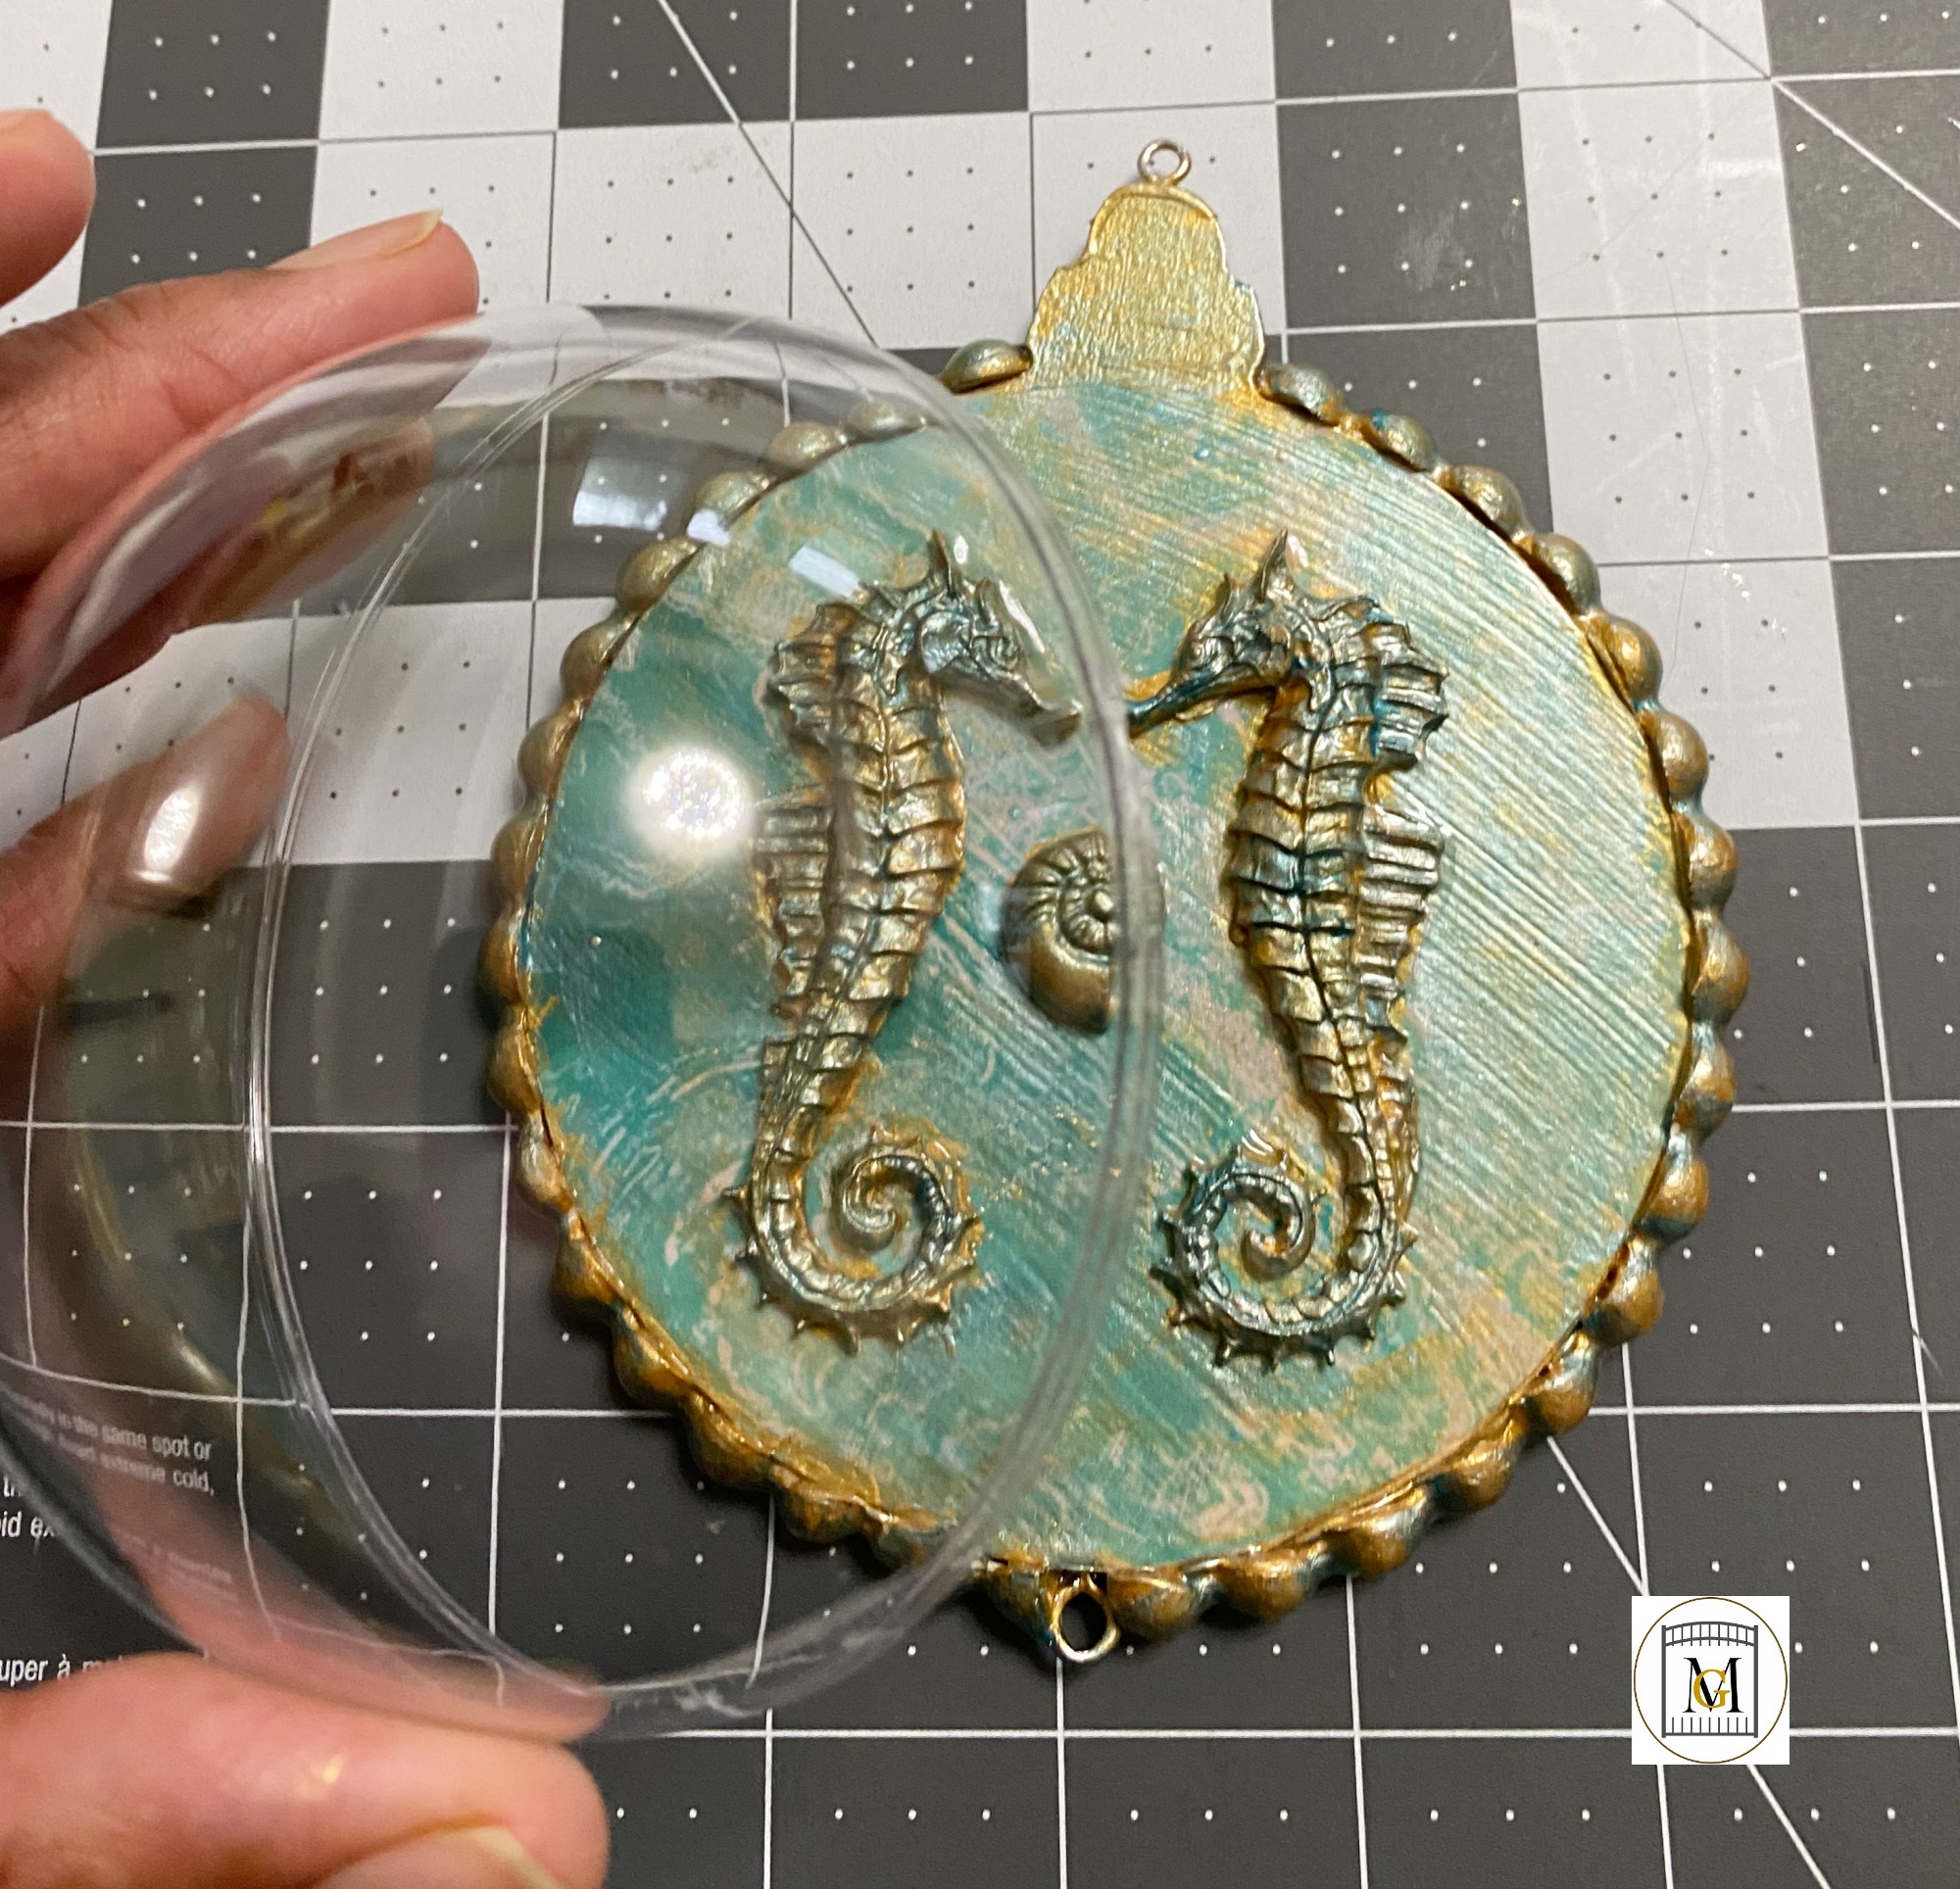
- 4 inch fillable clear plastic ornaments – typically sold in packs of 12 or 20
- 4 inch wood bulb ornament (about a 1/2 cm thick). You can also get the regular 1/8in thick wood ornaments but you will be unable to screw in the bottom or top. Just place the charm on the bow. I get my wood bulbs in large bulk.
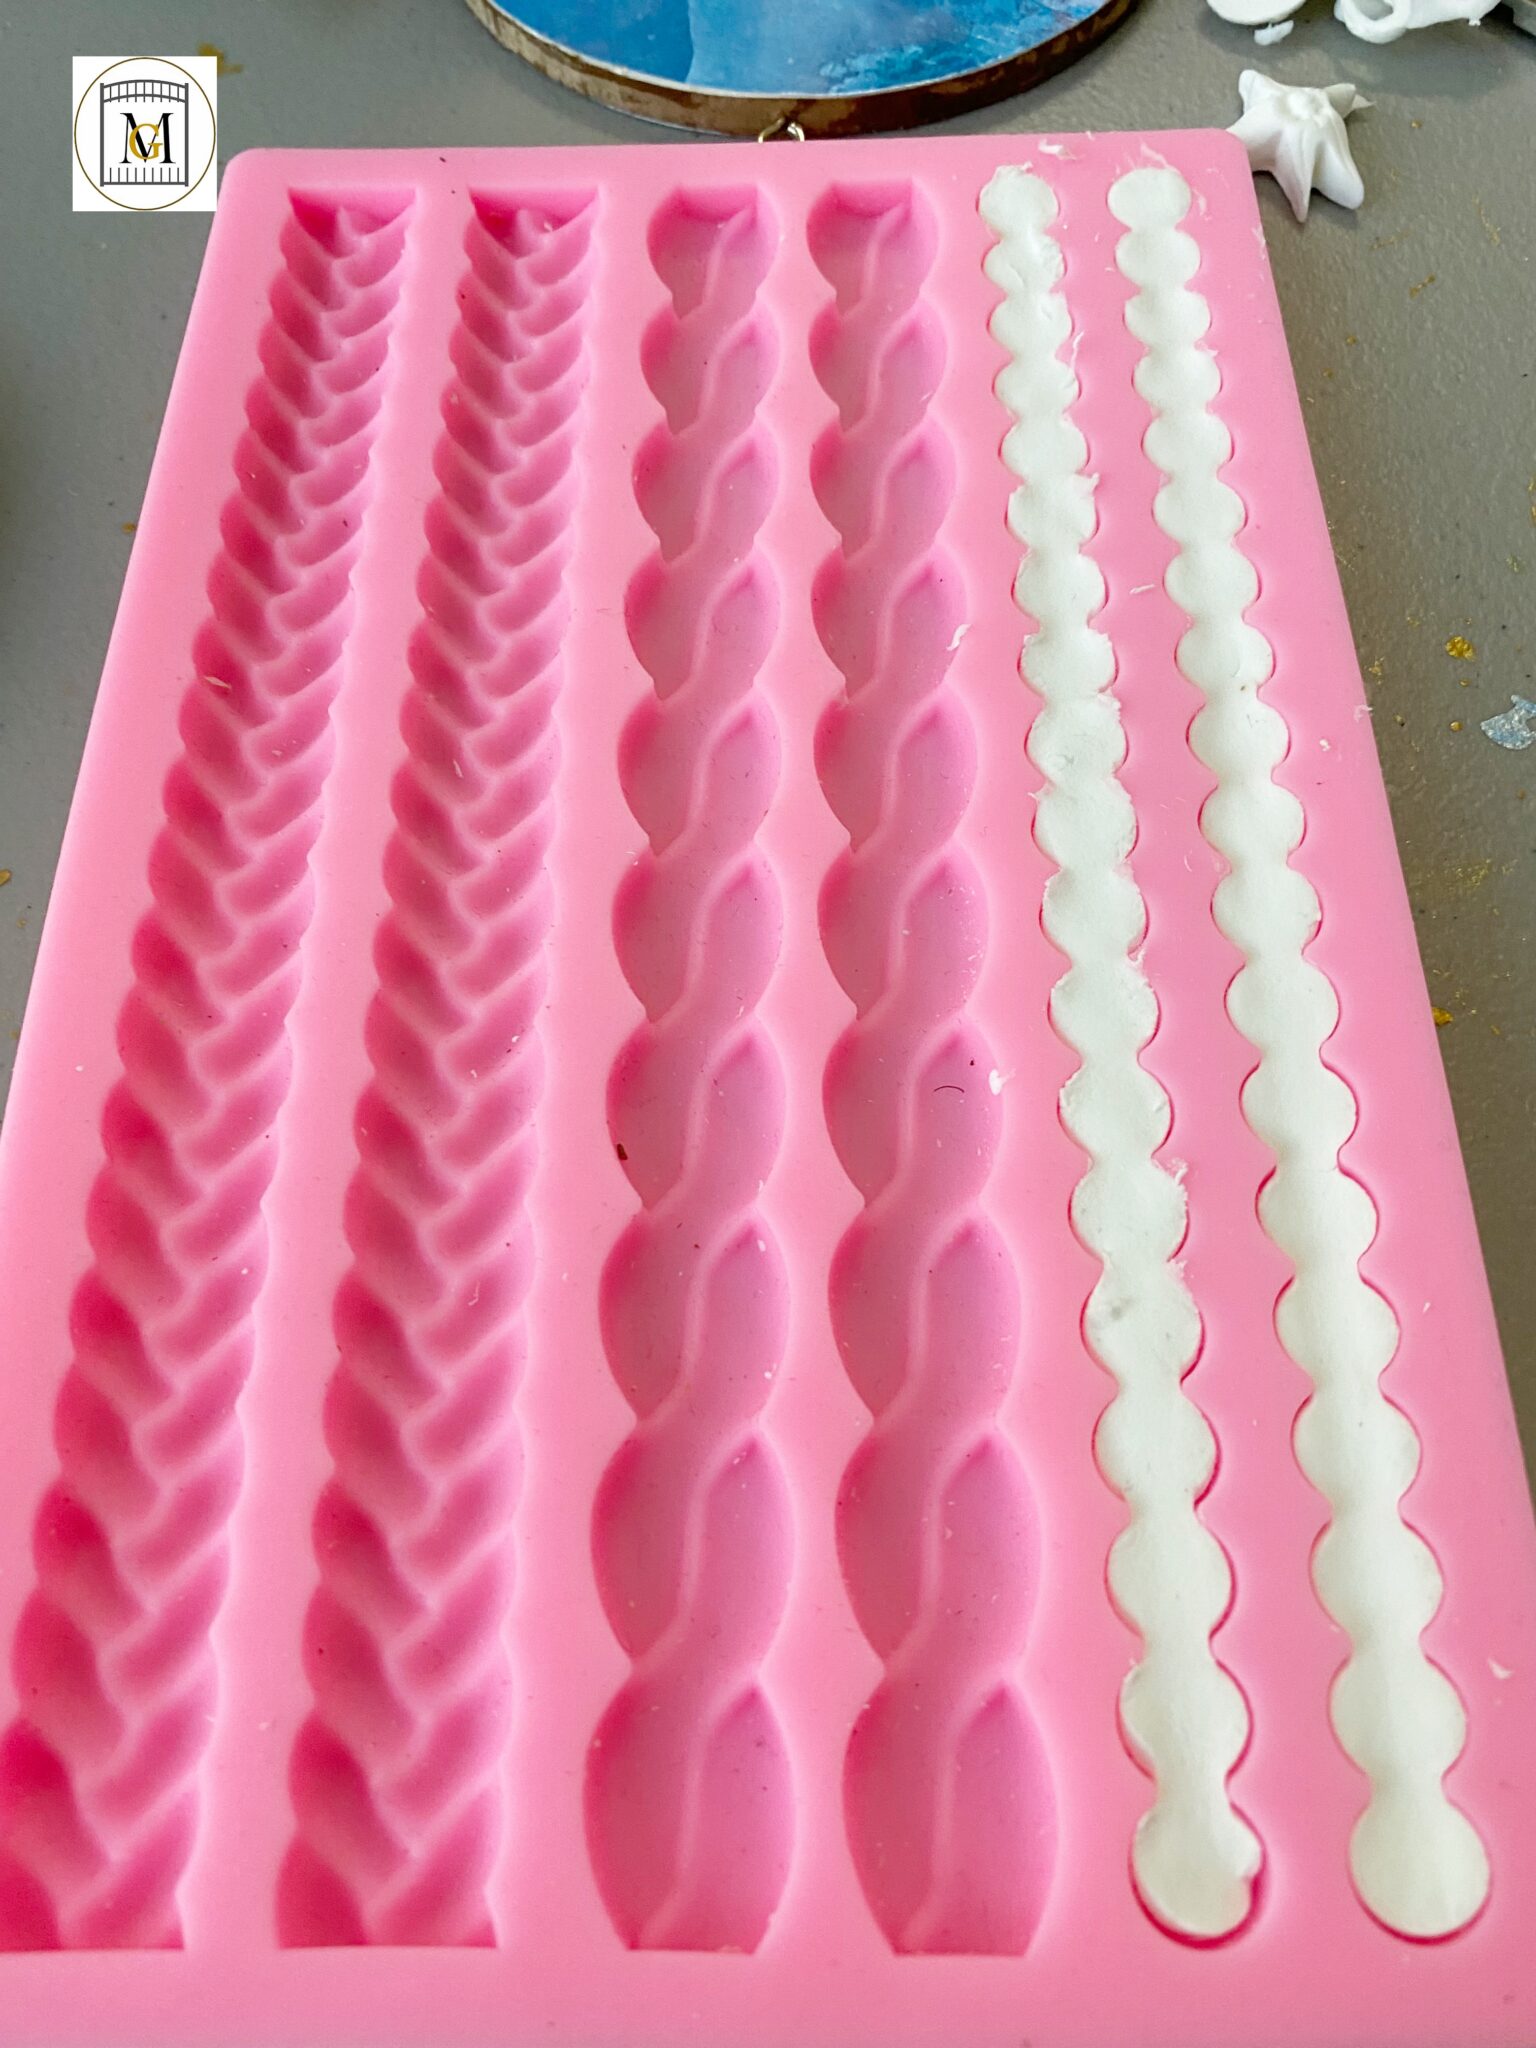
- Small silicone molds in the theme of choice. I offer a few molds in my shop that I can validate the quality, but Amazon also has a wide variety of choices. Make sure the design of the mold is smaller than 4 inches so that it fits on the bulb.
- Card stock or scrapbook paper
- 2mm (1/16in) gold cord ribbon
- 1 1/2 wired gold ribbon (or the ribbon color of your choice but it should be wired)
- Charms of your choice
- .12 x 0.2 in (3mm x 5mm) Eyelet screws
- 0.23 in (6mm) jump rings
- 1/8 in (0.32cm) Organza ribbon in the color of your choice (I like white)
- DecoArt Triple Thick Gloss Glaze – you can also use Mod Podge One Coat Super Gloss
- Gloss Mod Podge and Tacky Glue
- Dual temperature mini glue gun with glue sticks
- Needle Nose pliers
- Craft tweezers
- Scissors – regular and fine sewing
- Paint brushes and paint tray – make sure the brush set has a fan brush is included
- Acrylic paints – I mostly use metallics and enamels because the color and sheen is better. Get only 1 bottle for the colors that you want. I recommend getting a set of paints so that you can play around and mix and match.
- 1 container of baby wipes
- Paper towels
- Craft mat, place mat or something to work on that the ornament won’t stick to while working and drying.
To see my available 2-liter/wine and apothecary labels, click here: https://majorgates.com/product-category/potion-apothecary-labels/

Directions For Half Bulb Ornament
- Start by cutting out the card stock circles that will cover the wood bulb ornament.
- Next, push the clay into the molds and allow to dry enough that it is bendable and not all the way dry. Depending on the air dry clay this can be anywhere from 1-8 hours. Once you take it out of the mold, it will continue to harden.

- Then apply the card stock circle to the wood bulb ornament with Mod Podge. Also, paint on Mod Podge over the card stock and allow to dry for 2 hours or until dry.
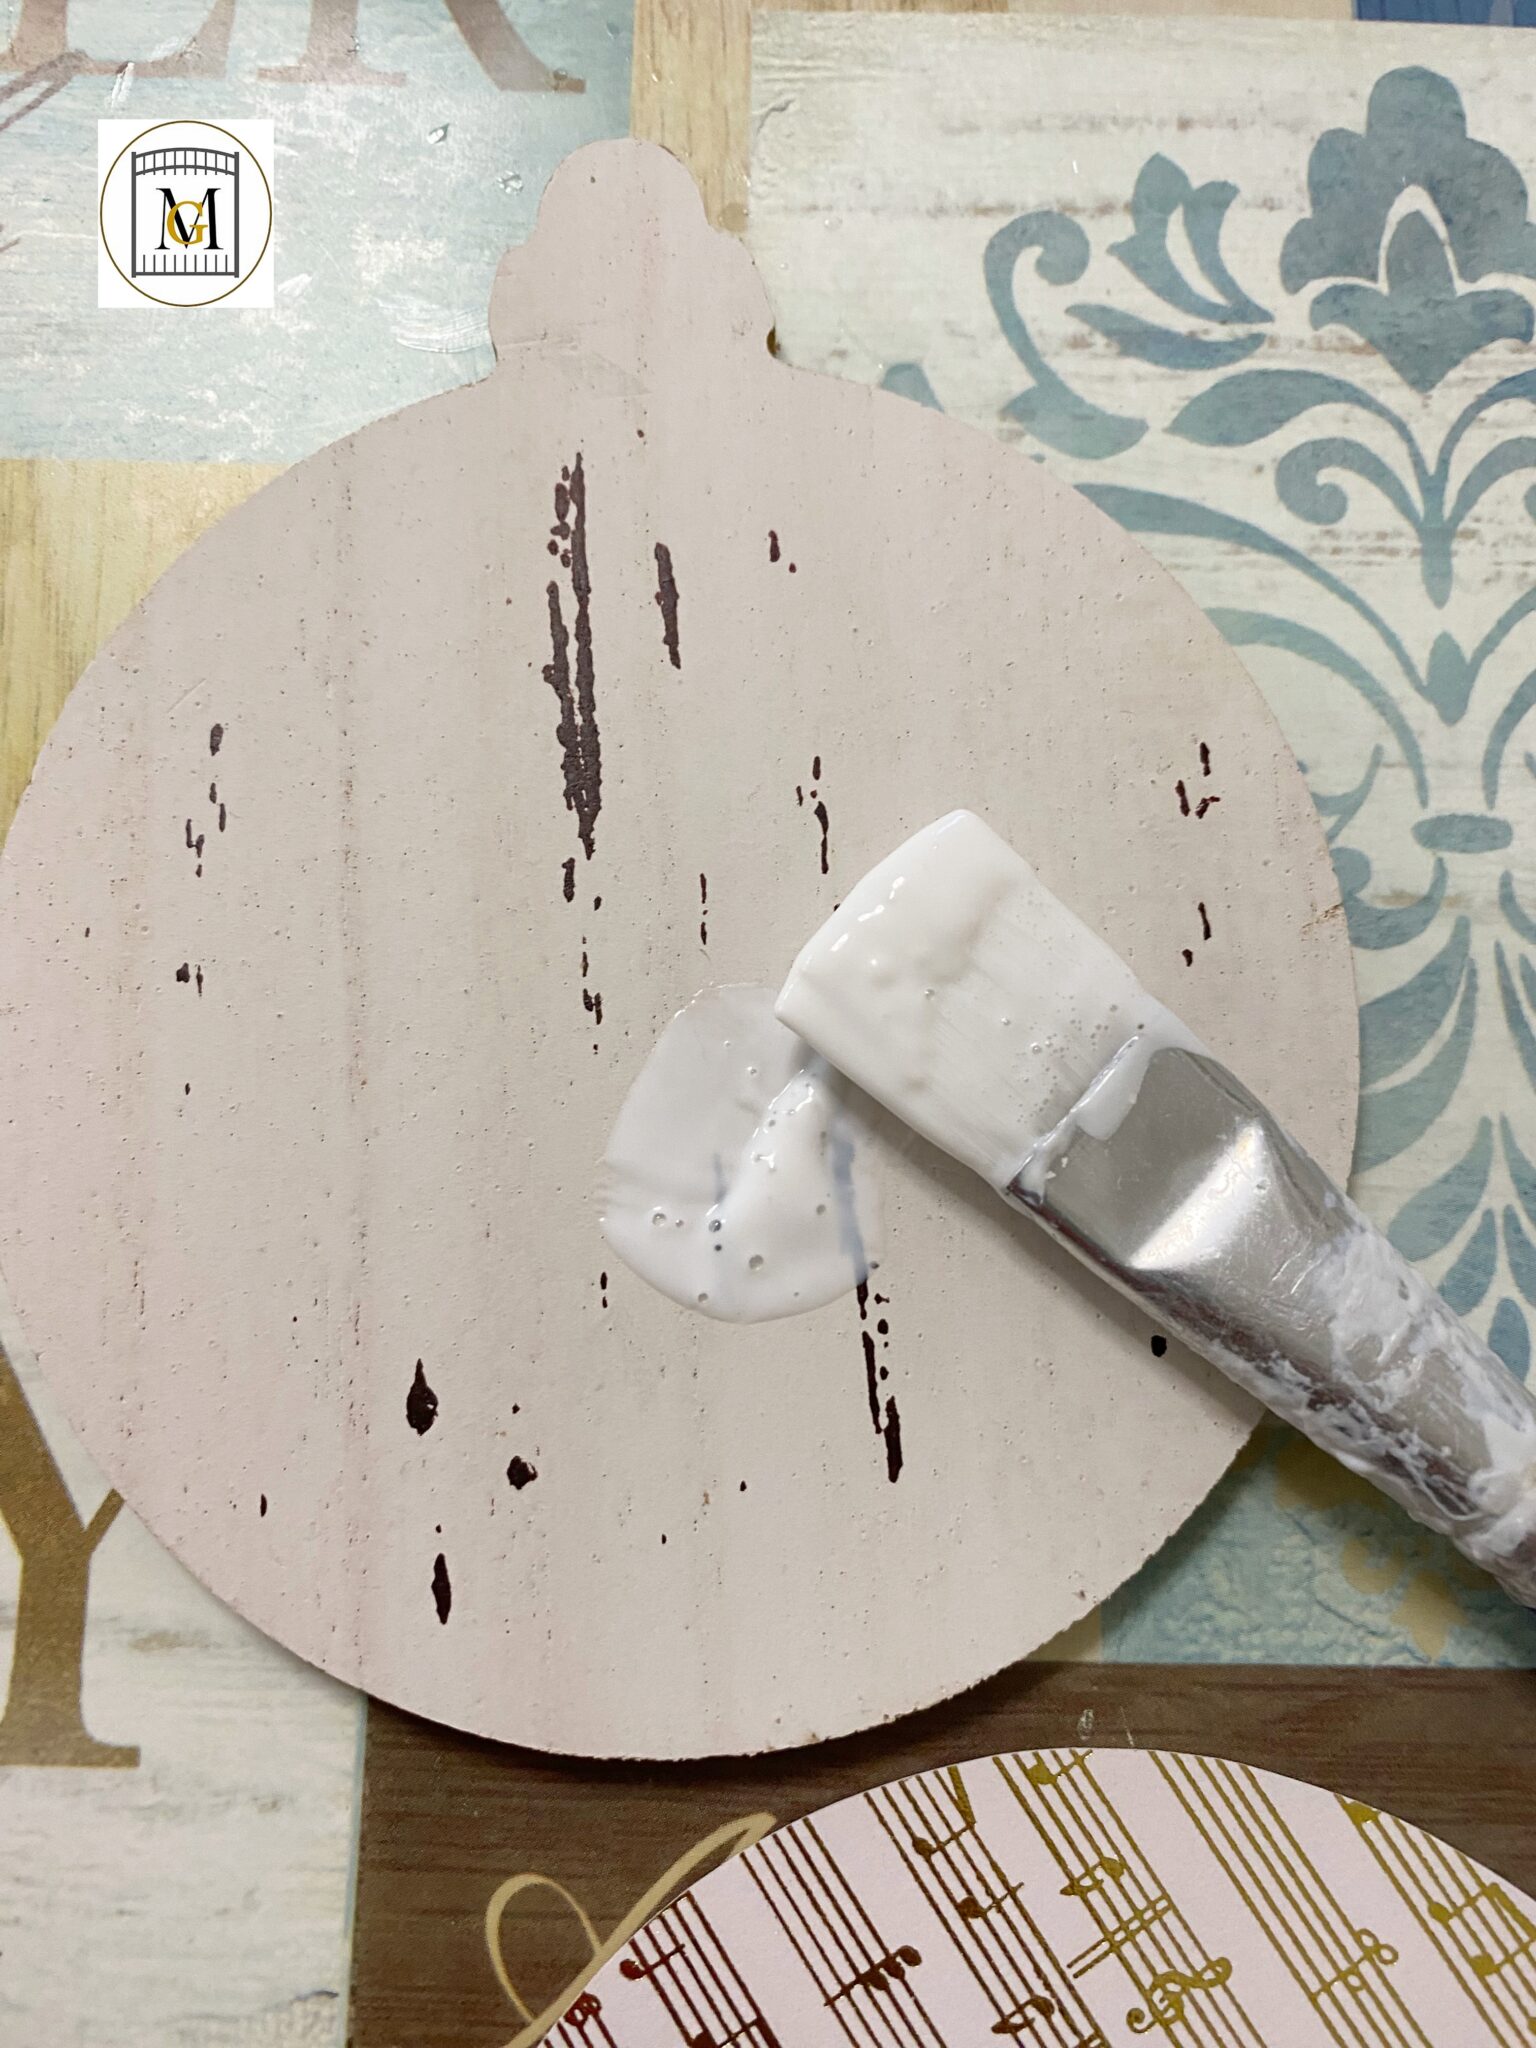
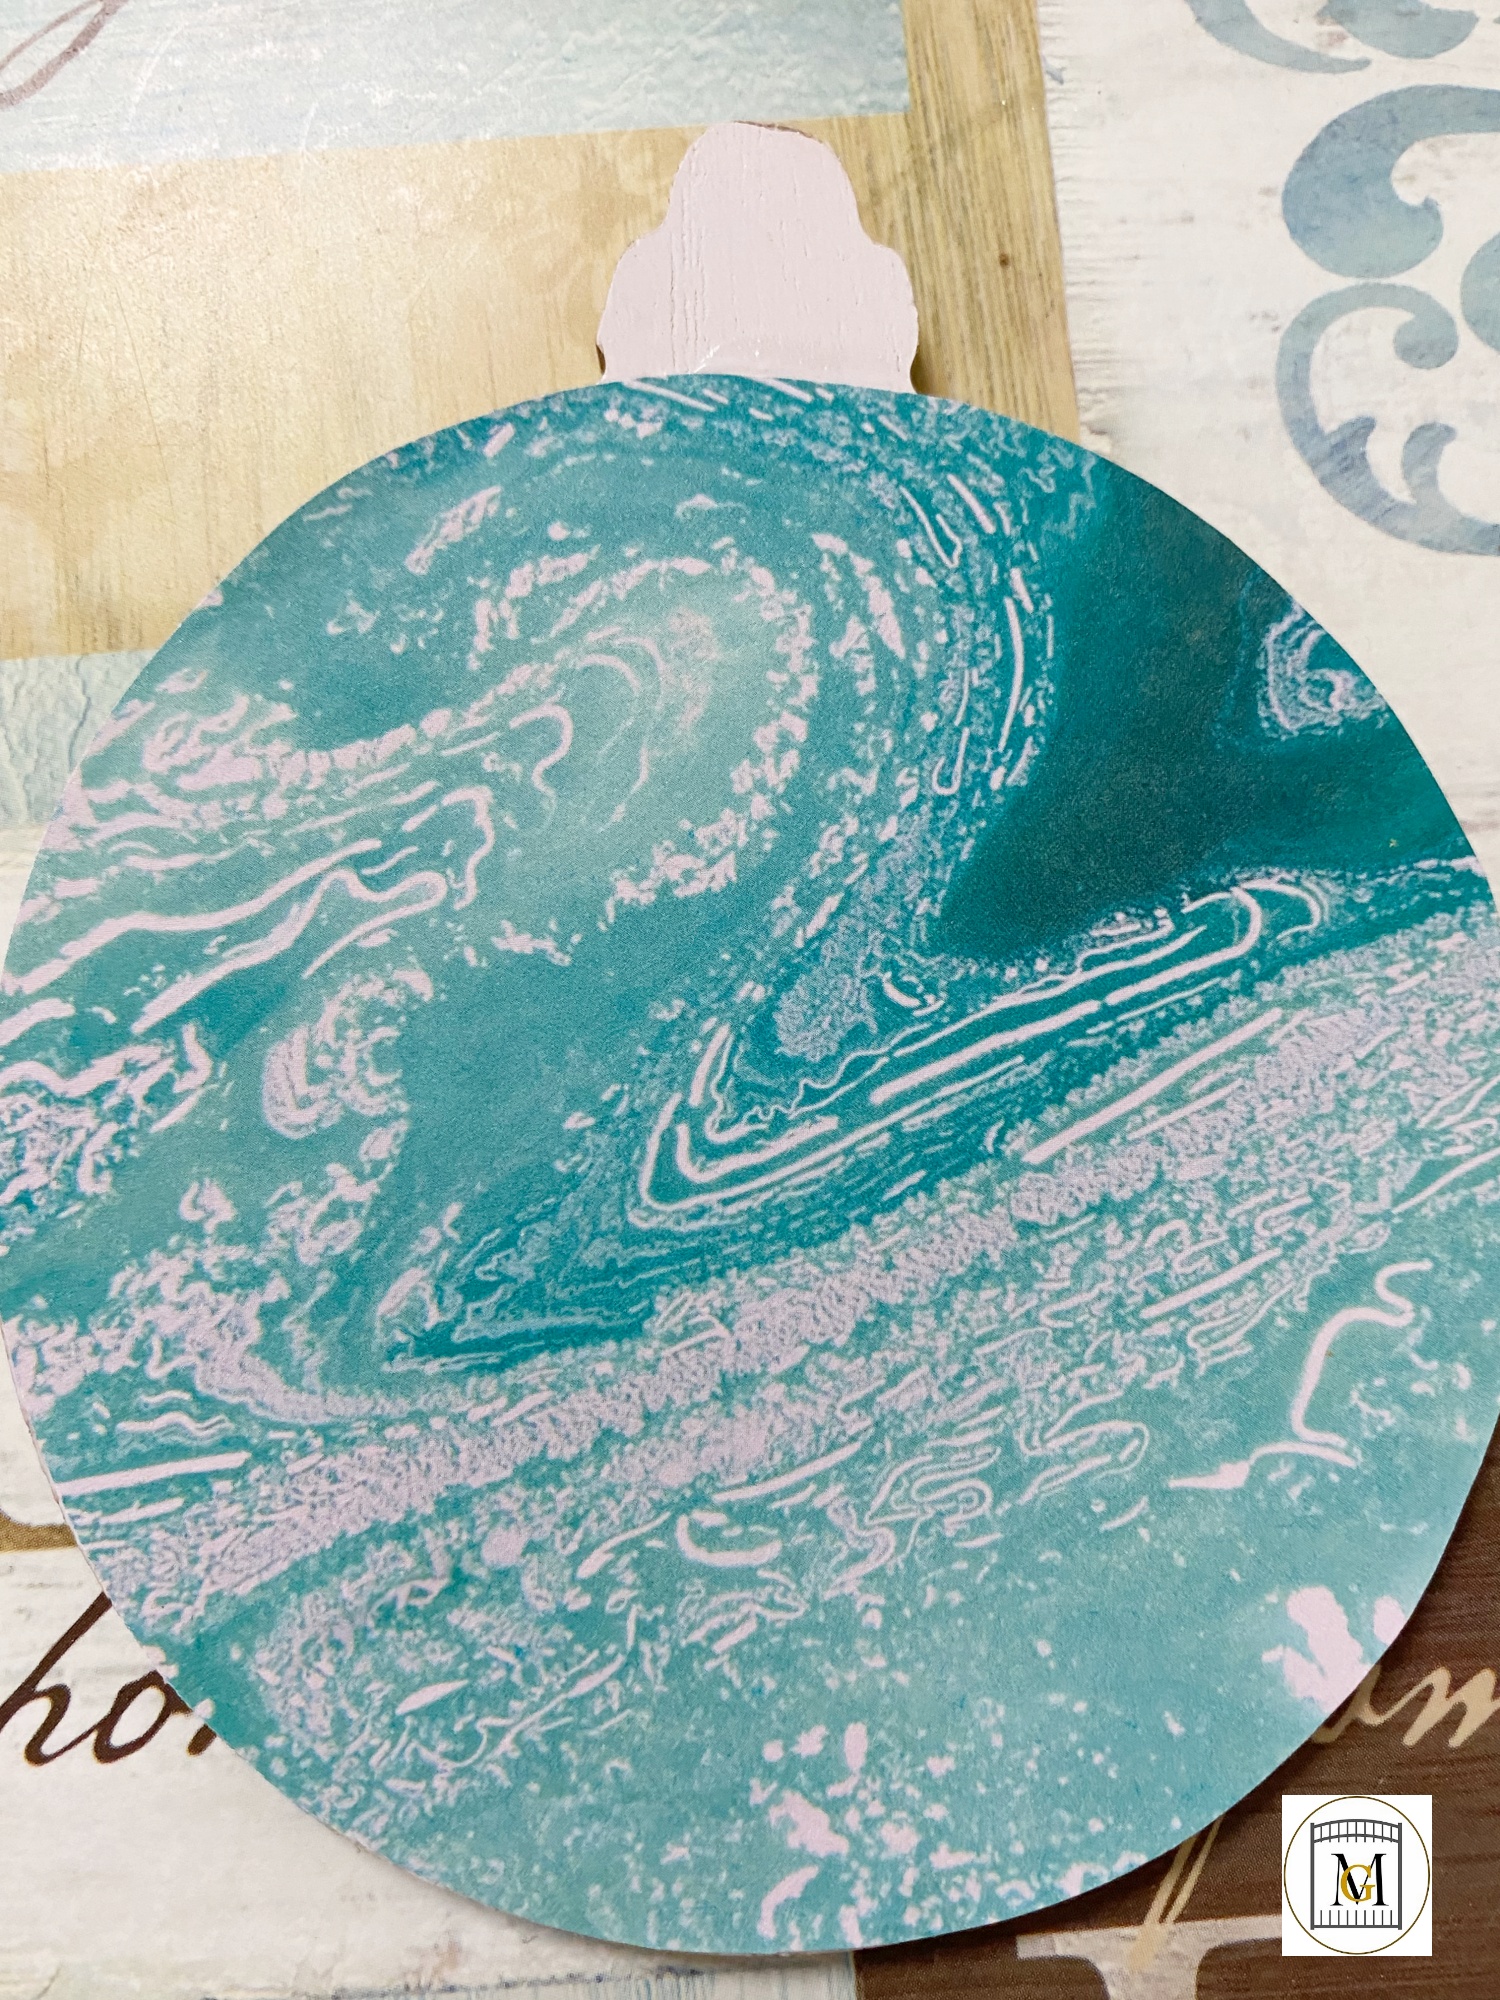
- Now, turn over the ornament and apply the back side card stock circle to the wood bulb ornament with Mod Podge. Then, paint on Mod Podge over the card stock and allow to dry for another 2 hours or until dry.
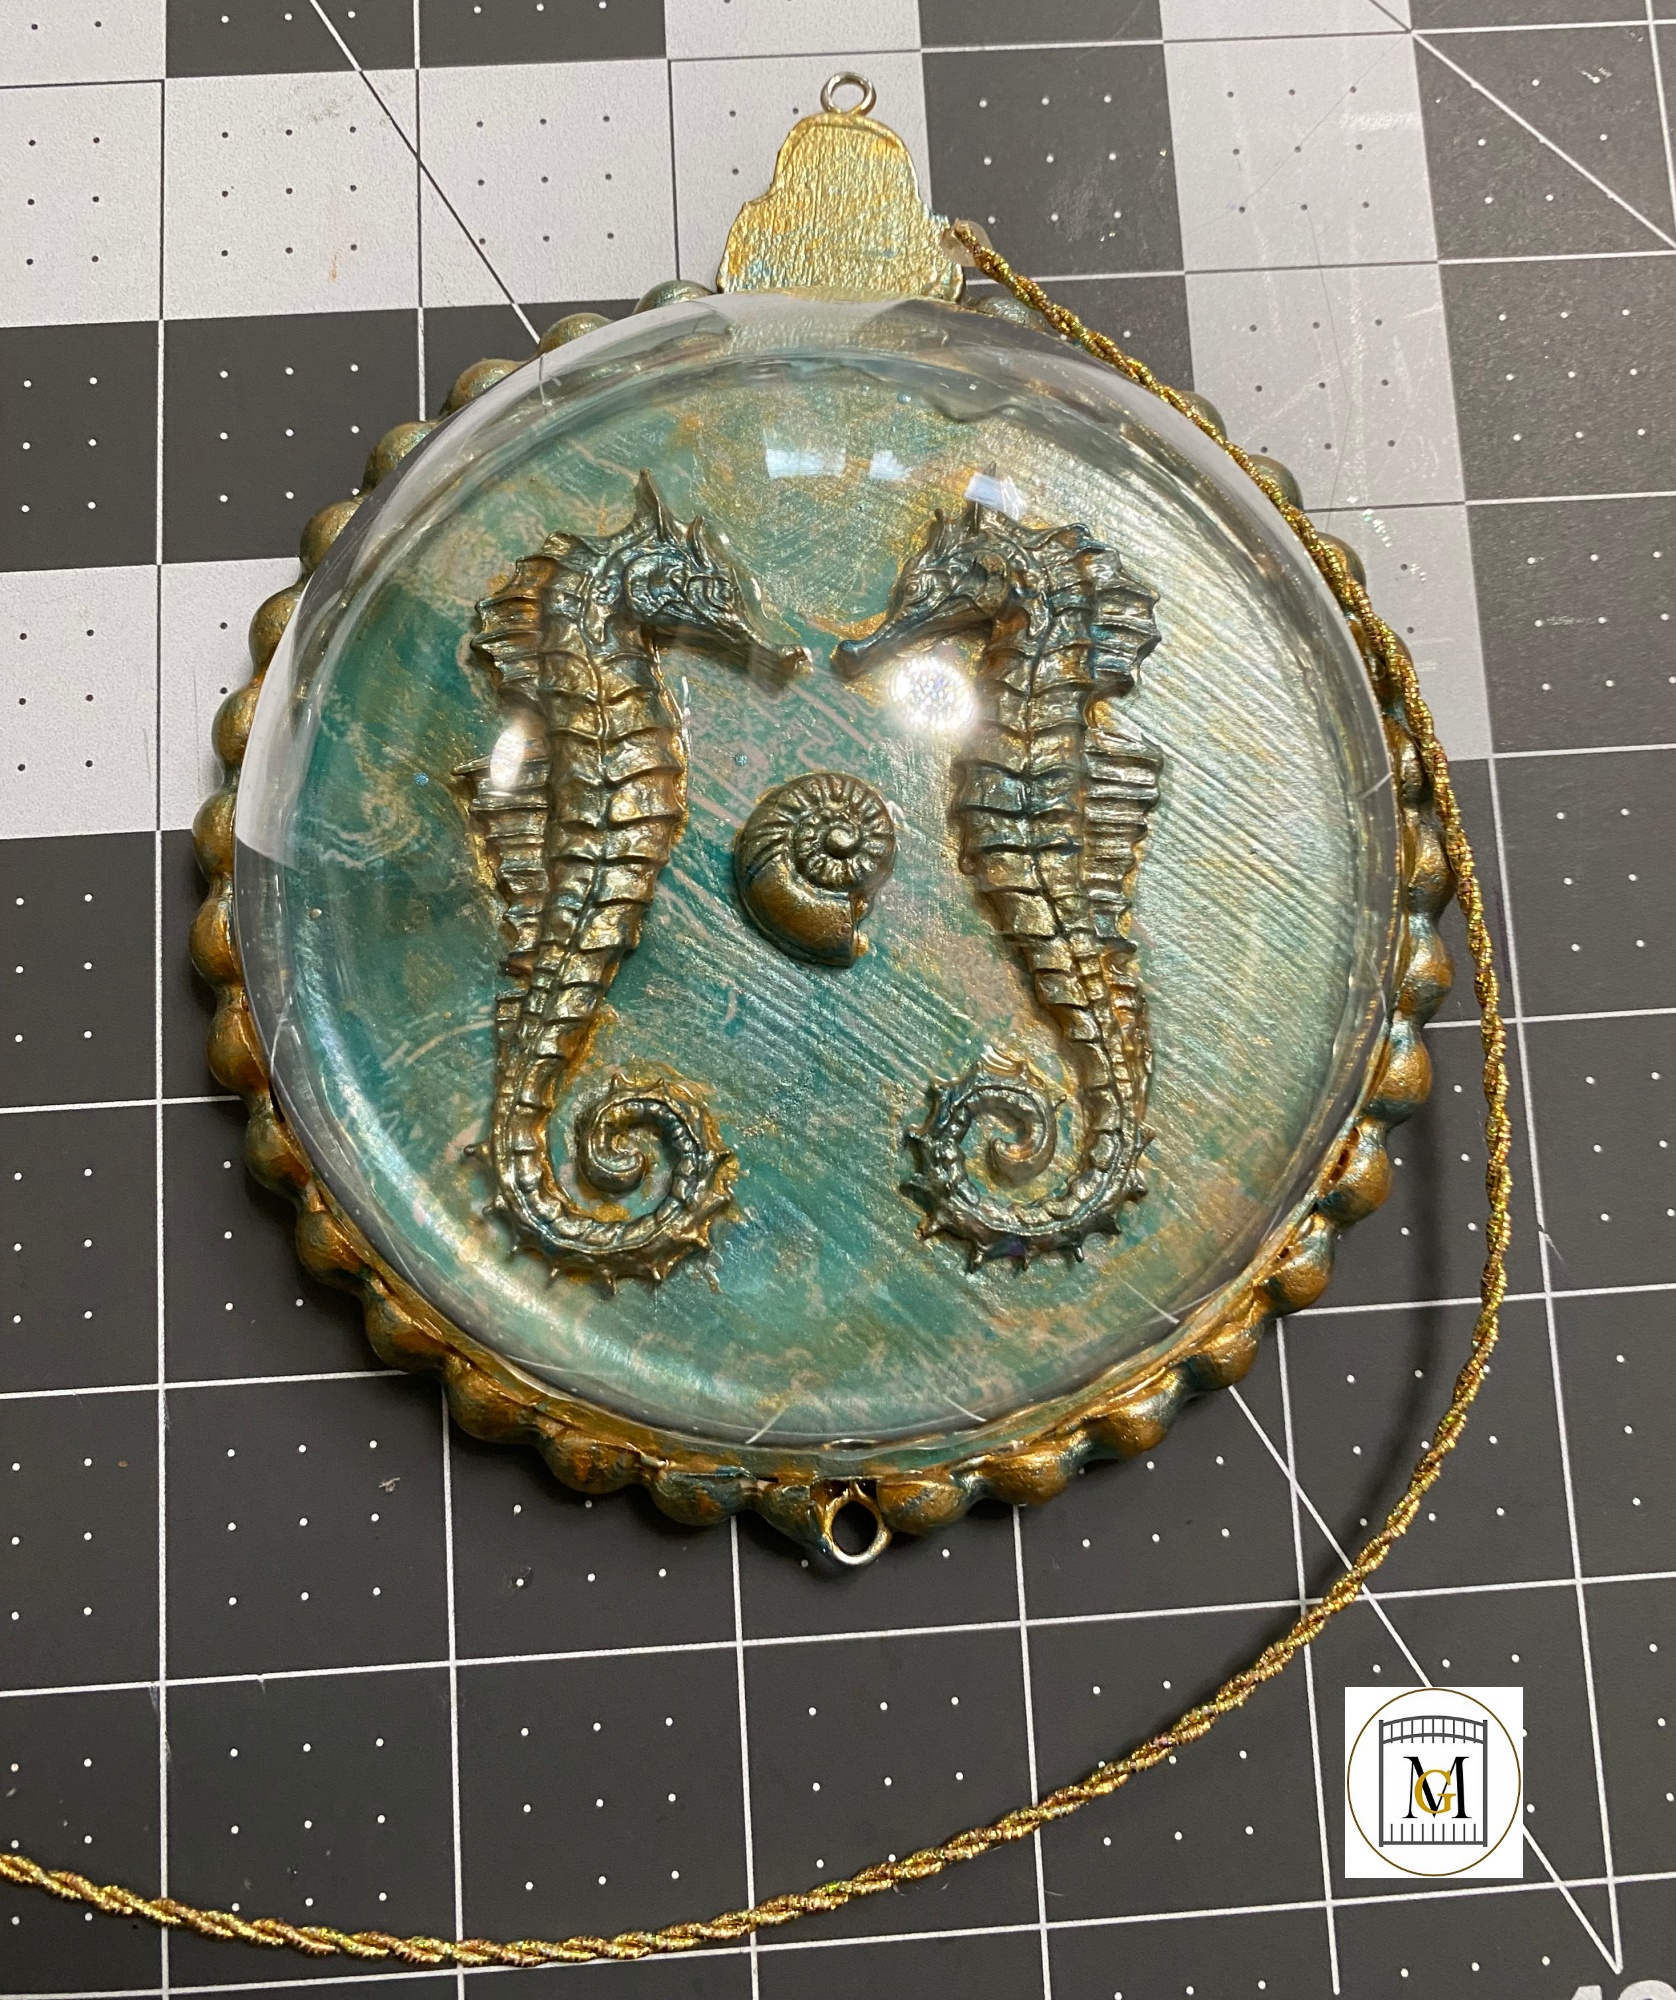
- Next, apply the main clay embellishments.
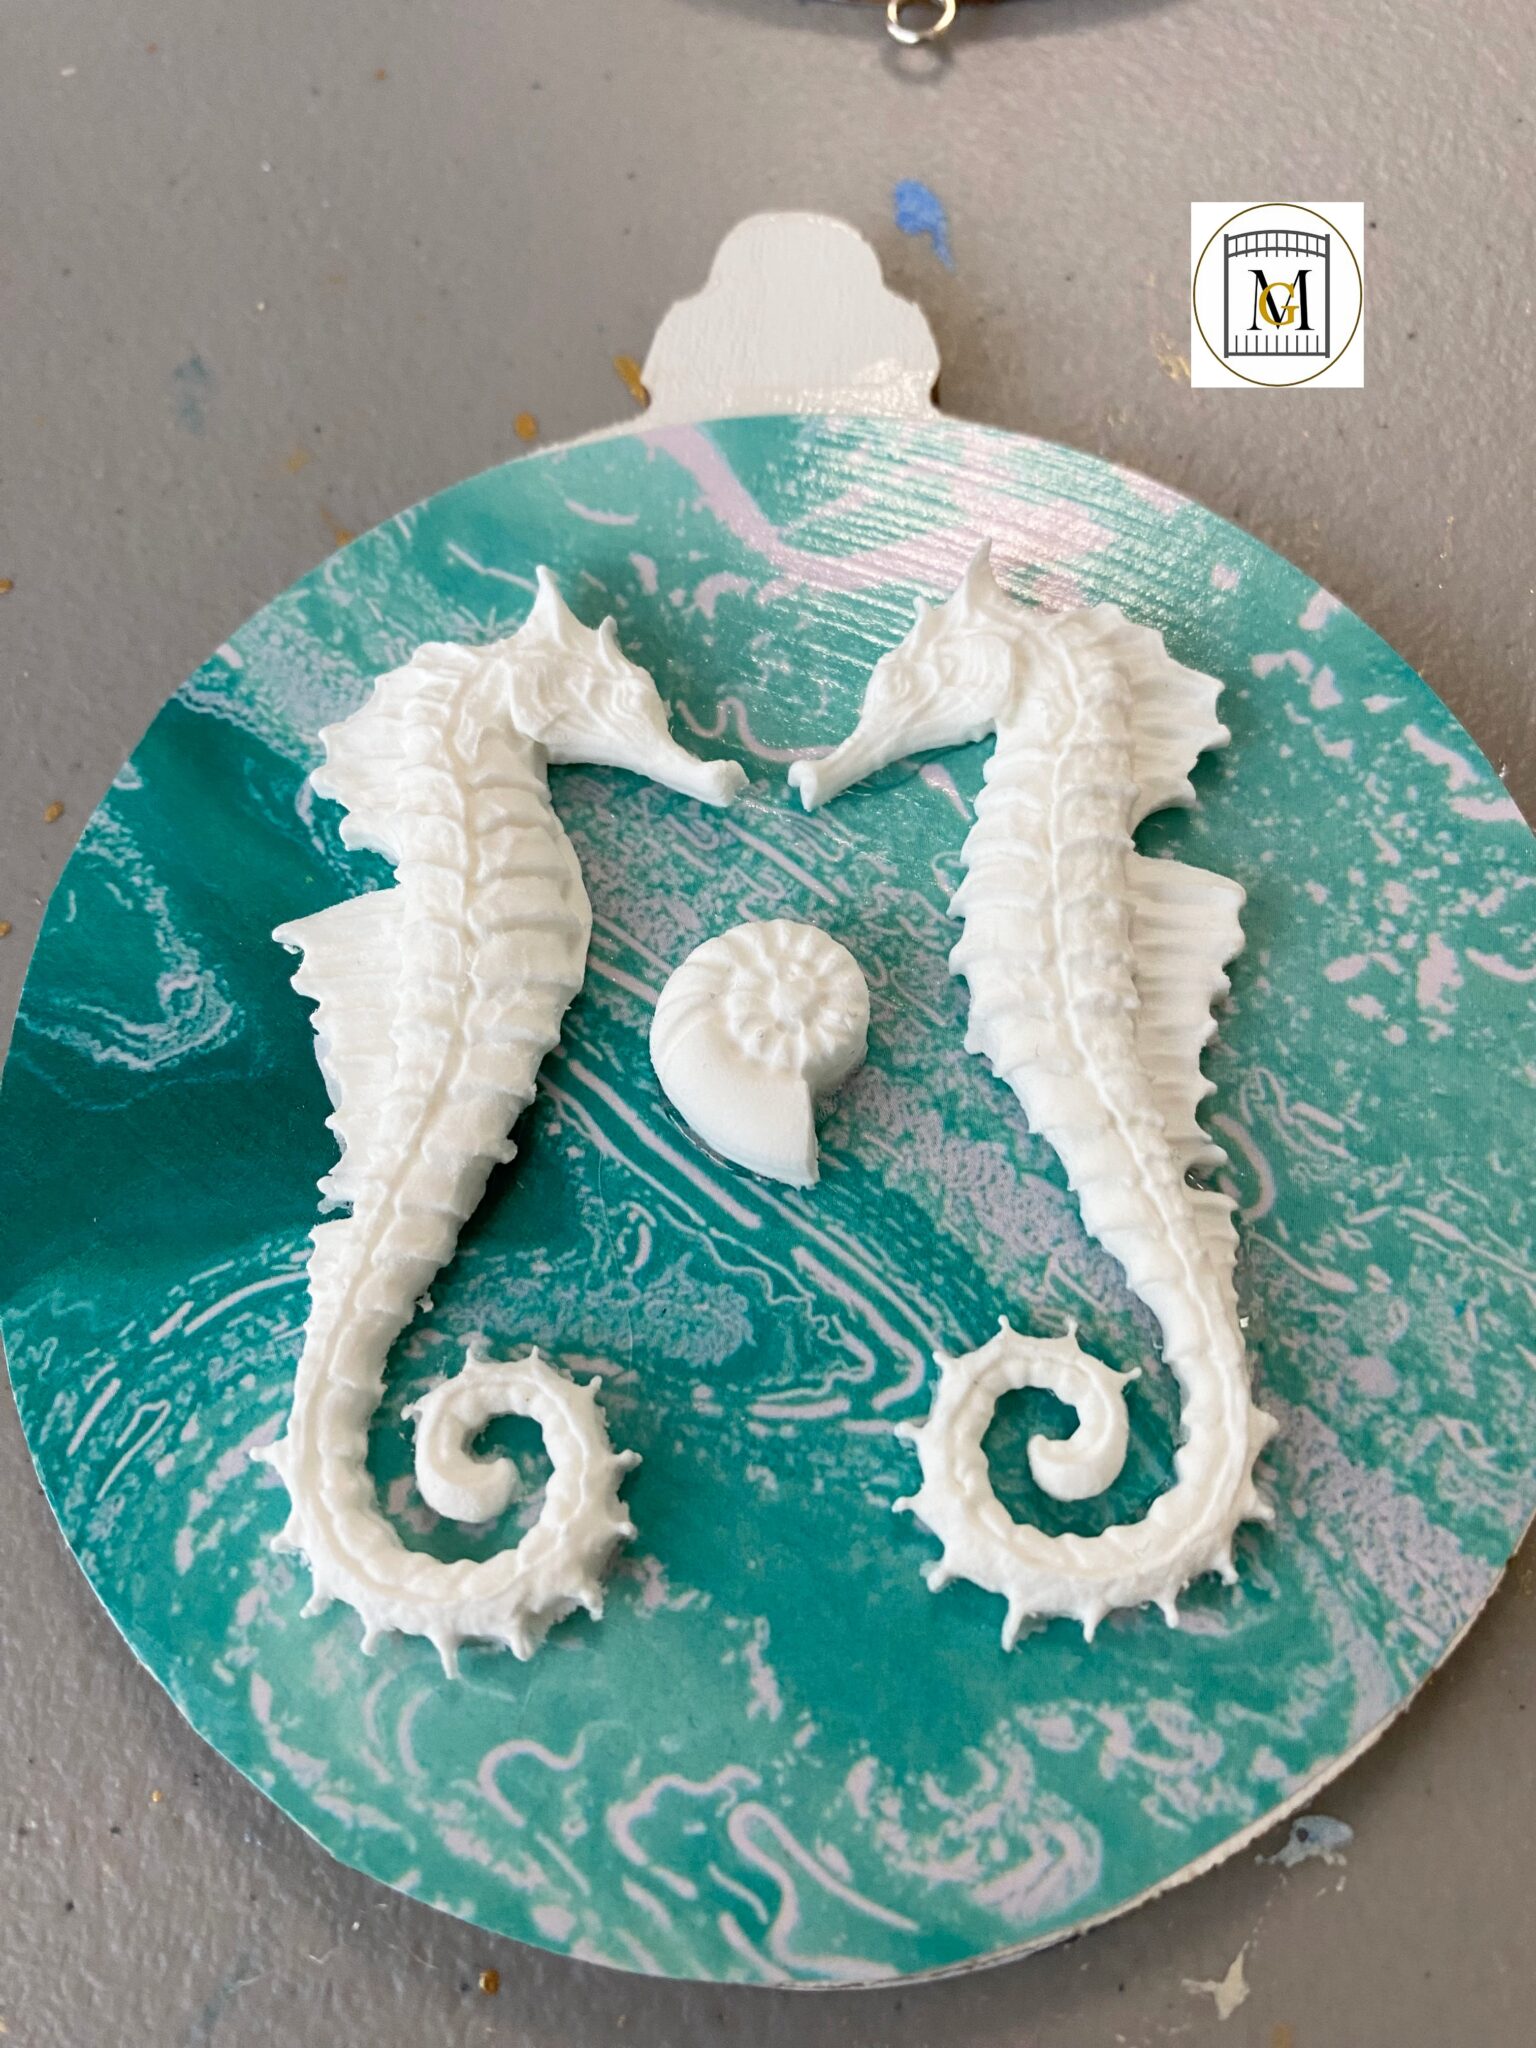
- But before you add the border, screw in the bottom eyelet screw centered and the apply the border. Then add the surrounding embellishments. Apply using fast sticking tacky glue. Sometimes you can use hot glue on flat surfaces but it is hard to reposition.
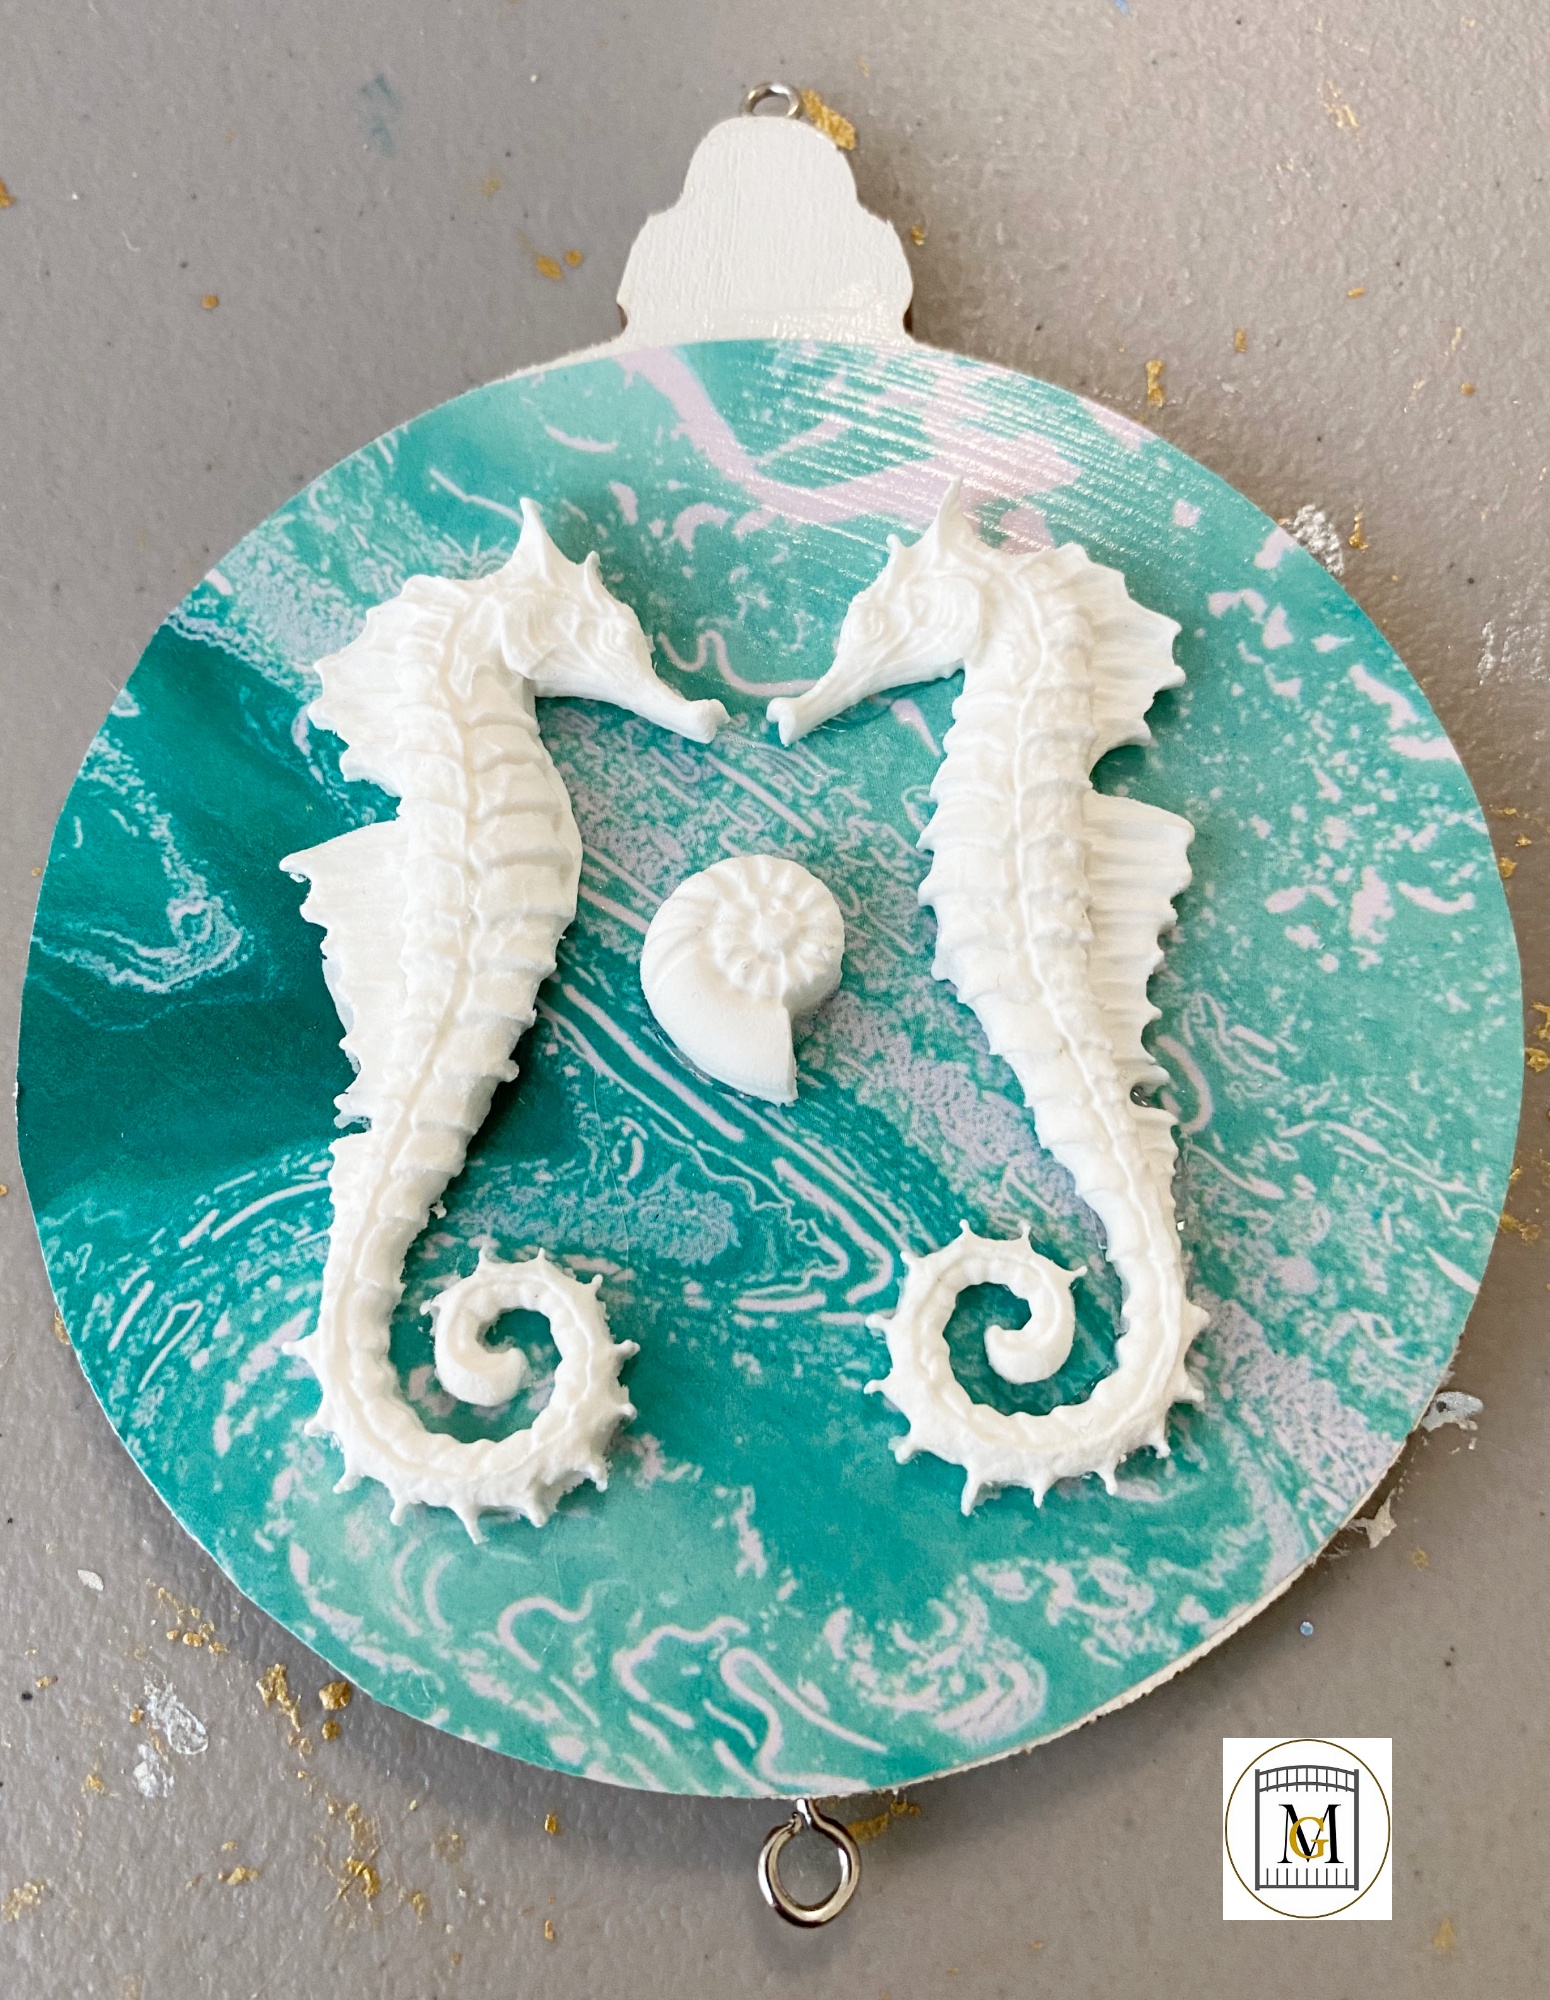
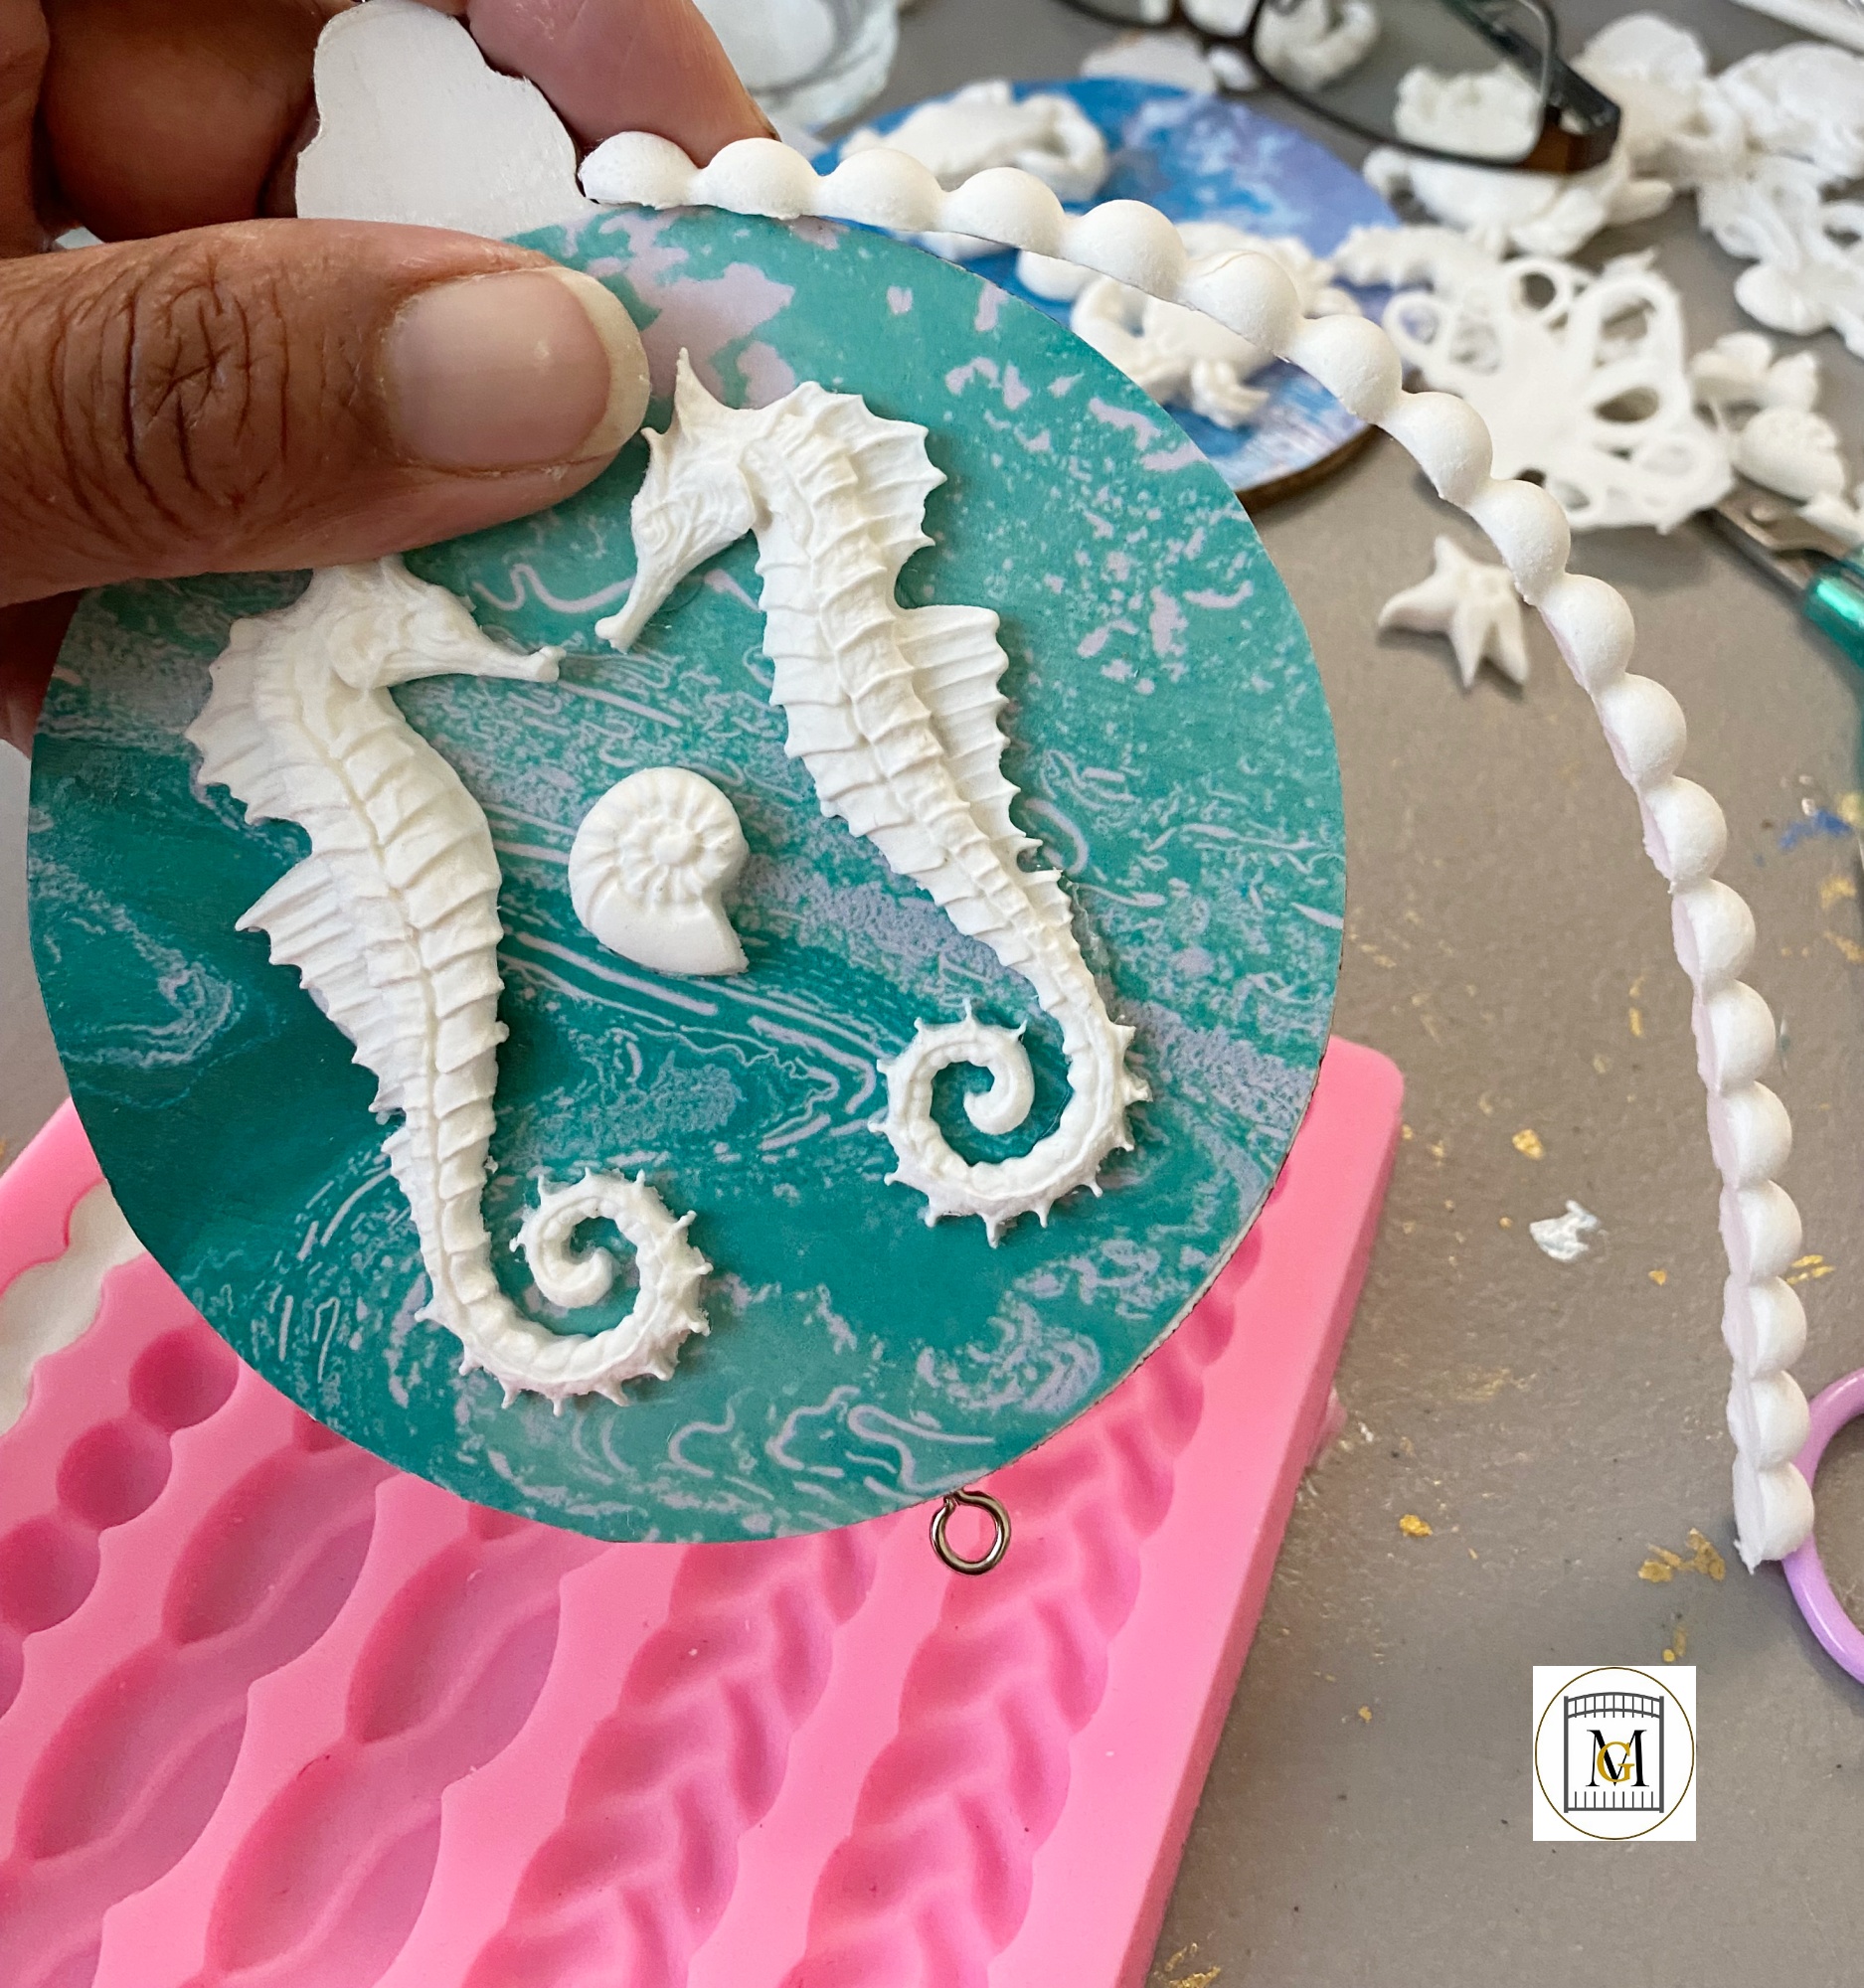
- Now, paint the border and clay embellishments with acrylic paints. I like the vintage look, so I dab areas with gold paint and then dab off with a diaper wipe. In this example, I blend different colors on this ornament. Then let the paint dry for at least 1 hour.

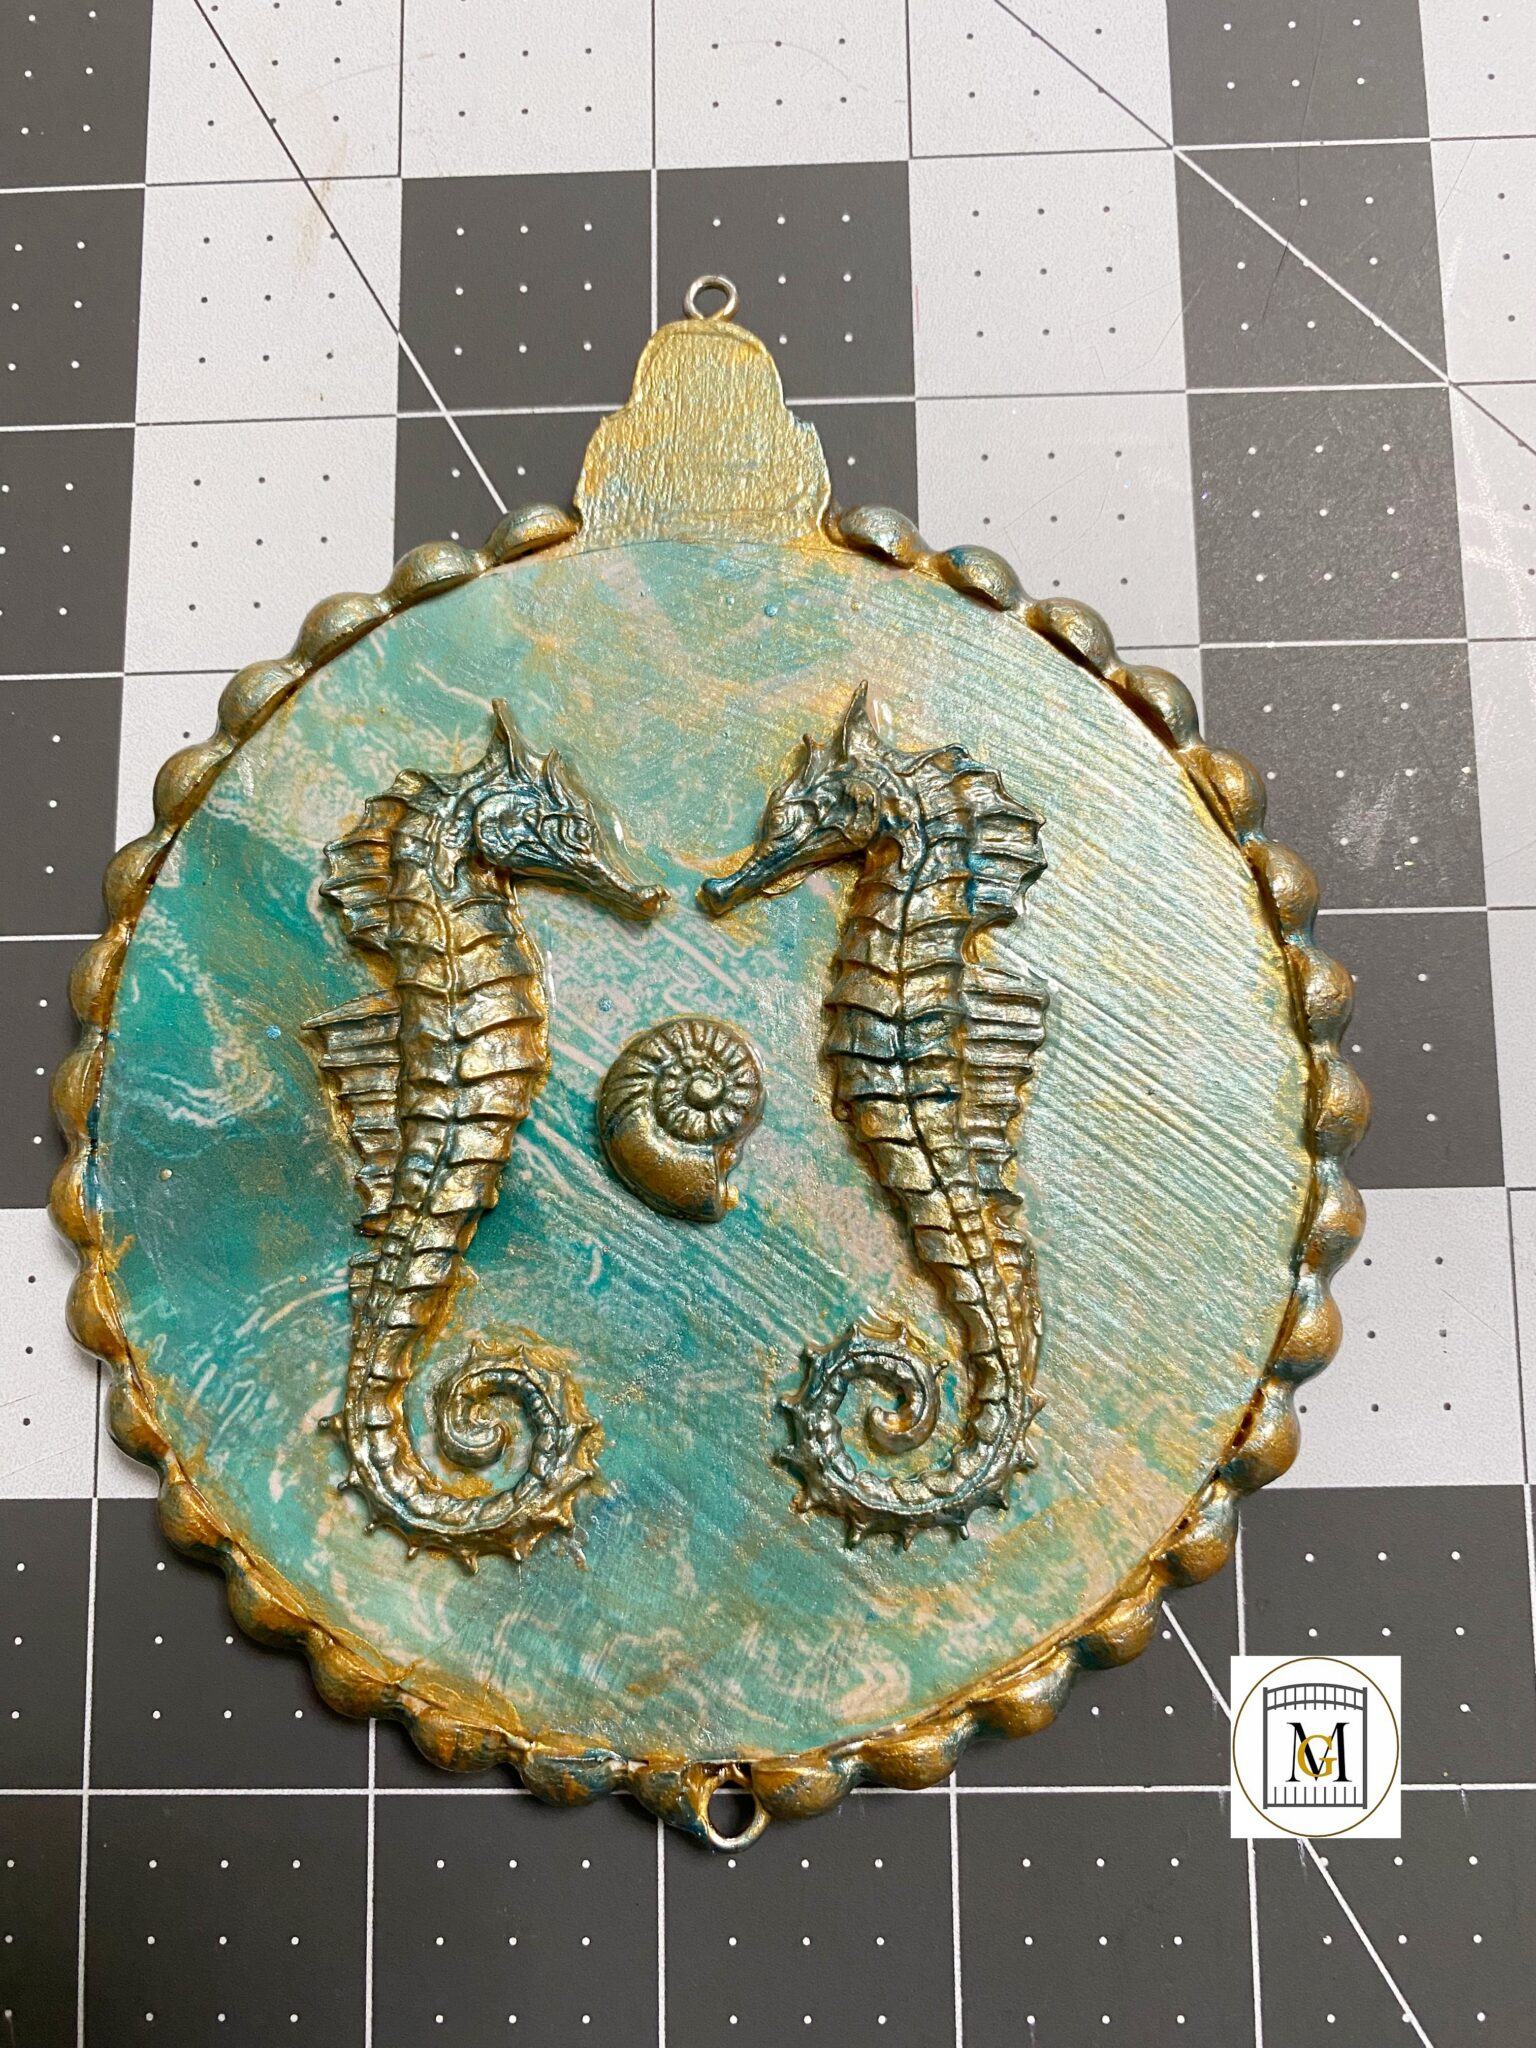
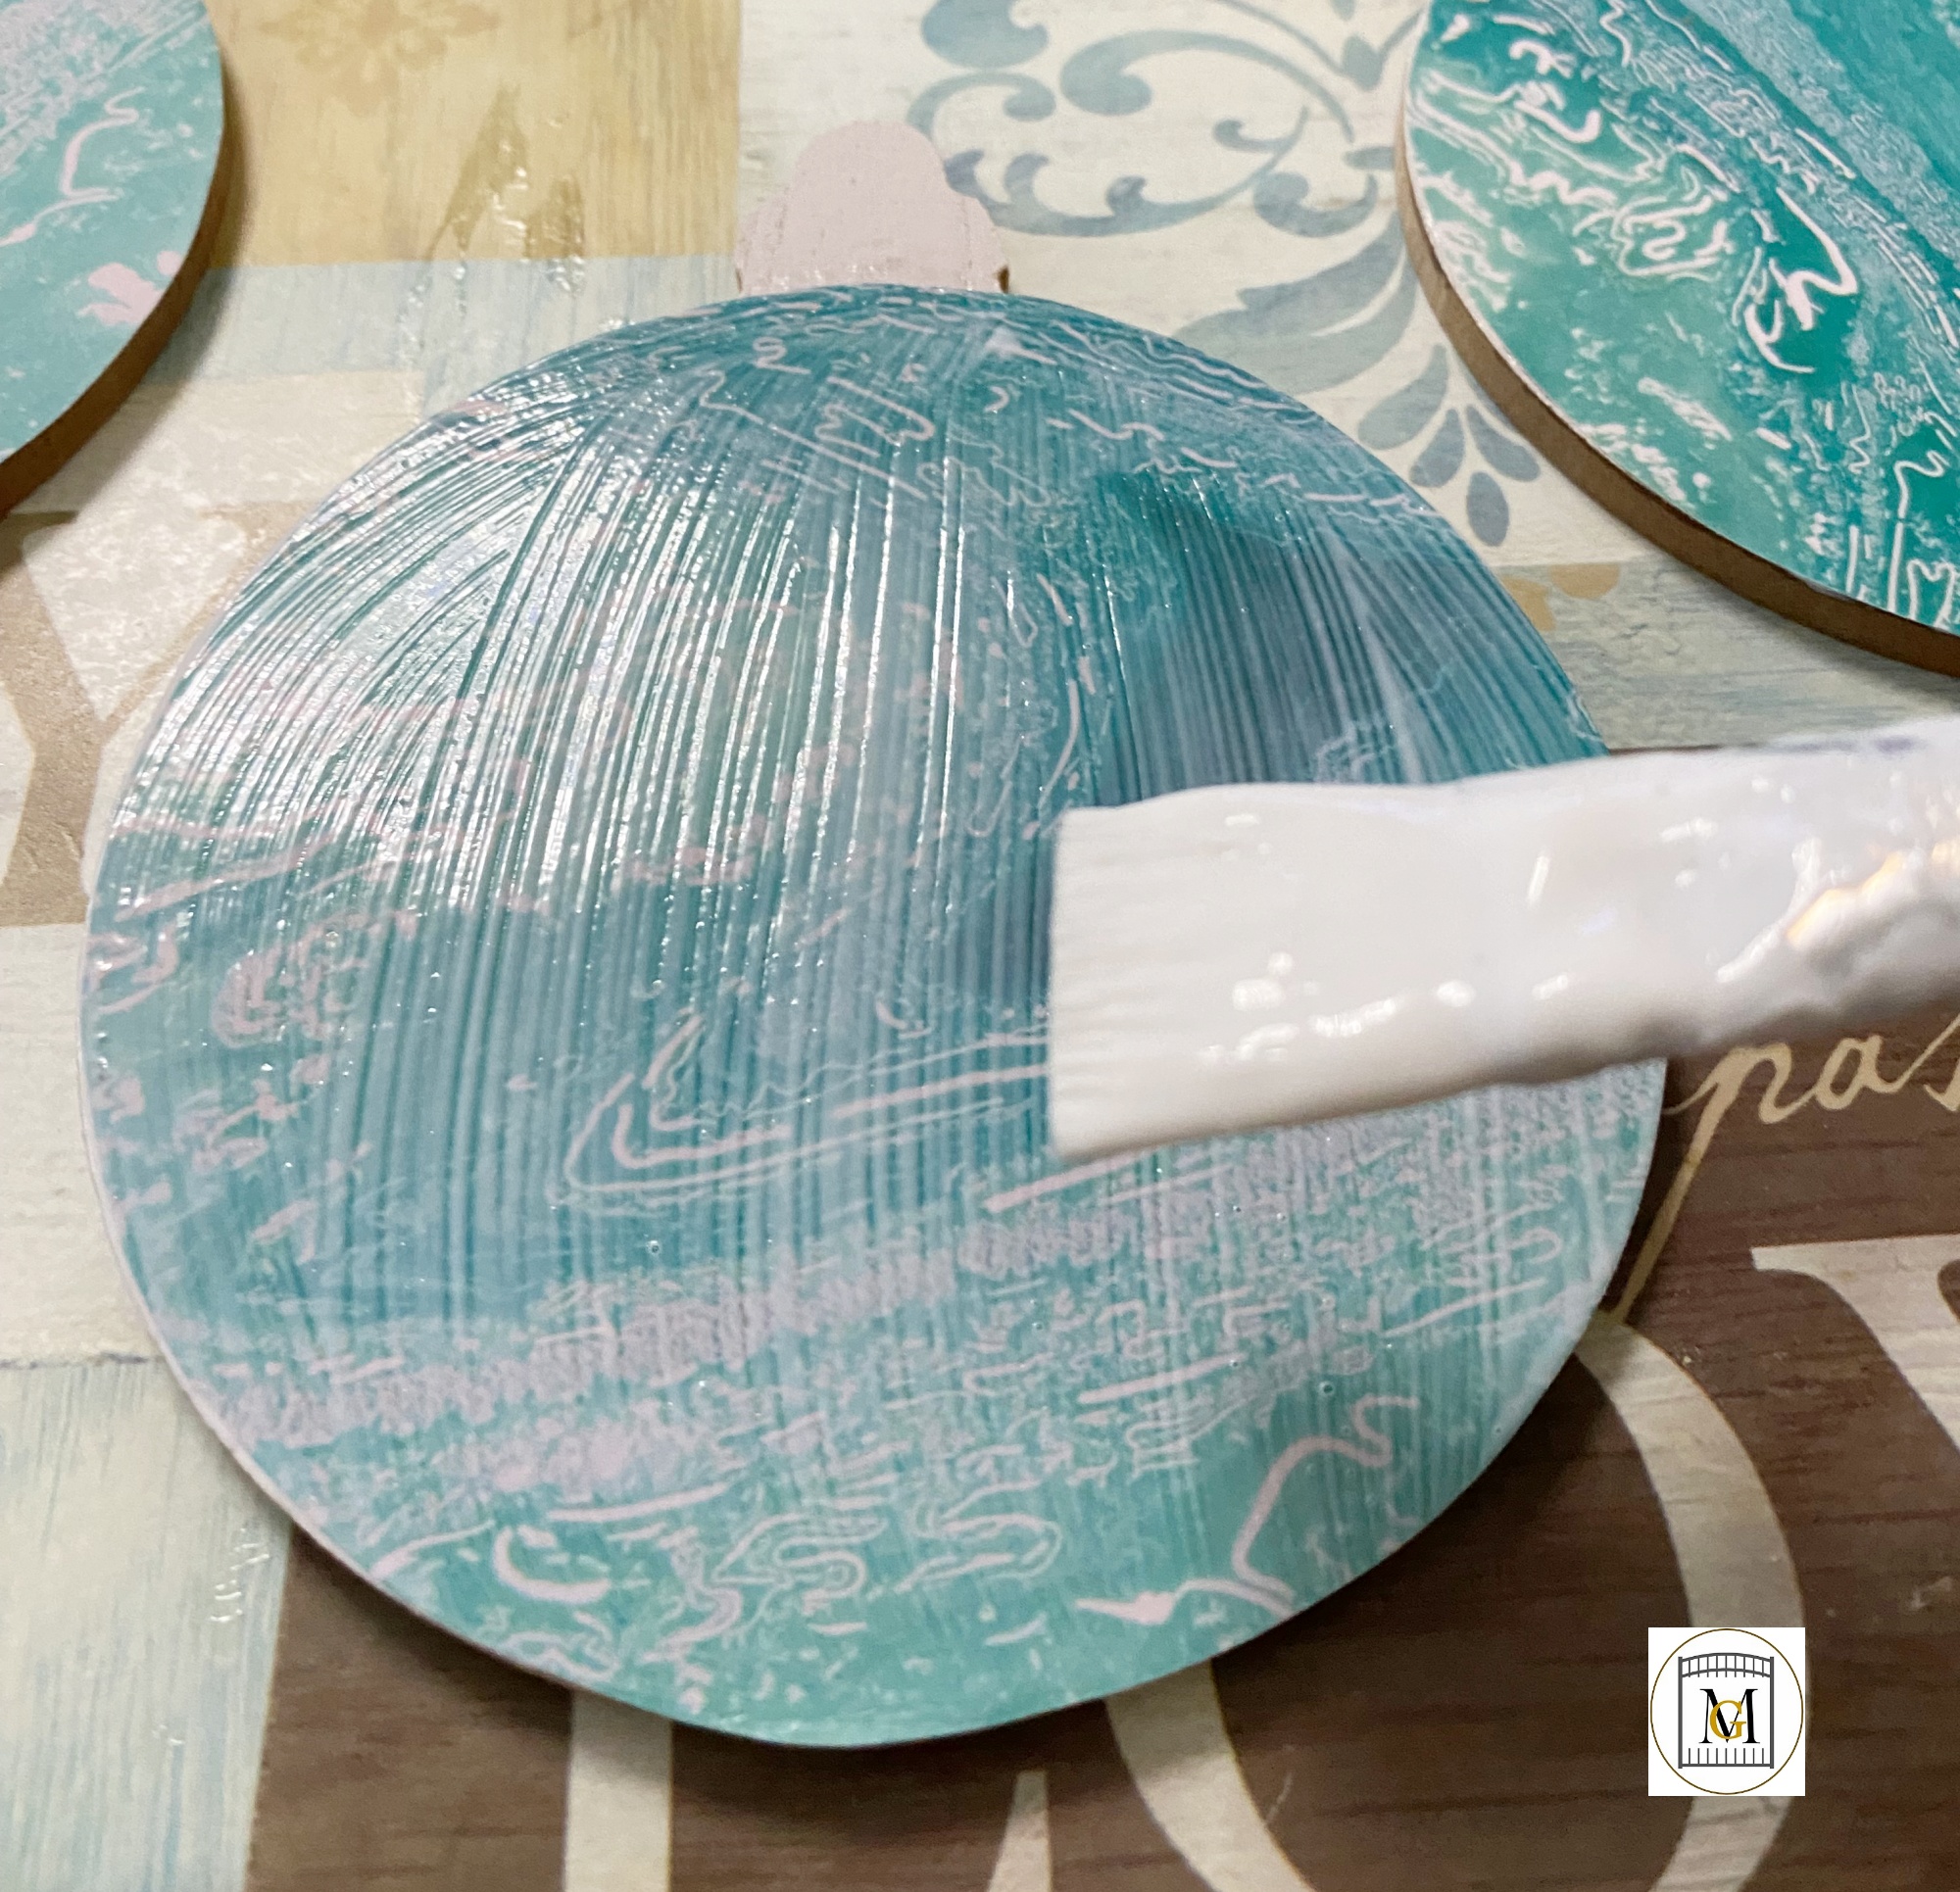
- Then, seal the ornament by brushing on with Triple Thick and allow to fully dry for 2 hours per side. So be sure to seal the back as well. The ornament will have a beautiful sheen once it is sealed.
- Next, I add on the half plastic bulb with hot glue. I first remove the plastic hole piece at the top of the bulb with some craft pliers.
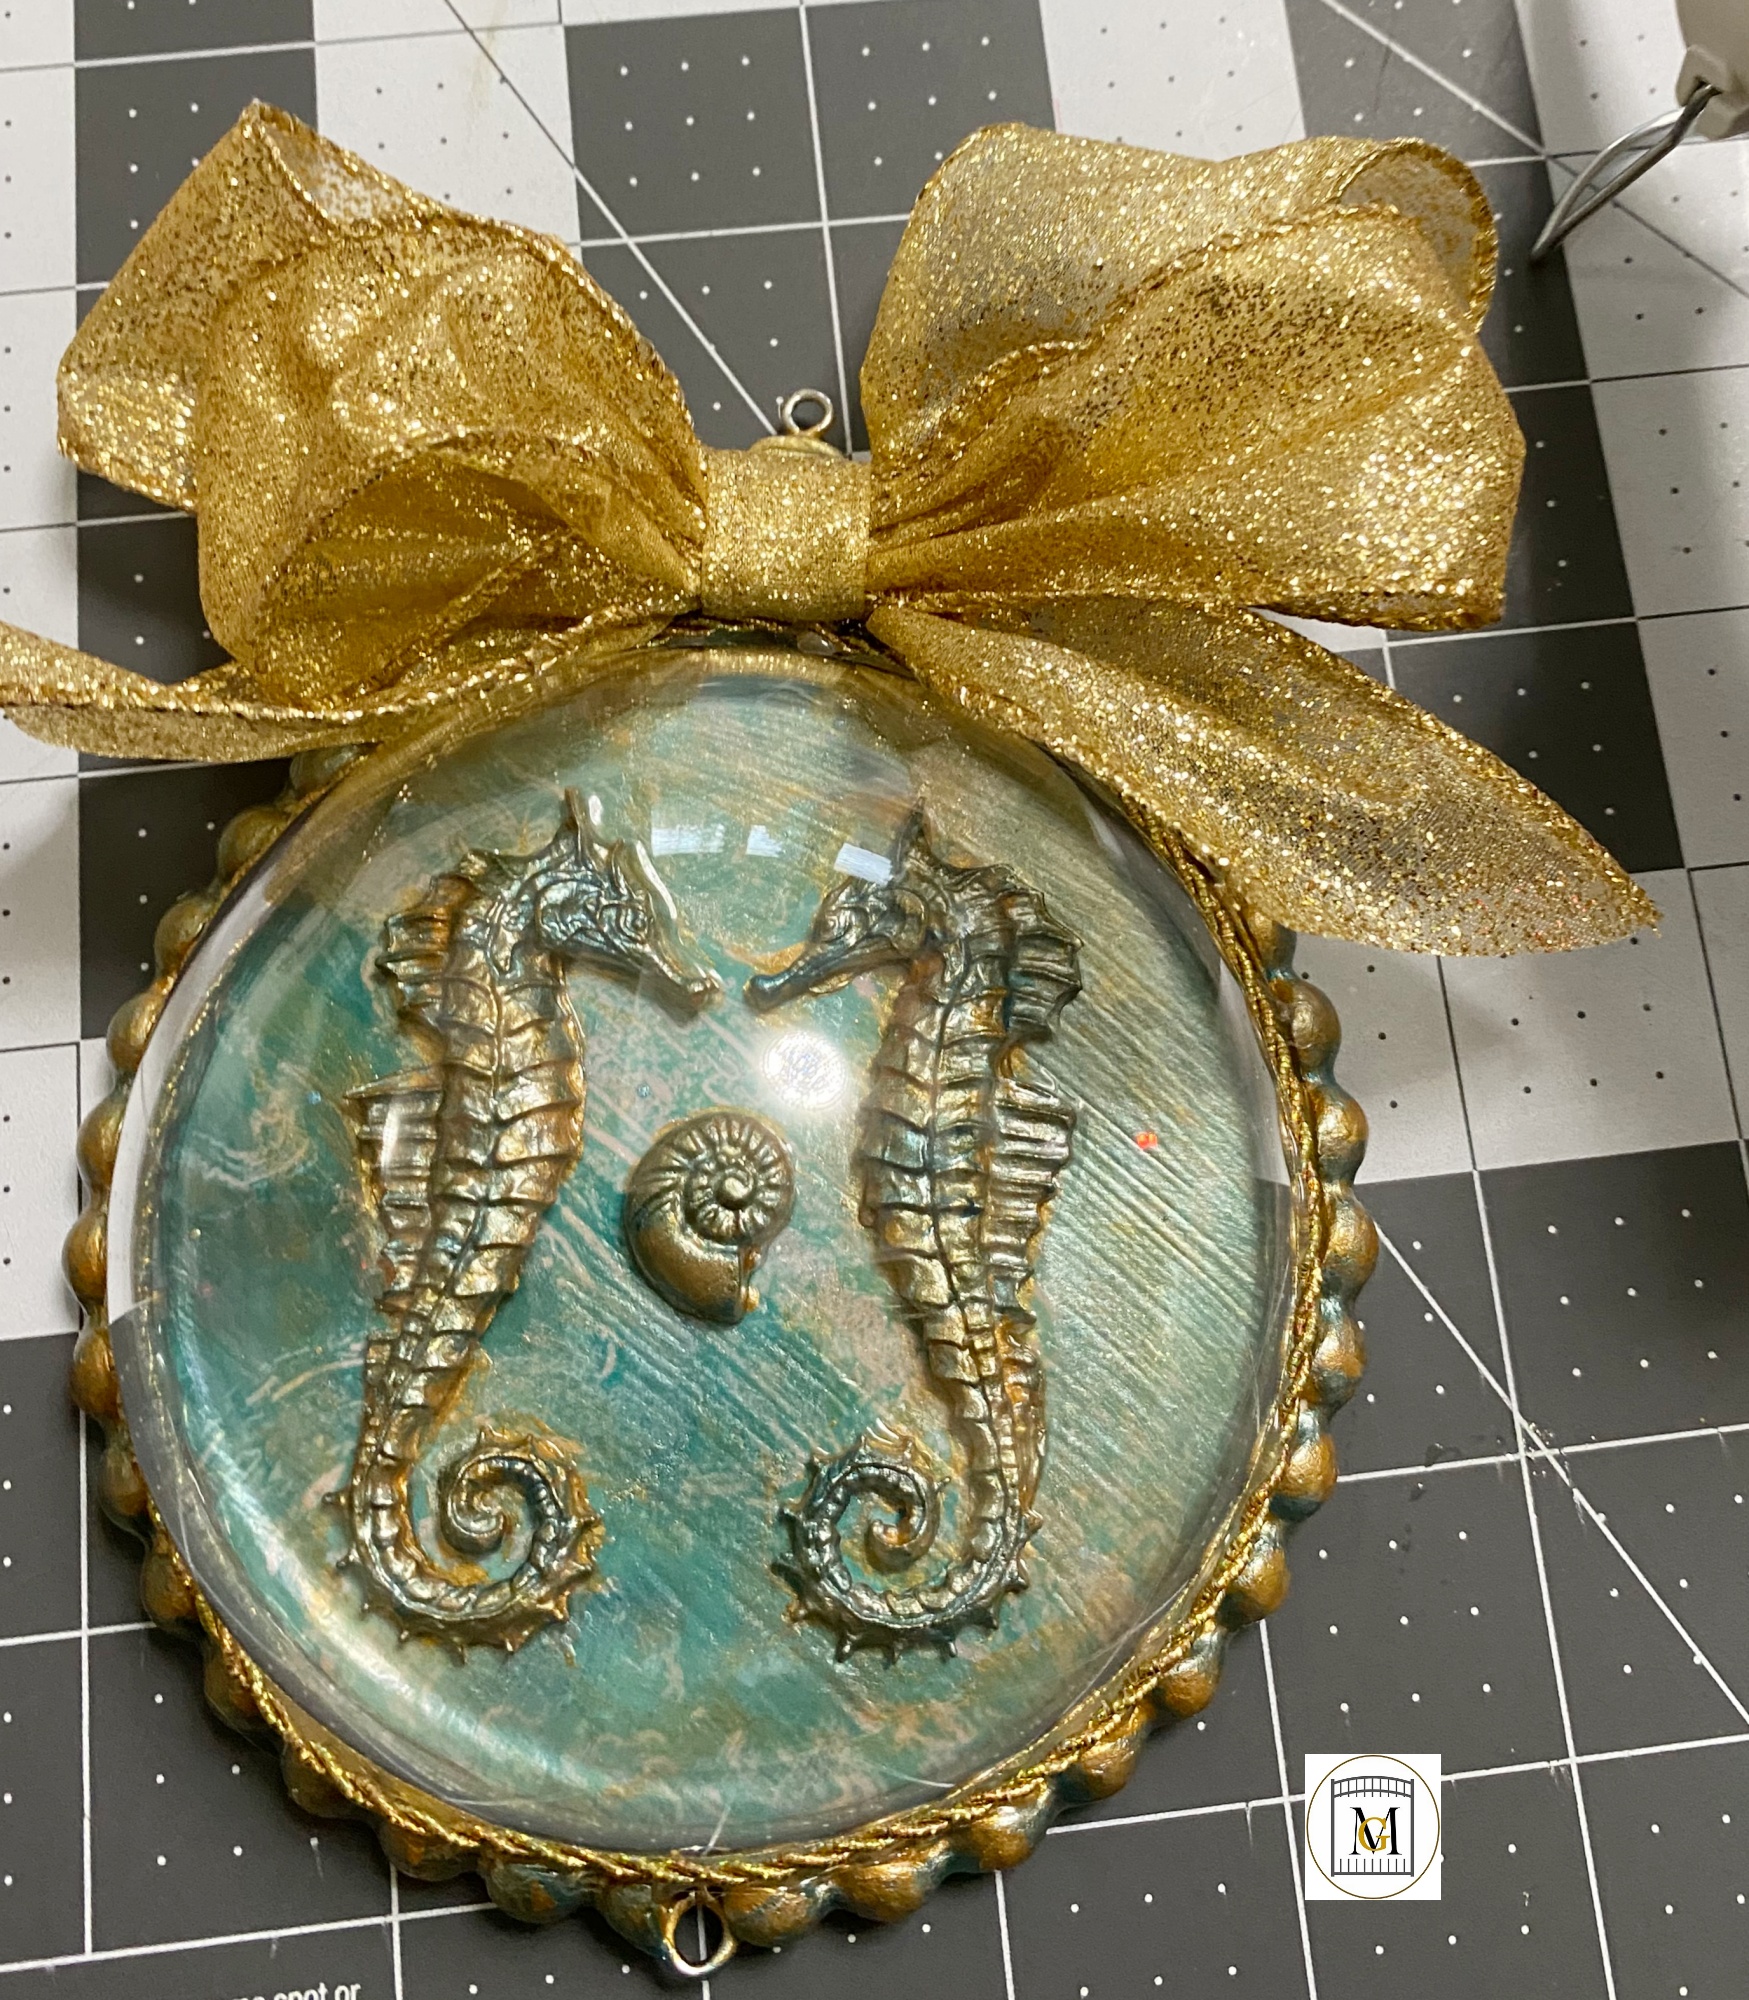
- Now, I add the rope trim with hot glue around the area where I just glued the bulb.
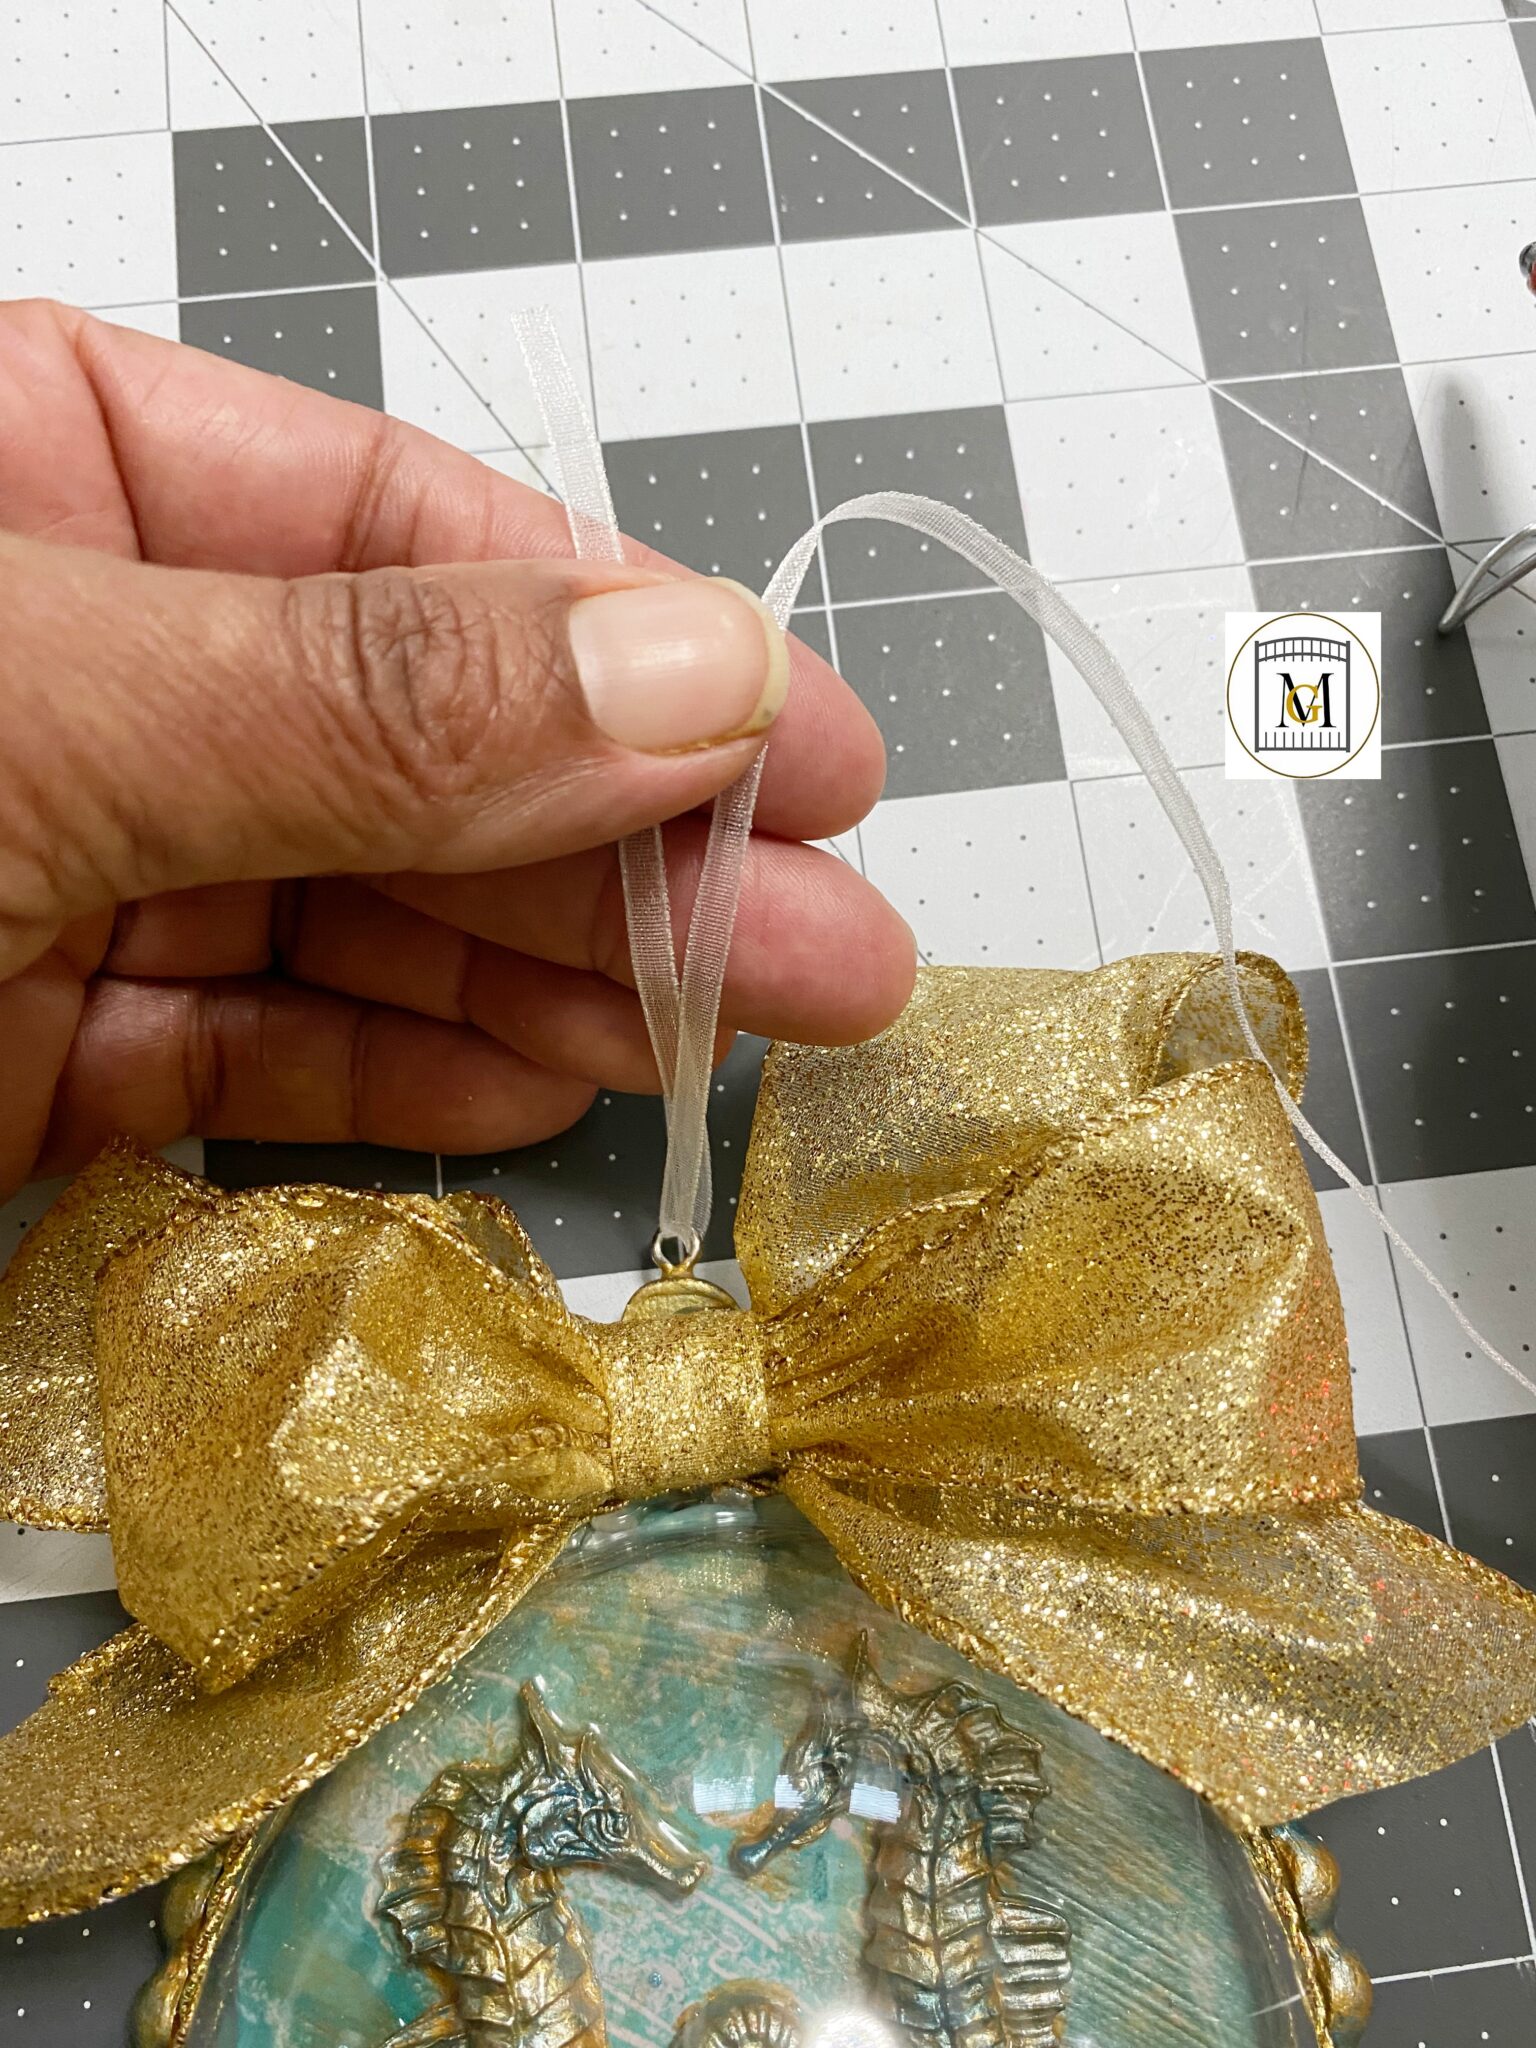
- Then I add the bow and ribbon to hang the ornament. Just make a simple bow and attach it to the ornament.
- Last, I add a nautical charm at the bottom and paint it lightly with the colors that I used to make the ornament.
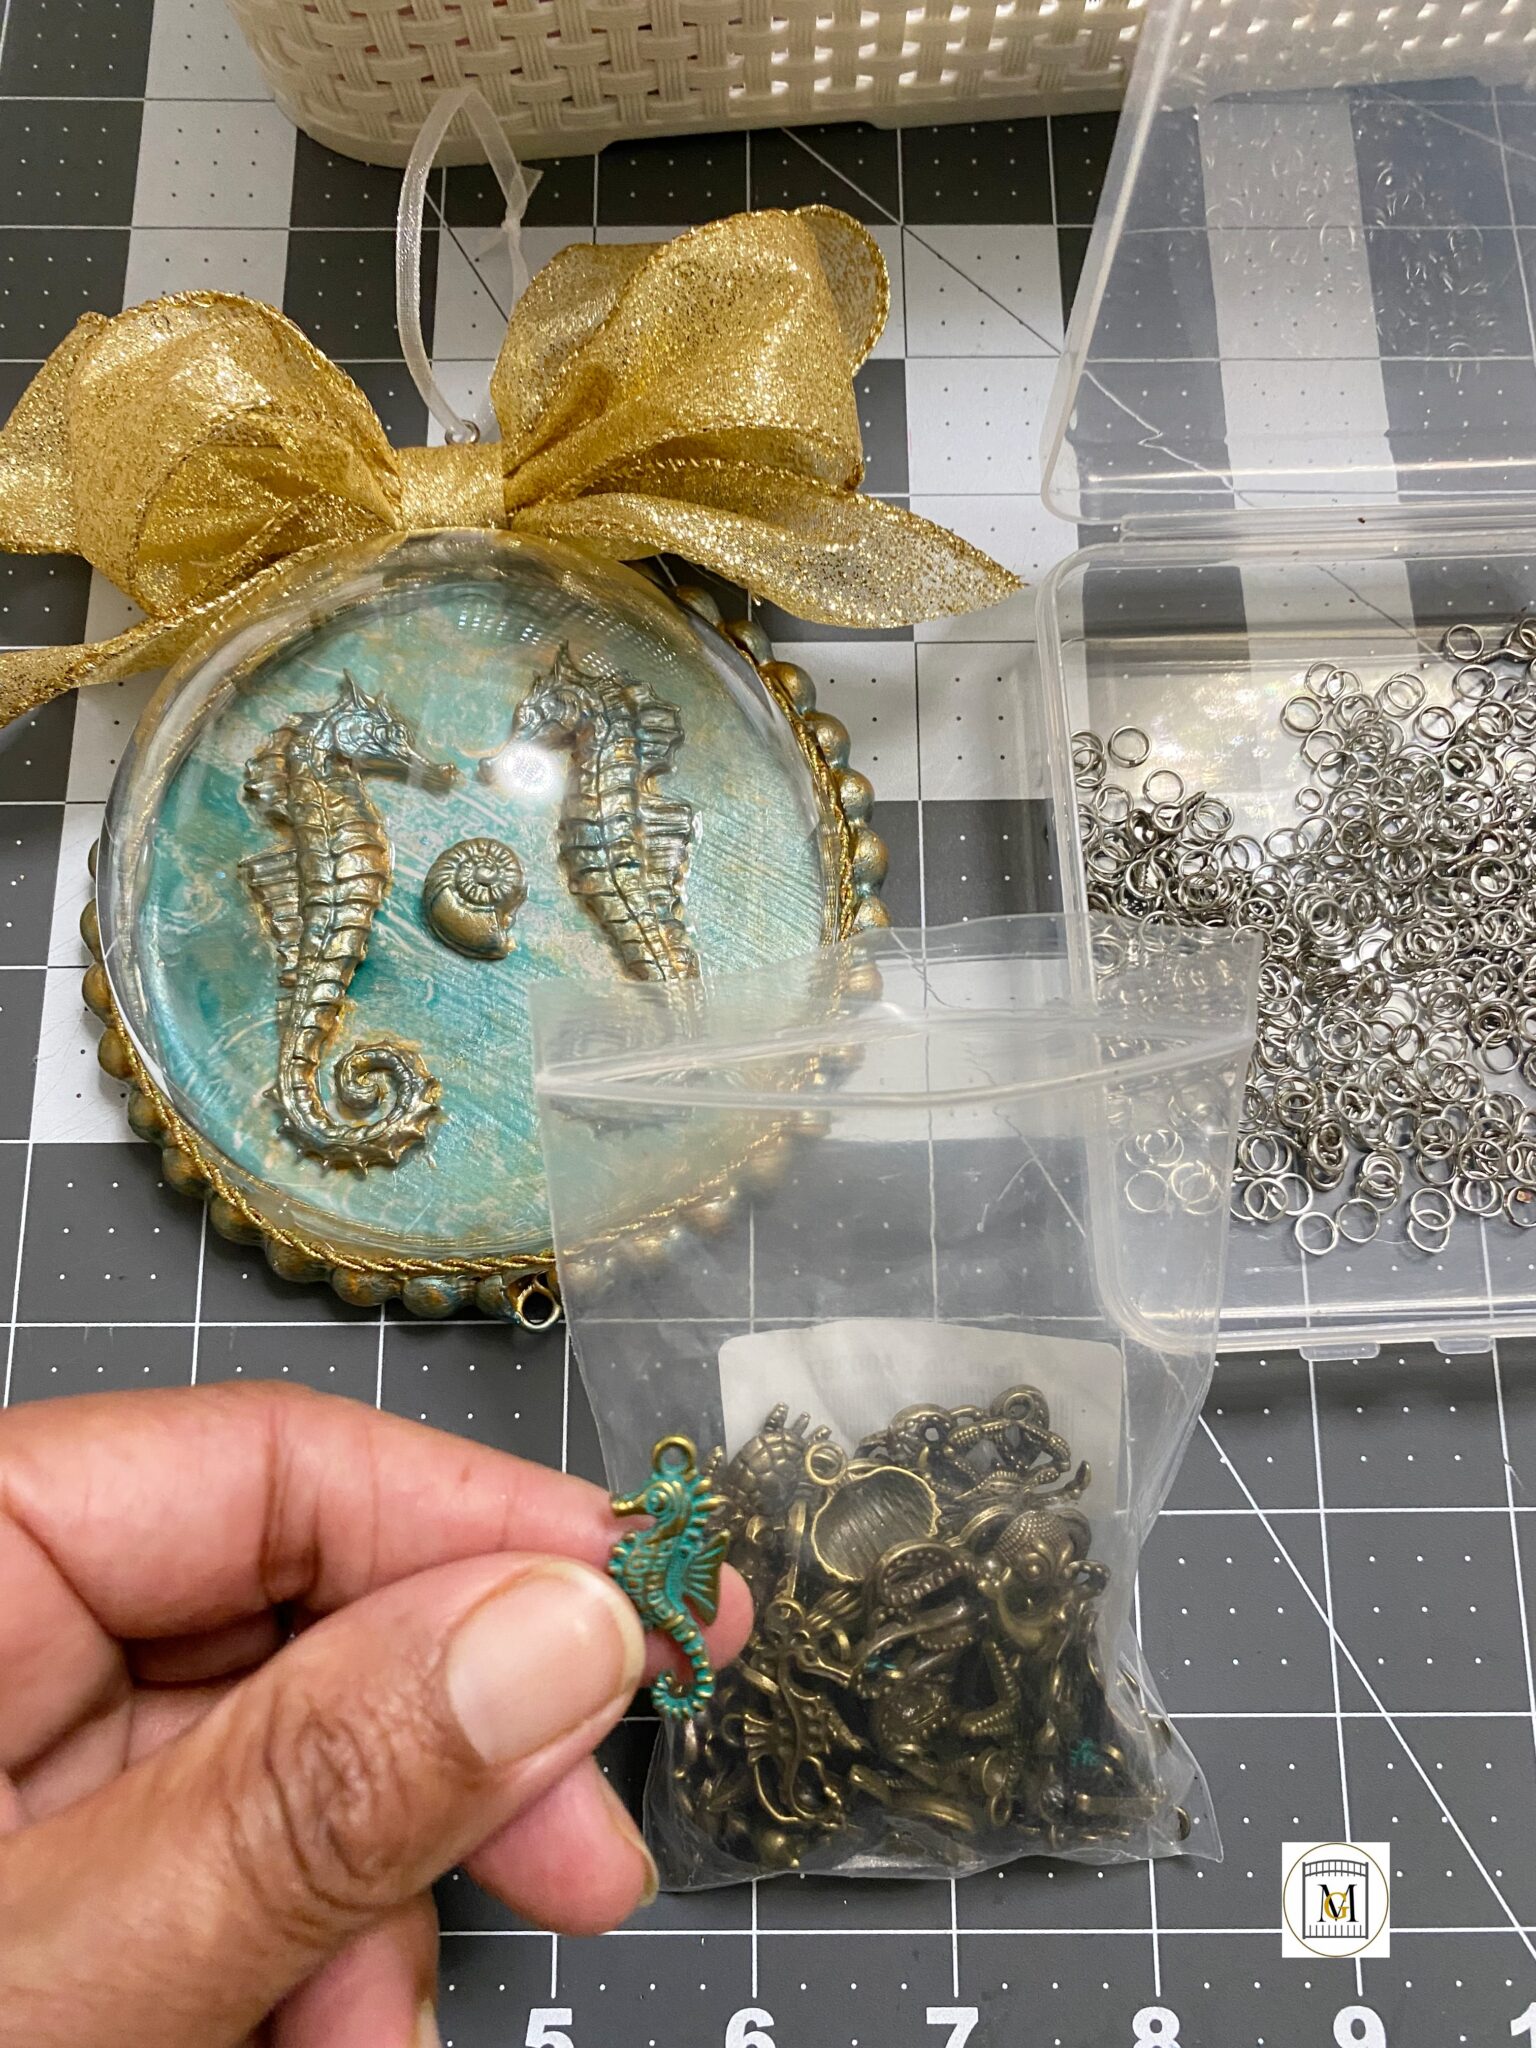
- It is done! It is ready to hang on the tree or give as a gift. I know this is a lot of work, so if I have some available, check out my shop to purchase one. You are sure to have a custom, one of a kind ornament. I make different kinds and themes.
For another great Christmas craft idea, learn how to make my Giant Glitter Snowflakes here: https://majorgates.com/do-it-yourself/giant-glitter-paper-snowflakes/
To see my available Jeopardy/Trivia Party Downloads, click here: https://majorgates.com/product-category/jeopardy-trivia/
